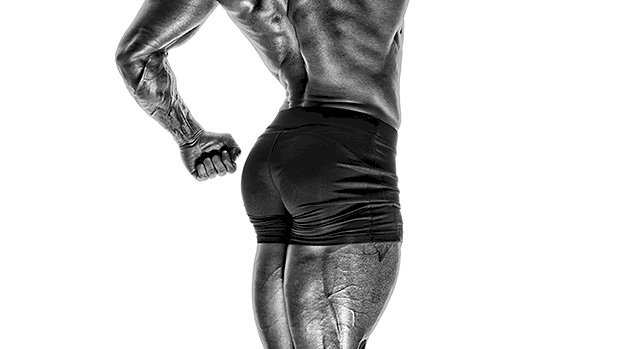
 Here’s a new way to perform back extensions for meatier hamstrings and glutes. Train at home? Train in a gym that doesn’t have a back extension or GHR bench? These exercises are great workarounds. 1. Bent-Knee Glute Extension Taking a few minutes to set this up is worth the glute gains. You can also use a Smith machine, which in a commercial gym setting might be more appropriate. Think of these as 45-degree back extensions. Set a bench to an incline (30-45 degrees works best) and throw a pad on the end for your hips. With this version though, you’ll lock yourself in position with your feet against an immovable bar. Everything about this position screams glutes. Your toes should be turned outwards and hips externally rotated. This frog-like position places a little more emphasis on the glutes as external rotators. (It’s not as ball-crushing as you might think.) Unlike a typical back extension with straighter knees, your knees stay bent to around a 90-degree angle. This slackens your hamstrings and forces your glutes to work harder as hip extensors. It’s one of the reasons why glute bridges and hip thrusts are so effective too. Lock yourself in with your hip crease on the edge of the bench, then execute by driving your hips into the pad. Keep a slight rounding through your thoracic spine and keep your chin tucked. Your arms can be crossed, or you can hold a plate or dumbbell to your chest to add load. A few sets of 15-25 reps will do the trick. 2. Hamstring Destroyer in Rack This exercise was popularized by Eugene Teo. Personally, I have no issues doing more than just squats in a power rack, but doing all your assistance work in there too might grind some gears, so I’d suggest using a Smith machine. Think of this as a horizontal back extension with slightly bent knees. Unlike the previous setup though, you’ll need to be further from the bar so there’s a greater angle at your knees. This will help get rid of the slack and place more tension through your hamstrings. With these you’re looking to maximally load your hamstrings in their mid to shortened position, which is made possible by the combined bent knee and extended hip (your hamstrings do both). These are also made more effective by your body alignment and foot placement. The devil is in the details with this one. Your feet should be parallel and the bar should be closer to your toes (versus mid-foot in the previous version). You need to feel secure, but placing the bar closer to your forefoot will increase recruitment of your gastrocnemius. This co-activation of your calf muscles will have an add-on effect, forcing your hamstrings to work harder. Lock yourself in with your forefoot to the bar and your hip crease on the edge of the bench. Keep a straight back position and initiate the pull with your hamstrings. Press your toes down throughout like you’re trying to calf-raise the bar up (you won’t). Then try not to squirm as your hamstrings and calves want to cramp. These are deceptively difficult. If performed correctly, they will rarely require more than your own bodyweight. Before you start adding load, try some isometric holds in the top position to really intensify things. 3. Glute Destroyer Take the hamstring destroyer, change a few body angles and the way you initiate the exercise, and now you’ve got an effective way to pump some blood into your glutes. Turn your toes outward, set your knee angle to 90 degrees (remember, this slackens your hamstrings), round a little through your thoracic spine, and tuck your chin. Initiate by clenching your butt cheeks and driving your hips into the bench. Imagine someone trying to steal your last dollar from between your butt cheeks in the top position. Your glutes will be active as both hip extensors and external rotators, working them hard in their shortened position. Pump out 2-3 sets of 15-25 reps, adding weight when
Origin: Tip: Monster Glutes, Meatier Hamstrings
Category: 1
Tip: Kung Fu Lunges for Killer Quads
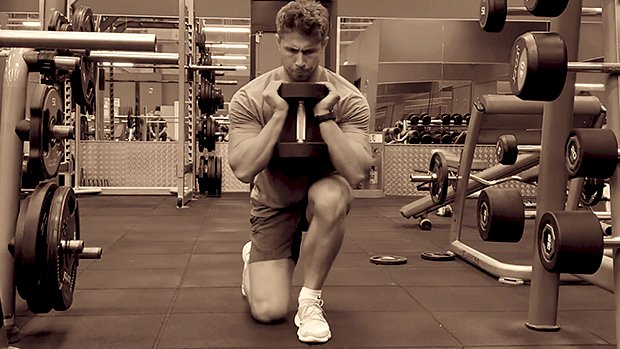 The “duck walk” is an ancient technique used in kung fu training. Martial arts aside, it’s a nasty way to finish off your leg workouts. Just grab a dumbbell or safety-squat bar, set a timer for two minutes, and go! Technique Tips Duck lunges are often performed with your knees coming out as you step forward. This gives more of a waddle-look to your lunge. But with this “in line” variation, we can emphasize full range of motion and give your quads a deep loaded stretch. Take a short lunging step. Stay down and imagine you’re LeBron James attempting to lunge in a house of Hobbits. Don’t stand up fully until you absolutely have to, or you’re turning around to come back. Notice how the back knee is traveling over the toe and getting close to the floor. You could just let your back leg follow its natural path, but emphasizing the back knee over the toe and towards the floor has a purpose. More on that in just a second. Try setting a timer for two minutes and see how many you can do. Over a few weeks, attempt to increase the amount you can complete in two minutes. When you hit two minutes without stopping, add a little weight. One or two sets will be more than enough. For a more advanced variation, a safety-squat bar is a good way to add load: Why These Work The constant tension:There’s a respectable amount of mechanical tension provided in these lunges, given the intense stretch of your quads under load. However, more so these create a lot of metabolic stress. That’s why they’re best reserved for the back-end of a workout when you’re in the mood for some punishment. It’s a traveling sissy squat:Take a look at what the back leg is doing. You might recognize the position as being close to a sissy squat, albeit with your torso a little more vertical. Because of this, your back leg is being subjected to some eccentric overload through a big range of motion. Your middle quads (rectus femoris) will be on fire. There’s knee-over-toe action:Just like walking up some stairs or riding a bike, there’s some knee-over-toe action that won’t cause your knees to blow out. Yes, if you’ve got a shady history with your knees then skip these. But if you have healthy knees these can help you develop your quads while also building some knee resilience. They’ll condition you:Nail your key exercises first: some kind of squat, hack squat, leg press, or whatever works for you. Then finish with just a couple of sets of these. It might feel like cardio, especially if going above five reps isn’t your forte. But those two-minute sets will help build a level of conditioning that’ll increase your work capacity for any workout. They’ll tax your entire
Origin: Tip: Kung Fu Lunges for Killer Quads
Tip: 4 Untraditional Delt Workouts
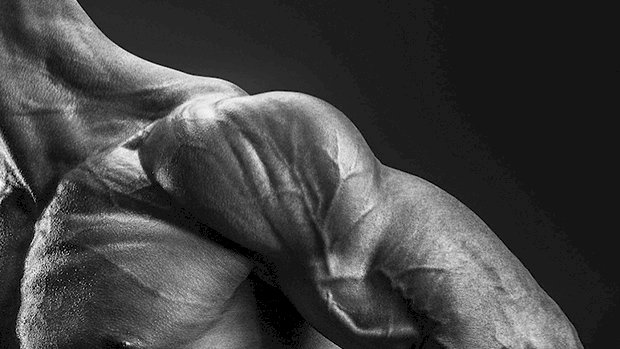 Combo Pyramids for Big Delts Heavy overhead pressing should be a part of your shoulder training, but for fully developed delts you’ll also need some higher volume, longer time under tension exercises. One way to do this is with combo exercises and pyramid training. Here are four shoulder exercises that use the pyramid loading scheme. Most of these are combo exercises, meaning two different exercises performed together. For most of these loading protocols, tap out at 6 reps because this already equates to 21 reps per exercise (or 42 if it’s a combo move) because of the pyramiding rep scheme. Kettlebell Swing to Press Grab a kettlebell that’s about 20 pounds lighter than what you’d use for a single-arm overhead press for 6 reps. Start with one kettlebell swing. Transition right into the rack position for a press. Do one press and go back to the kettlebell swing, but now for two reps. Complete two reps of the overhead press. Continue this pattern until you hit 6 reps of each. Snatch to Overhead Press Load up a barbell or a practice bar. Adjust your hands so that they’re outside shoulder width. The snatch is somewhat of a combination of a front raise and a snatch, essentially a front raise with some hip drive. For each snatch, do a wide-grip overhead press, ramping up to 6 reps. Overhead Press to Lateral Raise Pick two different weights. The overhead press weight will be heavier than the lateral raise weight by 10-15 pounds. In one hand, take the kettlebell or dumbbell into the rack position. The other hand is at your side with the lighter weight. Complete 1 rep of each, then ramp up by a rep until you get to 6. Sled Pyramid You’ll need a sled and some type of suspension training device for this. We’re going to be pairing an overhead press with a reverse flye. Ramp up by 1 rep for each round until you get to 6 reps. You’ll need a decent amount of space for this one, so use it when you
Origin: Tip: 4 Untraditional Delt Workouts
10 Combo Exercises That Aren’t Stupid
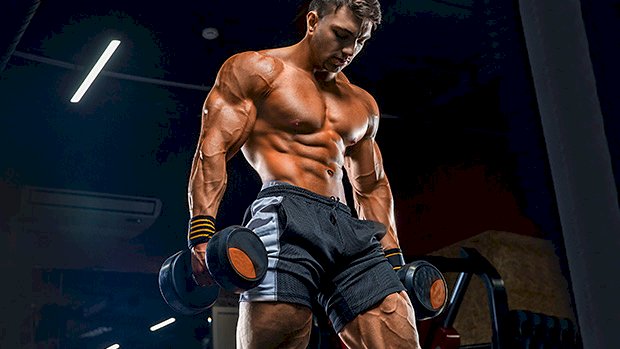 Combination exercises have a bad reputation among serious lifters, but not all of them suck. The good ones hit more muscles, make you train at a higher heart rate, and force you to expend more calories. Why Most Combos Don’t Work Think of the lunge with a bicep curl: a popular combination exercise featured in every mommy-blogger routine. Sure, it’ll help burn some calories, but since when should the weight you use for bicep curls be the same as it is for a lunge? Common combination exercises attempt to kill two birds with one stone. But in reality, all they do is kill one bird and partially wound another. Effective combo exercises do a better job at matching exercises so that each one is more evenly stimulated by the same weight. They also add variety and help you build some athleticism while keeping your heart rate up. Hit your muscles efficiently and burn more body fat with these smart combination exercises: 1 – Deficit Reverse Lunge + Single-Leg RDL If your single-leg strength and stability need some work, then combining reverse lunges with a single-leg RDL would be a great way to start. Adding a deficit to the reverse lunge upgrades the difficulty, but you can always start without one. You can also go the other route and use the deficit for the deadlift component too, if you have the range of motion. The horizontal nature of this exercise can help you develop athletic speed and help you prevent hamstring injuries. If you’re just after aesthetics though, this has you covered too. Develop that glute and upper hamstring area (some call it the “glute-ham tie in”) and get a great butt pump with this killer exercise. 2 – Landmine Lawnmower This one has many names, but we’ll call it a “lawnmower” since it loosely resembles starting up an old lawnmower… albeit one that needs some forceful encouragement to get it going. The combo is highly transferable to athletic movements too, teaching an efficient lower to upper body power transfer. You’ll recognize the hip snap on the back leg in many power-based sports. To nail this lift, think of it kind of like a sumo deadlift mixed with a high-pull that goes into a rotational press. You’ll burn a ton of calories while satisfying your inner athlete. 3 – Split Squat + Iso Split Squat Row Both reverse lunges and split squats work similar muscles, but the joint loading mechanics differ. During reverse lunges, the hamstring of the lead leg also contributes to a “braking” effect. In general, split squats are a regression of reverse lunges, since you have a better opportunity to reinforce hip, knee, and ankle mechanics in a more controllable position. Combining a split squat with a cable or band row increases the quad loading on the lead leg since the force is pulling you forward. The row is also a good opportunity to hit your back without adding too much complexity. You can add the row in at the top of the movement or, for more difficulty, add it while holding the bottom position. You’ll get a lot out of these if your job requires you to sit all day. While the split squat will help open your tight hips, the row will combat hunched-over shoulders. Try these to combat your gorilla posture while smoking your quads. 4 – Reaching Rear-Foot Elevated Split Squat + Row Split squats can be progressed into rear-foot elevated split squats (RFESS), emphasizing greater load on the lead leg. Kind of like in the previous exercise, you simply add a horizontal row. But on this one, you reach forward and add more load through the hips, which is somewhat of a deadlift-squat hybrid. The reach forward will also load your lats more in their lengthened position. So as you hit the bottom and reach, you’ll be emphasizing hip engagement and a stretch of the lats. As you come up, you’ll be targeting mid-back and quads. The height of the cable can change the feel of the exercise too, so feel free to play with it. This exercise is the definition of “bang for your buck.” It’s got a moderate-high complexity, but with a high return. If you’re looking to hit it all, then grab a cable or band and give them a go. 5 – Rear-Foot Elevated Split Squat + Foot-Elevated RDL Staying with the RFESS theme, here’s another way to use them to hit your entire lower body. This one is starting to make its rounds in corrective exercise circles as a more complex rehab progression. As a combination exercise to hit your quads and hamstrings, it’ll really light up some weaknesses. 6 – Box Step-Off + Deficit Reverse Lunge Box step-offs are a good way to load a squat pattern while moving in the frontal plane. There are many options too. You can use a landmine, dumbbells, kettlebells, or a goblet position. And, of course, you can use them to build big legs. Combining box step-offs with another deficit exercise – a reverse lunge – will hammer your lower body even harder. Granted, in our “killing two birds” analogy you’re really just killing the same bird twice here. But if you’re looking to add
Origin: 10 Combo Exercises That Aren’t Stupid
Tip: The Most Misused Machine in the Gym
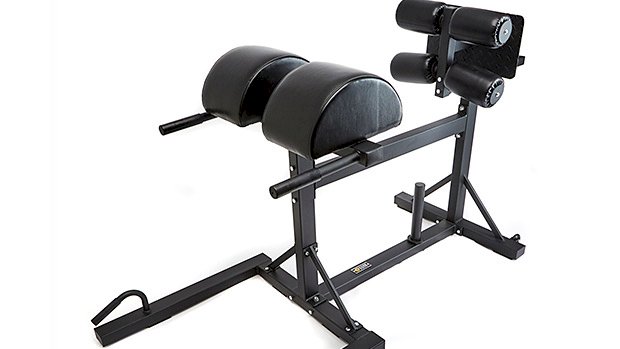 Of all the equipment in the gym, the GHD is one of the most misused. GHD stands for “glute-ham developer” (and sometimes “good hair day,” but that’s another topic). It doesn’t have the word “sit-up” or “abs” in the name, yet that’s what many people use it for. The most flagrant violation happens when people do really ugly looking sit-ups on it. They let their backs arch violently into extension and work their hip flexors, quads, and anything except their core to get each painful rep. This is a lower back disaster waiting to happen and should pretty much be avoided unless you have to do it in a CrossFit competition. Public service announcement: The primary purpose of this machine is to develop the glutes and hamstrings. Here are some legitimate ways to use the GHD, plus a common mistake to avoid. GHD: Traditional Begin with your thighs on the GHD pad, torso perpendicular to the floor and feet securely on the back platform. Your knees should be placed more on the back of the pad to prevent excessive stress to the back of the knee. Brace your core and contract your glutes and hamstrings while slowly extending your knees, lowering your body so that it becomes parallel with the floor. Do NOT hyperextend your knees by going to full lockout. Use your glutes and hamstrings to pull yourself back to the starting position. Maintain a straight line through the knees, hips, lower back, and neck for the duration of the lift. GHD: Dive The main difference between this and the classic GHD exercise is that you dive towards the floor instead of letting the body come parallel to the floor. This variation will act more like a leg curl and changes the angle of pull on the hamstrings. Your back should still remain neutral at all times. GHD: Hip Hinge This variation involves no joint movement through the knee. I like to use this with beginners so they understand how to hinge through their hips. You can do this version with the legs straight, but most lifters will rely too much on their low backs to make it to the top. Instead, opt for a slight knee bend and keep a straight upper body as you hinge through your hips. Most Common Mistake: Arching the Lower Back If you’re doing it like this, you’re going to have low-back issues. Your lower back should remain neutral at all times. You’re much better off cutting a few reps, moving the pin back on the GHD to make the lift easier, or doing the hip hinge-only
Origin: Tip: The Most Misused Machine in the Gym
Tip: The Back Burner
 Not only with this finisher light up your back, it’ll help “wake up” your rhomboids, making it an excellent tool for improving posture. How To Do It Set up in a good stiff-legged deadlift position. Make sure you’re “aware” of your hamstrings and you’re not putting strain on your lower back. Use two moderately heavy dumbbells that you can hold at the top position of a dumbbell row at maximum range of motion. This is your isometric hold position. Maintaining the full height of one arm/dumbbell, reach the other slightly forward and down to get a nice lat stretch, then row up and back to the retracted position. Repeat on the other side. Keep alternating and perform 5 reps with each arm (10 total) while maintaining the full retraction of the “resting” arm. Once you’ve completed 5 reps per arm, do 10 reps with both arms moving together, making sure you fully pull your elbows and shoulders back at the top and add a slight pause between reps. If you find yourself using any momentum or losing range of motion, drop the weight. There’s really no point in cheating by doing “bro-rep” dumbbell rows. Focus on retraction and recruiting the right muscles – the burn will come quickly. The full set will be: 5 rounds: 10 Alternating Single-Arm Rows (holding iso retraction) 10 Double-Arm Rows (pause between reps in retraction) Write down the weight you use your first time and try to increase the weight over
Origin: Tip: The Back Burner
The 4 Best Ways to Reignite Chest Growth
 1 – Add Some Instability Work… At the Right Time There’s a time and place for everything and that includes using some instability training for the chest. Here’s the only rule about instability training: Make sure you do your stable movements first so that your chest is pre-fatigued before you hit it with something unstable. If you haven’t tried it before, use the “hanging band technique.” If you don’t have a specialized bar, you can double up some loop bands and add kettlebells or plates, as seen below: Alternatively, you can use an unstable base of support by doing push-ups off a stretch band: You’ll find yourself struggling to maintain stability from four different directions (up, down, forward, and backward). 2 – Stop Counting Reps on Accessory Exercises After you’ve already finished your heavy barbell or dumbbell bench workout and are ready to move on to accessory movements (flyes, push-ups, banded exercises, machine work), use a rep range that actually makes you lose count. I’m not saying you need to be doing sets of 85, but high reps are your friend. If you’re strictly counting out sets of 6 or 8 reps on these exercises, you’re not going to build your chest much. Get some blood into the muscle bellies for once so you can get that insane pump you’ve only read about. Use these high-rep accessory exercises as a way to ease up on the shoulder joints, take advantage of superior isolation, and groove the movement patterns for efficiency. 3 – Use Cables for Flyes The classic dumbbell flye is perfectly fine, as long as you realize it forfeits a piece of your force curve. Remember, the chest fibers run in a generally horizontal fashion. When you hold on to a pair of dumbbells, the force angle follows that fibrous path – in theory at least – because of the movement pattern, but in truth, the force angle is directly downward, bearing on the shoulder joint. In other words, you’re attempting to do a horizontal movement using a relatively vertical load. To clarify, let’s exaggerate a bit. Imagine you were going to try flyes with 100-pound dumbbells. There’s a high chance you couldn’t perform a deep flye movement with that kind of weight because it’s just too heavy for the pattern. But, you COULD hold them there at the top of the lift for as long as you want because that position doesn’t stress the actual muscles. However, when you switch that force angle to a horizontal one – in the form of a cable flye where the cables are trying to pull your hands apart rather than the dumbbells simply pressing downward – it can act as a game changer for your activation levels. Not only does this better match the direction of the pec fibers for better quality reps that use more of the force curve, it also makes it much easier to keep good form, even when you’re losing steam. The video gives a demo of conventional incline cable flyes, but also shows an easy way to extend a set by simply converting the flye into a cable press to get some help from the triceps. 4 – Stop Ignoring Push-Ups Whether you want to do them one handed, two handed, using rings, a suspension setup, or with your feet elevated, the classic push-up affords too many benefits that many other movements can’t deliver. There just aren’t many people who are really good at push-ups who don’t have a great chest. That says something. Here are some distinct advantages that push-ups offer: Push-ups are healthier for the shoulder joint. They allow the shoulder blade to move around the ribcage as the movement progresses. This movement matches the upper arm’s change in position – scapulohumeral rhythm. Without it, we’d have gummy shoulders. This is particularly important because conventional bench press patterns force you to pin your shoulder blades back. Consequently, you don’t get a chance to train that healthy scapulohumeral rhythm as much as you need to. Push-ups help engage the serratus anterior, a muscle on the side of the torso that engages when the shoulder blades protract. Developing that muscle can keep your shoulders healthy AND really help finish off an impressive V-taper. Proper push-ups create plenty of time under tension that can’t be duplicated with other exercises. You’ll understand that when you crush repeated sets of 40. You shouldn’t be afraid to make a whole workout out of push-ups. You haven’t “graduated” from them just because you’re strong enough to press 300 pounds. Look at it this way: If you can’t do a set of 35 unbroken push-ups, then you’ve got work to do. No one should get to the point in their fitness where having proper control over bodyweight staples goes to shit and they no longer possess the strength or endurance to do them properly. Try This: If you really want to cook your chest, try super-setting push-ups and bodyweight deep dips. Do 12 reps of push-ups and then do dips to failure and see how many rounds you can get done in 25 minutes. When your chest and triceps are ready to pop out of your shirt, you can DM me
Origin: The 4 Best Ways to Reignite Chest Growth
Tip: No More Forearm Pain From Benching
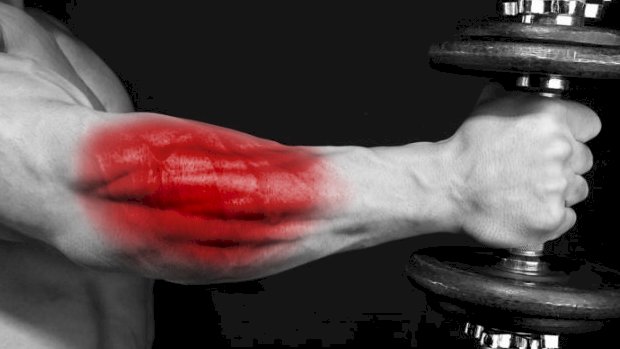 Forearm pain from bench pressing is common… and it’s misunderstood. The culprit is generally the brachoradialis, a muscle normally associated with hammer curls. The reason it can get upset is because the fixed hand position on the bar forces your forearm through a pronation and supination cycle as the elbow bends and straightens. That means you’re effectively being forced to turn your hand over towards an end-range “palms down” position in the bottom of a bench press. Then, as you press up towards lockout, the forearm supinates into a more neutral position. This happens without us really thinking about it. However, while the forearm pronates and supinates, the brachoradialis is loaded to stabilize the movement occurring between the two long bones of the forearm. It’s a little complicated, because the muscle changes functions through the movement, doing different things at different points. Small stabilizer muscles under big loads often leads to overload and pain. Yes, you can back off bench pressing for a while, or you can rub or needle the muscle. All that might make it feel better in some way, but none of it will resolve the problem. Solving the issue requires you to condition the problem range of movement, making that range more easily available and stronger so it has the capacity to deal with the demands of benching. That means specifically conditioning loaded forearm pronation through a horizontal pressing cycle. Sounds complex, but the hammer press is the simple answer: Hold a hammer out at arm’s length and pronate the forearm until the hammer is parallel to the ground. Start with a very short lever. That means holding close to the top of the handle, near the head of the hammer. Holding the hammer parallel to the floor, try to mimic the bench press movement. You’ll feel the forearm fire up and work, and you’ll feel the problem muscle in the relevant way. Some discomfort, up to around 4-5 out of 10 on the pain scale, is acceptable and therapeutic throughout the movement. Do slow and controlled presses. If you need to make it more challenging, work your way down the hammer shaft to make the lever longer. Because the movement goes through the same range of motion as your bench press, it’s the only way to ensure you’re conditioning the relevant parts of the relevant muscles/tendons so they can adapt and actually solve your problem. Since this is a therapeutic exercise, it should be done daily and only to moderate discomfort. You’re actually adding work to tissues that are failing to cope with their current workload, so go steady. It may take a week or two to adapt and improve. It’s worth the time investment though. You’re really solving the problem, not just masking
Origin: Tip: No More Forearm Pain From Benching
The Deload: Everything You Need Know
 When you’re trying hard to gain muscle and strength, you must train with a high level of effort, dedication, and intent. You also need a sufficient amount of volume to stimulate physiological adaptations. That type and amount of training can take its toll on both the body and the nervous system. Old injuries can flare up, new ones can start to appear, and delayed onset muscle soreness might linger longer than usual. You might even begin to notice that your libido, along with your motivation to train, plummets. Not surprisingly, your mood might also start to sour. Enter the deload, the solution to all training problems! You decrease training stress by reducing the weights you’re lifting, the number of sets you’re doing, or the days you’re spending in the gym. You can even exchange your exercises for less demanding ones. You do that for a week and then you feel better. Performance starts to go up again. But… What if you’re feeling fine? What if you’re showing no signs of fatigue or stagnation, or no aches or pains? Should you deload just because a training plan instructs you to? Wouldn’t it be more useful to keep training hard and continue to ride the gains train? What does a deload even do, precisely? Let’s consider all those questions, along with examining some of the best ways to accomplish a successful deload. What Happens When You Deload The old theory about deloading has to do with a phenomenon called supercompensation. You overload the body so that there’s a decrement in performance and then you allow it to rest. Nutrient levels and neurotransmitter levels supposedly swing back up and end up higher than they would typically be, allowing you to get a boost in performance. But that only happens to glycogen stores, not to the factors that play a crucial role in lifting performance. As such, the method is moderately useful for endurance sports, but not so much for lifting. Strength training performance is just not as reliant on glycogen stores as endurance activities. And unless your carb levels are extremely low, you likely will not achieve the level of glycogen depletion that would lead to supercompensation. Deloading also doesn’t supercompensate neurotransmitter levels, but it is true that a deload will help if you’re noticing symptoms of fatigue and your performance is going down. It has to do with beta-adrenergic receptor sensitivity. These are the receptors that interact with adrenaline to excite the nervous system. When they’re activated, your mental awareness and focus increases, you’re more competitive and energetic, and your heart beats faster and stronger. Activated receptors also allow your muscles to contract harder and faster so you’re more efficient at executing movements. If your training is excessive, or if the combination of exercise and day-to-day stress is high, cortisol goes up and these receptors can downregulate. This down-regulation means that you lose your capacity to respond to your adrenaline and your motivation, focus, and performance go down. When you include a deloading week in a weight-training program, the beta-adrenergic receptors recover the lost sensitivity and once again respond more strongly to adrenaline. This will increase strength, speed, motivation, and focus, among other things. So Should I Deload? Deloading is a tool. It’s used to recover beta-adrenergic sensitivity reduced by high cortisol levels. If you don’t suffer from such an issue, the deload won’t do anything for your performance. The training factors that can increase cortisol are: Volume. One of the main functions of cortisol is the mobilization of stored energy. More work means a greater need for fuel, which requires a more significant release of cortisol, which then increases adrenaline. Intensiveness. The harder you push a set, the more stressful it becomes. The closer you go to failure, the more cortisol you release. Psychological stress. When a load or an exercise intimidates you, it can also create a stress response that will lead to higher cortisol levels. Examples include attempting a PR or having a previous injury that makes you insecure about doing a movement. Neurological demands. The more familiar and efficient you are with an exercise, the less stressful it is on the nervous system. More complex movements, however, require a greater focus and mental awareness and in turn create stress. Density. Shorter rest intervals also lead to higher adrenaline levels, which require a more significant release of cortisol. A training program that has a high level of several of these factors is more likely to cause “overtraining.” If you only check one or two of these boxes, your chances of getting into an overtraining state are much lower. But let’s look at how the average lifter works out. I’m talking about the regular Joe you see at the commercial gym. They usually do not push hard, using perhaps a RPE (rate of perceived exertion) of around 7. They pretty much stick to “comfortable”
Origin: The Deload: Everything You Need Know
Tip: 5 Heavy Band Exercises for Legs & Glutes
 Here’s a useful way to set up a heavy band, providing both comfort and stability. Simply place a plate over the center of your band and stand on it. Compare doing this to just standing on a band and you’ll instantly feel the difference. The band will also stay closer to shoulder width throughout any exercise. Resistance bands have many uses. One is the ability to accelerate through increasing resistance. This can prime your nervous system, activate high-threshold motor units, and potentiate your whole body for a better workout. Banded single-leg RDLs are an excellent way to prepare for a heavy lower-body workout, especially if you do a few explosive reps, allowing the band to accelerate you back down. This will overload the stretch-reflex mechanism and prime your muscles for a good workout. Because single-leg RDLs done this way provide an element of stability (versus your standard single-leg deadlift) these can also be used as a teaching tool to improve single-leg stability and strength. 2. Banded Split Squat This is an excellent way to warm up your quads and get a bit of blood in there before your heavy lifts. Because of the angle of the band, there’s even greater quadriceps emphasis. As an alternative to the leg extensions and sissy squats, these can make for an excellent assistance exercise for your lower-body workouts. If you’re at home or in your Vegas penthouse suite wondering how you could do these without an Olympic-size plate, all you need is something flat and strong to place over the band. Or you could just step on the band. 3. Banded Pull-Through Cable pull-throughs are on par with 45-degree back extensions and reverse hypers for developing posterior chain strength in a manner that limits load through your spine. Loop a band around a post somewhere and boom… you’ve got yourself an effective pull-through setup. Because of the ascending resistance of the band, doing pull-throughs in this way tends to bias glute activation at the top, although you’ll get a nice stretch and a little load through your hamstrings at the bottom too. Excellent as a warm-up drill, to teach hip hinge technique, or to burn out your glutes. 4. Lateral Kneeling Hip Thrust Open up your tight adductors and wake up your sleepy glutes with these. Here you’re combining a band kneeling hip thrust with a great hip-opening drill. Throw these into your warm-ups for healthy hips and knees. They’ll also work as a high-rep booty-pumper – just don’t make eye contact. 5. Band ISO Bird-Dog A resistance band is one of the best ways to progress and load a bird-dog. So if bird-dogs are a frequent part of your training anyway, here’s how you can make them harder. You’ll be challenging the collapse of your extended arm and leg. This will help fire up everything from your hamstring to your opposing-side shoulder, and everything else in between. Bird-dogs are part of Professor Stuart McGill’s “big three” core exercises. It’s good to add them into your warm-ups, at the end of workouts, or supersetted with other exercises for long-term back health. Add a heavy band like this for a bigger
Origin: Tip: 5 Heavy Band Exercises for Legs & Glutes
