 Cable chop variations are some of the most effective exercises for building an athletic midsection, making your abs as athletic and strong as they look. Chops help build an efficient power transfer between your lower and upper body, meaning they’re great for athletes. Adding rotation to your training is a must if you want a good set of obliques. Try this drop set: A1. Cable Chop (left): 8-12 A2. Cable Tight Chop (left): AMRAP Rest 30 seconds A3. Cable Chop (right): 8-12 A4. Cable Tight Chop (right): AMRAP AMRAP means “as many reps as possible.” Just make sure they’re GOOD reps. Only rest between A2 and A3. Go straight from one set to the next. Then rest as needed before you start the whole thing all over again. Do three rounds. Start with your standard cable chop setup. Keeping your elbows straight throughout, swipe the cable horizontally. Engage your core and hips in a powerful transfer of movement (think of the whip of a baseball swing). Once you’ve completed your set on one side, continue the set by “dropping” to a stronger chop position. A “tight” chop simply means your elbows are going to come in tight to your ribs. By bending your elbows and bringing the cable in you’ll be able to lift more weight, or in this case get in a few more reps. Complete a drop-set on one side before switching to the
Origin: Tip: The Oblique Exercise You Need
Author: ondriving
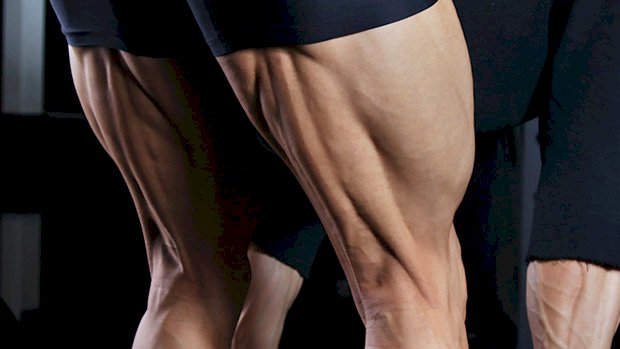
Death to Small Quads
 Impressive quads aren’t easy to build. Going through the motions with a handful of machines won’t cut it. But if you’re willing to pull out all the stops, you can build them. That’s where high-bar squats comes in. High-bar squats will hit all the critical components for muscle growth, including mechanical tension, training intensity, and metabolic stress. We’ll cover those, and more, in the workout below. Remember, big quads are rare because few people are willing to do the terrible things necessary to earn them. You’ll do this four-exercise workout twice per week. Here are the lifts that’ll score you an impressive pair of quads: High-Bar Squat These are your big-ticket move for this workout. It’s important to get them right to really emphasize the quads. The Setup Place a barbell on your upper traps while squeezing your upper back muscles together to form a shelf. If you aren’t used to a bar on your upper traps it can feel uncomfortable at first. Get used to it. Just make sure the bar isn’t sitting on the bony ridges of your spine or your neck. Find your best foot position, allowing maximum hip mobility at the bottom of the squat and preventing rounding of your spine or knee discomfort. Start with heels around hip width and toes angled outward. Then adjust and use what feels best. We’re often taught to use a narrow stance for better quad recruitment. This may produce more quad tension but isn’t essential. If you can’t set up narrow you’ll still get excellent quad recruitment with good range of motion, loading, and reps. Form a strong arch by squeezing the ball of your foot toward your heel. Externally rotate your hips to get your knees vertically stacked with your toes. The stress and tension of the load should be directed through stacked bones, joints, and muscles. Protect your lower back by flexing the abs and locking your sternum down into your pelvis. Though the high-bar position keeps your torso more upright than the mechanics of low-bar squatting, this doesn’t mean your torso must be perpendicular to the ground. Too often, lifters create a vertical position by aggressively arching their lower backs. This can lead to potential injury. The Movement Maintain a neutral lumbar spine (natural arch) to protect your lower back. With abs locked down, elevate your chest and extend at the thoracic spine to maintain a slight but not excessive upright posture. If you’re tall with long femurs, no amount of exaggerated arch will allow you to sit vertically in a squat. Exaggerating a vertical torso also pushes the knees forward to maintain center of gravity – producing even more stress in the knee and possibly causing patella-femoral pain. This usually restricts the ability to squat deeper, which can lead to overloading a shorter range of motion squat and further aggravating joint stress. Most lifters subsequently abandon squats and knee-wrap their leg press because “they hurt my knees.” High-bar squats are more upright and quad dominant than low-bar squats. More emphasis on quads, and therefore knees, doesn’t mean your knees can’t handle the stress. Our joints aren’t fragile structures ready to explode if loaded. Creating strong muscles around your knees by using correct form will encase the knee with muscle to protect and stabilize it, while applying controlled stress to strengthen your connective tissue and bones over time. Just don’t be careless. Loading through the ball of the foot can cause knee pain. This may happen when your knees dive too far forward past your toes at the bottom of the squat. Your knees can and should go past your toes on a good squat. Often lifters let their heels rise at the bottom of a squat as the focus is in the front of the foot. Maintain your weight evenly through the entire foot and push firmly through your heel as you squat. If you can’t squat deeply without your heels rising, this means you have poor ankle mobility. So restrict your depth while working to improve your ankle dorsiflexion. Healthy, mobile ankles are crucial for good squatting. Sets and Reps Warm up with an empty bar or bodyweight set to mobilize hips, knees, and ankles and to sense any major joint discomfort early. Do 2-3 warm-up sets of 10-12 reps before moving up to working weight. Then, use 3-4 working sets of 8-12 reps. Adjust the weight so that you get within two reps of failure to optimize muscle growth. This will produce enough mechanical tension and metabolic stress to trigger a growth response. Occasionally jumping to 15-20 reps to near failure is an unpleasant yet effective way to break plateaus. High-bar squats are tough. Even sets of 8-12 will leave you winded while taxing your central nervous system. The goal is to do enough training volume to grow. Focus on developing the stamina to do more reps, sets, and weight. Hitting absolute failure is fine for curls and cable rows, but it increases the chance of getting hurt on heavy compounds and accumulates fatigue more rapidly than training
Origin: Death to Small Quads
A New Protein, A Designer Carbohydrate
 Nutritional Evolution People who want to build a lean, muscular physique go through a kind of nutritional evolution: Stage 1 First, they start to actually pay attention to nutrition. After the newbie gains fizzle out, they realize they need to improve their diet strategy… or, you know, actually have one. They learn that things like protein and carbohydrates are pretty darn important for fueling workouts, recovering from workouts, and ultimately building the body they’re after. They improve their food choices. Maybe they’ll even pick up a bucket of whey protein at the grocery store. Sadly, many folks stop right there. Then they assume they’ve reached their “genetic limits” and may even lose some of their enthusiasm for training. That’s too bad, because there’s one more step they could take. Stage 2 They could begin to fine-tune their protein and carb choices. They could learn how nutrient timing is important, and they could learn that different types of protein and carbs have different tactical effects on performance and body composition. These lifters and athletes who enter stage two put on their lab coats and increase the magnification of their nutritional microscopes. They discover that specialized proteins and designer carbs exist, and these bespoke macros were created for the sole purpose of building muscle faster, protecting muscle, and making workouts more productive. In short, they discover Mag-10®. A New Kind of Protein You’ve heard of the super protein, micellar casein, but there’s another form of casein with its own unique set of benefits: casein hydrolysate. Unlike micellar caseins, hydrolysates are heavily processed… and that’s a good thing. The goal is to get a complex mixture of two and three amino acid (di- and tri-peptide) chains that have unique biochemical properties and that are absorbed intact, not requiring any further digestion. Casein hydrolysates are at least 30% more effective in stimulating muscle protein synthesis (read: gains, bro) than intact casein. These rapidly-absorbed casein hydrolysates are ideal for peri- or intra-workout consumption. Casein hydrolysates also have another unique mode of action: they’re more insulinogenic than whey proteins. “Insulinogenic” means they elicit a rise in insulin, which is exactly what you want in a protein during the peri-workout period because insulin shuttles amino acids to working muscles. In short, a dose of a good casein hydrolysate, as found in Mag-10®, stimulates muscle protein synthesis to a much greater degree than a much larger dose of conventional proteins. And whole foods can’t even come close. A Specialized Carbohydrate Along with isomaltulose, Mag-10® contains just the right amount of cyclic dextrin, a nutrient-partitioning, functional carbohydrate. Cyclic dextrin: Acts as a powerful anti-catabolic agent (controls cortisol). Pulls fluids into muscle cells. Potentiates glucose transport into muscle. Delays fatigue so you can train harder, longer. This special carbohydrate mixture, in addition to increasing metabolic rate, drives supraphysiologic levels of Mag-10®’s di- and tripeptides, as well as other vital nutrients, into the muscle cell. Five Ways to Use Mag-10® 1 – Protein Pulsing How your body utilizes protein can have a powerful impact on how fast you gain muscle mass. Simply put, the greater the body’s response to protein utilization, the greater the muscle gains achieved. Unfortunately, the standard advice has been to “consume a big dose of protein every couple of hours,” which is too often and actually causes the body to become unresponsive to protein. Science and experience now tell us that we actually should’ve been doing something called “protein pulsing.” Protein pulsing is a science-based dosing strategy for making the body hyper-responsive to high-protein utilization and producing the maximum anabolic effect. For protein pulsing to be effective, you have to achieve three or four sizable amino-acid “spikes” per day, and allow the body’s amino-acid levels to return to baseline after each spike. In order to do that, you have to use a fast-acting protein formulation that’s designed specifically for maximum pulsing effect. Optimal times for pulses are 30 minutes prior to meals, between meals that are six hours apart (or longer), and post-workout, when the body is already in a hyper-responsive state and needs the additional protein. Mag-10® is the only formula in the world designed specifically to deliver the maximum pulse effect. 2 – During Cardio or Metcon Many physique competitors use fasted cardio (doing cardio on an empty stomach first thing in the morning) for fat loss. The hope is that body fat is vulnerable in this state and can be better oxidized and burned. But there’s a problem. Two, in fact. First, the extra fat burning is minimal. Second, muscle is also vulnerable, and that means your metabolism is at risk. If you like fasted cardio – because you’ve seen some benefits or it’s just
Origin: A New Protein, A Designer Carbohydrate
Tip: Best Deadlift For Leg Size & Back Health
 You’ll need a dual-adjustable cable machine like the one in the video. Something like a Cybex Functional Trainer or a Keiser Functional Trainer would work. You’ll also need a bar-style cable attachment. (If you don’t have one of these attachments, you’ll see a workaround below.) The attachment should be set just off the floor. Pick it up and step back a foot or two, which will change the angle of pull from the cable. Engage your lats, push your hips back, and allow the bar to travel in toward the cable machine. Once your hamstrings have gone as far as they can handle, return to the start position. Just think of it as a traditional RDL, but you’ll be forced into a slightly different movement to compensate for the direction of the cable. If you don’t have access to the type of cable attachment shown, here’s an effective way to do it using a barbell. Combo Hamstring RDL Here’s a closer look at how the cable is attached to the barbell using a common handle. (Ankle attachments will also work.) When using the combo (cable and barbell) version you’ll also need to account for the extra weight of the bar. This adds another element to the exercise, where on top of the more horizontal cable load you’ll also be adding to the vertical. You can add weight to the bar here, but keep in mind how this’ll affect the overall profile of the exercise. There are some merits to doing this, but for now let’s stick to the exercise in question where the majority of weight is coming via the cable stack (two cable stacks, technically). Why They Work Due to the cable angle, the exercise is designed so that your hamstrings are likely to give out well before your back does. Your hamstrings are taken into a fully lengthened position under load, while your low back will feel like it’s on vacation. Theoretically, there’s very little sheer or compressive force coming through your lumbar region, while there might even be a little traction of the spine as you reach into the bottom position (depending on the height of the cable). These Romanian deadlifts are anything but an ego lift. They prioritize tension through the targeted muscle. This is good news if size is your priority. When it comes to hypertrophy, your muscles don’t give a damn how much your ego is lifting. Tucked away by layers of connective tissue and skin, they’re blind to what goes on outside. They do recognize tension though – and you’ll get plenty of it with this exercise. You’ll also notice that as your toes get pulled into the floor (resisting dorsiflexion), your calves will become more active. This co-contraction of the gastrocnemius adds to the effect and will make things even harder for your hamstrings. Programming Try these in place of your regular deadlifts as a way to vary the training stimulus or work around a tricky back. They’re also a useful alternative to exercises such as 45-degree back extensions, reverse-hypers, pull-throughs and the like. Sets and reps should be
Origin: Tip: Best Deadlift For Leg Size & Back Health
Tip: The End of Shoulder Pain
 When focusing on upper-body size and strength, lifters usually gravitate toward two moves: the bench press and the shoulder press. But over time, shoulder issues – from annoying niggles to major injuries – can cause lifters to move away from the barbell shoulder press and focus more on bench work. But it’s not difficult to keep track of your shoulder training and avoid problems that may set you back. Check out this diagram: Looking at this, we can easily see that if the muscles at the front of our shoulder (such as pecs, responsible for shoulder protraction) are overdeveloped from benching, your shoulder will end up in a compromised forward position. This concept is often referred to as “joint centration” and is pertinent with the ball and socket joints of the shoulders and hips. If the humeral head isn’t centered in the socket as it moves through different angles, it will start to push and pinch in ways that cause pain and discomfort. Let’s break it down: Think of your shoulder as the centered dot in a circle. To keep it happy all you need to do is make sure you’re doing exercises which take your shoulder in all directions. This doesn’t have to become the basis of your entire workout program. Even a few banded retractions in your warm-ups and cooldowns could be enough to keep your shoulders centered. Some examples of exercises you can use for each direction are: Upwards (Push, Elevation, Traps/Delts): Overhead Press Shrugs Downwards (Pull, Depression, Lats): Pull-Ups Lat Pulldown Forward (Push, Protraction, Pecs): Push-Ups Bench Press Backward (Pull, Retraction, Rhomboids): Face-Pulls Rows Rotation: Banded/Stick Dislocates Dumbbell Shoulder Rotations Skin-the-Cats Frequently missing out on one or more of these directions (or overdoing a single direction) will gradually move the shoulders out of position. This leads to all those common things that lifters struggle with, like neck pain, elbow pain, tendonitis, shoulder pain etc. Rotation is the easiest to throw into your warm-ups, yet the most frequently neglected. Get a thin resistance band and do some dislocates every day! This keeps you on top of your “mobility” but via strength training. So rather than having to do a ton of boring rehab/prehab drills, you’re just using your regular training to keep your shoulders happy. It’s simple enough to remember. Even if you’re following a specialized program that’s heavy in bench pressing, you’ll be able to easily program your assistance exercises and warm-ups by using the diagram. Review your training for the past few weeks using the diagram and the exercise list above. See if you’ve missed anything. Keep it in mind for what you do in future. Provided you have all four directions and rotation in mind, the likelihood of you running into shoulder issues will be severely
Origin: Tip: The End of Shoulder Pain
Hamstring Hammering: 6 New Exercises
 A great set of hamstrings will always stand out. Building them can even help protect the knees and prevent injuries. Here are some new moves that’ll add more meat to your hamstrings. 1 – Slider Hamstring Curl with Eccentric You’ve probably heard of Nordic curls and the benefits of controlled eccentrics (lowering slowly), particularly for hamstring injury prevention. Well, this is a good alternative that benefits your hamstrings in a similar fashion. Exercises such as these also tend to bias more biceps femoris (both short and long head), which is useful for “outer” hamstring development. The lifting portion is a glute bridge – much easier to do with a heavier weight because you’re at a greater mechanical advantage. On the way down, you do something that resembles a leg curl, which is possible with the use of sliders. During this part, the hamstrings are at a mechanical disadvantage so more work is required from them at the same relative load on the way down. The result of all this? An overload of the hamstrings during the eccentric portion of the lift. Sliders work well here, as does a hockey slide trainer, a Sorinex glute-ham roller, or even just a pair of socks on a slippery surface. Like Nordic curls, these can mess up your hamstrings for days, so watch the volume. Just 2-3 sets of 5-8 reps with a controlled negative work best to start. Add an extra set or two as your hamstrings become more accustomed. 2 – Dumbbell Hamstring Walk This exercise is relatively simple, but deceptively difficult for many. If you’ve got good hamstrings then these shouldn’t be a challenge. If your hamstrings or gastrocnemius (the big meaty part of your calf) are a little out of condition though, cramping is common. Keep your feet as narrow as possible on the dumbbell and point your toes. Having your feet close together will stop the dumbbell from steering off in one direction. You can also use a foam roller. By plantar-flexing your ankles (like a ballerina) you’ll create a co-contraction of your calves and hamstrings. This co-contraction increases activation of the hamstrings. The active insufficiency of the gastrocnemius muscle causes your hamstrings to work harder. Don’t believe it? Just try any ham curl machine with a plantar-flexed position and note the difference. Walk the dumbbell up to the point just before you lose hamstring tension. You’ll know when. You can even palpate your hamstrings during to check engagement. Walk it back down as far as you can, getting as long as you can with toes pointed. That’s one rep of probably around 6-10 steps. Go for 3-5 full reps and don’t let off the tension. Add reps over time, or try it with a bar across your hips for some extra nastiness. 3 – Band Prone Hamstring Curl When choosing exercises, one of your main considerations should be the muscle length you’re training them in. Exercises that train muscles in their longest position (think hips bent with knees straight) do a great job, but so do exercises that train them in their shortened position (think hips straight with knees bent). Banded hamstring curls put your hips in a straightened position, working through knee flexion. With this position and the ascending band resistance, these load the hamstrings most in their shortened position. Because of this, these do a crappy job of training your hamstrings in their lengthened position, but the squeeze and pump you get more than make up for it. Combine them with something more hip-dominant (like RDLs, back extensions, pull-throughs, etc.) to cover all bases. Sets of 20-30 reps work well towards the back end of a workout. Or you could start with them – your squats will feel smoother after you get a hamstring pump using these bad boys. 4 – Landmine Single-Leg (Ipsilateral) RDL Landmine Side-Facing RDL Landmine Front-Facing RDL These work well with a variety of rep ranges. Try both options to find the one you like more. Single-leg RDLs are most commonly done with a contralateral load: planted foot with the load in the opposite hand. Contralateral work mostly relies on using an interconnected line of tissues known as the “posterior functional line.” This line connects the glutes of one hip to the opposite side lats, essentially creating an X-shape that crosses the lower back. Why should you care? Well, think about athletes and their sport. Developing stabilization between hip and shoulder is essential. But if you care more about getting bulging hamstrings, contralateral might not be the best option. Ipsilateral means using the same-side arm and leg. It’s more useful when you’re trying to train the muscles of the lead leg, and that hip “snap” from the lead leg you’ll see in some sports. An ipsilateral RDL tends to be more stable and it emphasizes the lead leg’s hamstring more. A dumbbell or kettlebell can be a good option, but if you’re looking to really load those hamstrings (and glutes), using a landmine offers more stability. The bar stays in contact with
Origin: Hamstring Hammering: 6 New Exercises
Tip: How to Fix All Your Biceps Problems
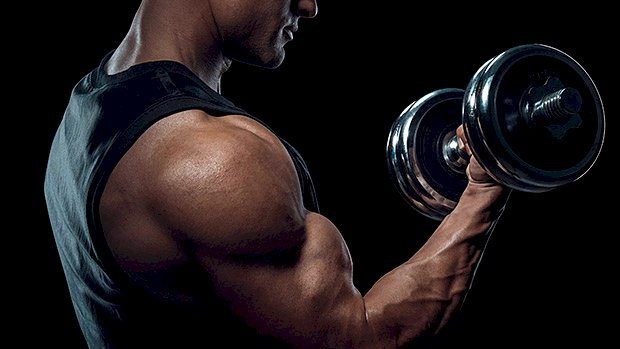 Most guys struggle to build their biceps. This is usually because… They have crappy form. They lack stability. They’re ignoring one of the functions of the biceps. Swinging the weights, leaning back, doing half-reps, and letting the shoulders take over are all common issues. Training like this might boost your ego, but it won’t build your biceps. How To Fix Those Problems The best solution is to create a stable base by strengthening your lower and mid-traps, rear delts, and rotator cuffs so that you’re placing tension on the biceps and making them work to overcome the weight. Want a more immediate fix? Artificially create a position of stability during your curls. Take a look: You can see that I’m getting support from the leg pads of a lat pulldown machine. This will allow you to drive your triceps back into the pad and create a very stable platform to train the biceps. It also makes it harder to cheat your reps. Another problem solved. This all adds up to more tension going where you want it – the biceps. More tension equals more growth. Why the Offset Grip? You already know the biceps bend the elbow. But they also supinate the wrist. Taking an offset grip will cause the weight to shift to one side. Place the thumb-side of your hand up against the end plate of the dumbbell. This means if the dumbbell is pulling you into pronation, your supinators (including the biceps) have to work hard to keep the dumbbell level. You end up working both elbow flexion and supination. This increases the activation of the biceps during each rep. By making these small tweaks, every rep will stimulate the biceps more than the regular, sloppy curls you see in gyms all over the world. Work to develop strength in this exercise and your biceps will grow way more than they were when you were “curling” the 60s. Oh, and if you ever progress to using the 60s for reps on offset supported curls, your arms will be
Origin: Tip: How to Fix All Your Biceps Problems
Tip: This Hybrid Ab Exercise Will Make You Cry
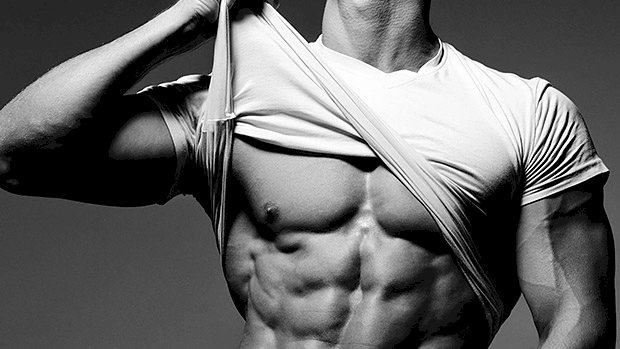 Eccentric training is an excellent way to tap into those neglected fast-twitch fibers. Using any cable crunch as an example, take the cable further away from your shoulders (overhead) to increase the load via a longer lever arm. To reduce the load, bring your arms closer so your shoulders will shorten the lever arm. By changing the cable position during a cable crunch (further from the torso on the way down) we can increase load in the eccentric or negative phase. A1. Decline Eccentric Cable Crunch: 6-10 A2. Decline Crunch: As many good reps as possible Do three rounds. There should be a “peeling” of your spine as you come up and an unrolling as you come down (almost a crunch/sit-up hybrid). If you’re not used to this type of training, your entire mid-section will feel these for days. You’re
Origin: Tip: This Hybrid Ab Exercise Will Make You Cry
6 Ways to Upgrade Your Back Workout
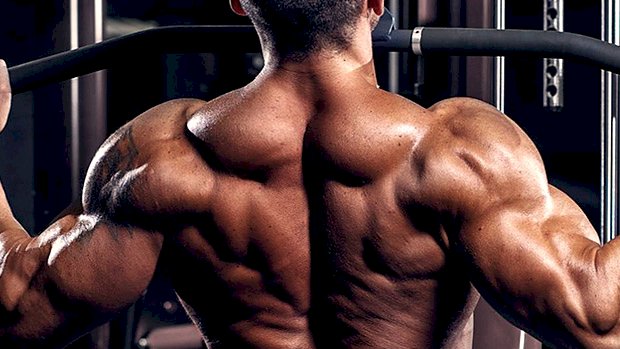 There comes a time when you’ve done rows and pull-ups to oblivion and reach a plateau in strength, muscular development, or both. That’s when it’s time to think outside the box. These hidden tricks can help you do just that. 1 – Stop Moving Weight This may seem misleading. I’m not saying you shouldn’t resistance train. I’m saying you need to stop training with weight that you can actually lift. I just blew your mind, right? No, really, if you want to improve your strength and even your mobility, you’re going to get through your sticking points by using isometrics (trying to lift something that can’t be moved). The benefits: Isometrics allow you to apply maximum force without risking injury since the body isn’t changing positions under load (which is the most likely scenario for injuries). They strengthen a part of a typical force curve that traditional weight training would simply pass through. As an example, focus on shoulder flexion and extension isometrics to hit the rear deltoids and lower traps, thereby challenging the limits of your range. Watch me put Dani Shugart through the gears: Setting up a barbell with a heavy load on the pins in the rack is a great way to do both of these isometric exercises. Banking it against the back of the rack makes it even more sturdy. 2 – Pause for the Cause The above is all fine and good when it comes to the idea of trying to push something away from you (in this case, the loaded bar). When you pull something towards you and hold the end ranges, it typically exposes glaring issues of weakness that lifters have been overlooking for years. Adding a pause to a pulldown or row is a good first step in acknowledging that it’s a different ballgame. Beyond this, however, we can increase the octane by taking things back to fitness testing in 11th grade gym class. The flexed-arm hang was probably a piece of cake when you were 16 years old, weighed 150 pounds, and were unaware of good lifting technique. I remember being able to hold myself up there for close to a minute. Change the game and use proper pull-up mechanics, though, coupled with all of your added mass, and you have a whole new challenge that probably won’t allow you to do much more than a 20-second hold. If you’re not used to these, prepare for a world of intrinsic soreness for the next couple of days. 3 – Do Big Boy Rollouts Yep, they’re an ab exercise… until you use a barbell instead of an ab wheel and go out wide (think of your bench press grip). Then they become one of the greatest ways to torch your upper lats and teres muscles. They can be a game-changer for the constant tension they provide to the upper lats during both the eccentric and concentric halves of the lift. Bonus points: If you really want to torch the upper lats, then try supersetting barbell rollouts with snatch grip deadlfits. You can even use the same bar. Boom. 4 – Rock n’ Row If you want to engage as much of your back musculature as possible during your seated rows (or horizontal pulls in general), it’s imperative you add some movement from the hip joint. I call this “toprock.” By applying a little sway with a neutral spine, you’ll remain safe while keeping the emphasis away from the biceps and away from unwanted shoulder glide once the weight begins to get a little heavy. Think about it: The “intro to training” textbooks says the form police will arrest you if you keep anything other than a completely rigid torso when doing rows, but applying a bit of momentum is perfectly acceptable and isn’t “cheating.” This is me doing what I consider to be a standard set of heavier seated rows: As you can see, I’m maintaining good tension throughout the rep, and never is there any rounding of the lumbar (or thoracic) spine. And, as the video below shows, I believe this same principle should apply to all row variations, within reason: 5 – Isolate with Fisherman Rows Dumbbell rows are a staple in many programs for unilateral pulling strength and development of the lats. Unfortunately, there are plenty of people who might not have the right conditioning to use the classic single-arm dumbbell row without risk, and others who just plain struggle to get a handle on proper form and technique. For lifters with a history of lumbar issues, the last thing they need is a one-sided load combined with an uneven hip position, which is what happens when they place one leg up on a bench while the other stays grounded. Moreover, finding the right places to put your hands and feet to promote a level hip position to avoid the pitfalls can be frustrating. Even healthy lifters can have trouble finding a position that gives the proper amount of emphasis to the right areas. The major difference you’ll see right off the bat with the fisherman row is the fact that both legs are mounted on the bench, not just one. This immediately stabilizes the pelvis so you don’t have to spend time trying to finding the least objectionable hand, foot,
Origin: 6 Ways to Upgrade Your Back Workout
Tip: The Biggest Keto Myth
 “Calories Don’t Matter on Keto!” Wrong. Caloric intake above maintenance will still cause fat gain. One of the most misleading statements about keto diets is that calories don’t matter as long as you’re not consuming carbs. This stems from the insulin-to-obesity theory. It goes something like this… Carbs cause insulin to be secreted. Insulin (the storage hormone) stores those carbs as fat. Eliminate carbs and you’ll stop storing fat regardless of calories consumed. Become a fat-burning machine. It’s true that getting into a state of ketosis will increase fat oxidation. After all, fats and carbs are the main fuels used in the muscles for oxidation during exercise. If you eliminate carbs, then eventually the body is left with no choice but to use fat as the primary source for fuel. Boom! Increased fat oxidation, right? But there’s a difference in fat oxidation and a reduction in fat mass, which can only happen in an energy deficit. And if you’re consuming an excess of calories from fat, then the body will do the same thing with those excess calories from fat as it does with carbs: it’ll store them for later use. The reason that a ketogenic diet works well for some people is that it can increase satiation – the feeling of fullness. This higher degree of satiation can naturally cause some to eat fewer calories, which leads to fat loss despite the fact that they may not be counting calories. It’s Just an Energy Deficit The ketogenic diet will work for fat loss in the same way that every other diet works for fat loss – by creating an energy deficit. You cannot eat “as much as you want” on a keto diet and still lose fat simply because you eliminated a macronutrient source. From the data we’ve seen, keto does appear to increase satiation better than most standard diets, which can help with dietary compliance and naturally reducing caloric intake. However, when calories and protein are equal, it’s not a significant advantage for fat loss (1). On the flip side, the keto diet falls flat on its face when it comes to increasing muscle (2)
Origin: Tip: The Biggest Keto Myth
