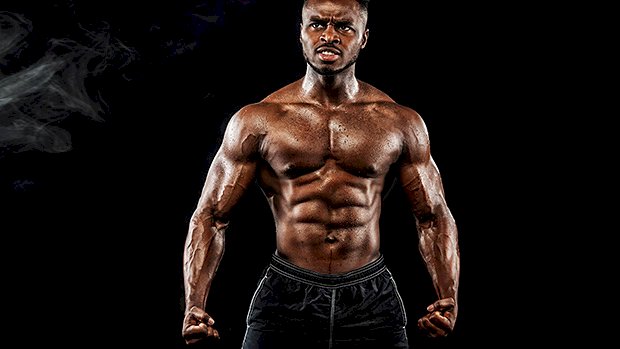
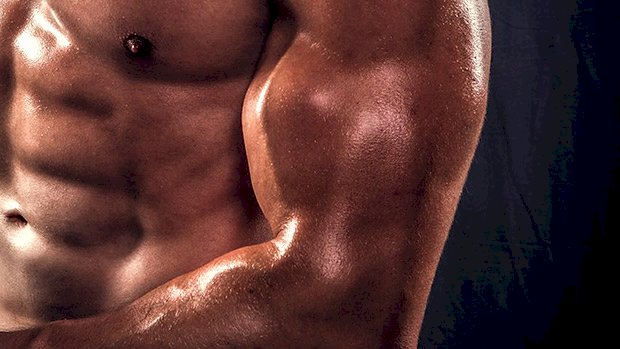
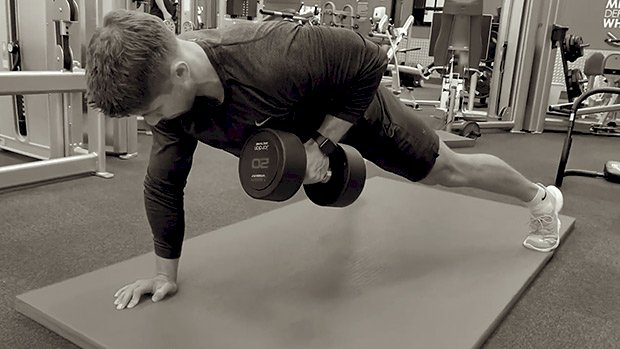
 After grinding through a lineup of taxing multiple-joint exercises, pushing sets to the limit, and trying to set PRs, ab work is the last thing lifters want to do. But don’t leave the gym just yet. Building and strengthening the abs can shore up weak links, prevent injury (particularly in the low back), lead to bigger lifts in the gym, and give you a carved-up mid-section. Here are some no-nonsense ab and core exercises you’ll love to hate: 1. Super Abs Alternate between a weighted over-the-knees crunch variation and a reverse crunch. Start with five reps on everything and try to progress to 8 or 10 reps over time. Use a 10-15 pound kettlebell or dumbbell. Finish with a 10 to 20-second hollow body hold and a 10 to 20-second RKC plank where you tense your body as hard as possible and drive your elbows back to your toes. If you love the “burn,” this should blow your hair back. I came up with this twelve years ago to keep my personal training clients (who were all about the abs) paying me. I ended up really liking it since you only need one or two rounds. If you hate ab work, at least it will be over quickly. 2. Super Abs 2.0 Here’s a harder version which includes hollow body holds after every crunch/reverse crunch transition. 3. Stability Ball Serratus Crunch and Chop The serratus crunch is pretty effective on its own, but the ball increases the range of motion. While this will fry your abs, you’ll also benefit from the serratus activation, which is key for shoulder health and scapulae stability/mobility. The chop makes it even harder as you change the length of the lever arm. Do 2-3 sets of 8-10 reps and you won’t need any more than about 10-15 pounds. 4. Stability Ball Serratus Crunch (Progressive Isometrics) This version isn’t necessarily harder, just different. Do a rep and hold the contraction, protracting the shoulder blades hard up top for one second. Do the second rep and hold the contraction for two seconds. On the third rep, hold for three seconds. Continue until you’re trashed and hit failure. Two sets should be plenty. 5. Weighted Dynamic Hollow Body Hold If you’re not doing hollow body holds, now’s a good time to start. Getting into and maintaining a posterior pelvic tilt will do wonders for your core strength, and I’ve found the variations of this exercise make my low back feel great. If this is too demanding, a basic version where you hold a static position (hands behind the head or across the chest) without added load will do just fine. The key is to keep your shoulder blades off the floor the entire time, and keep your low back pinned to the floor. Adjust the height of your legs as needed. Adding a dynamic or weighted element will increase mind-muscle connection and force you to maintain the correct positioning. You won’t need more than 10 pounds on each end. This is NOT a high-rep exercise. 6. Serratus Hollow Body Crunch This is a variation of the hollow body hold with the addition of spinal flexion and serratus activation. Don’t rush these. Break it up slowly and methodically and transition smoothly. 7. Anti-Rotation Hollow Body Hold and Chop This progresses the hollow body hold by adding an element of anti-lateral flexion and rotation into the mix. You won’t need much added resistance. A very light mini-band or maybe one plate on a weight stack will be more than enough. 8. Anti-Rotation Serratus Hollow Body Crunch and Chop This is another hollow hold variation. You just add spinal flexion and serratus activation. Move slowly and methodically. 9. Countdown Barbell Rollout Rollout variations are hard enough on their own, but if you want to up the ante, try these in countdown fashion: Roll to point where you don’t fall into spinal extension (if you feel it in your low back you’re going too far) and come back in as normal. Do four reps. On the fourth rep, hold for four seconds in the fully extended position. Do three more normal reps and hold the third one for three seconds. Do two reps and a two-second hold. Do one rep with a one-second hold. This turns out to be a 10-rep set. If you’re not completely taxed by the last rep, continue doing normal reps until you are. You won’t need more than one set of this. In the video, I made it harder by adding a slight decline. 10. Tall-Kneeling Anti-Rotation Landmine You’ll be hard pressed to find a better anti-rotation exercise. By kneeling, you cut off your base of support, making it more difficult. Keep your pelvis underneath you and squeeze the hell out of your glutes. Don’t allow the weight to rotate you; keep your shoulders square. 11. Off-Bench Side Plank Side planks are fine. That said, I’ll rarely have clients do them since most people just butcher them (not getting their hip bone up high enough) or complain of shoulder pain. This version eliminates both of those issues and you’ll immediately feel your obliques firing if you make an effort to keep your torso up. Check out the video
Origin: 11 Ab Exercises You’ll Love to Hate
Author: ondriving
Tip: Does Getting Ripped Make You a Weakling?
 Can You Maintain Strength While Cutting? Many things can contribute to strength. As such, you can lose strength for many reasons while dieting down. The two main reasons you lose strength when trying to get lean are: 1. You’re losing muscle. This is the most obvious one. But it should never happen unless you get down to lower than a real 8 percent body fat. If you keep training hard (but smart), have a high protein intake (1.25 to 1.5 grams per pound of body weight) and an acceptable deficit (not losing more than two pounds per week) you won’t lose muscle. 2. You’re losing tightness. This is the most common reason for losing strength. Normally what happens is that you get weaker on the big basic lifts (bench, overhead press, and squat) but your strength on isolation exercises for the muscles involved will be the same or even higher. By losing muscle glycogen, intramuscular fat, water, and fat, your strength leverage becomes worse and the joints are less “compressed.” If you accumulate a lot of glycogen, water, and fat inside the muscle and water/fat outside the muscle, you’re creating pressure around the joint which stabilizes it. This passive stabilization makes you stronger. When you lose it, the body feels less “safe” and force production is more easily inhibited as a protective mechanism. Let’s Address the Muscle-Loss Thing The reason why people lose muscle while dieting is NOT the caloric restriction. To maintain or even increase muscle, your body needs protein and enough calories to fuel the repair processes. “Yeah, but Thib, if I’m in a caloric deficit I don’t have enough calories to fuel the repair process!” Really? When you’re in a deficit you still walk, move around, and train, right? Of course! But you’re in a deficit… by definition you are not taking in enough energy to fuel all of that. How can you still function? Well, by using stored energy for fuel. And the same can be done to fuel the muscle repair and growth process. Even in a deficit, if protein intake is sufficient you should be able to repair and even grow some muscle by relying on stored energy and the ingested protein. I’m not saying you can build as much muscle on a deficit. When you eat less – especially when you go lower in carbs – you get a lower level of mTOR and IGF-1, which can make it harder to build muscle. But you should still easily be able to maintain what you have. So why then are people losing muscle while dieting down if it’s not because of the caloric deficit? Because they’re afraid of losing muscle. That fear leads to the fulfillment of that fear. So let’s say a dude decides to get shredded. He cuts calories and maybe starts doing cardio. But he heard that he’ll lose muscle when trying to get lean. At first, he feels smaller in his clothes and doesn’t look shredded yet. It’s even harder to get a pump (because of lowered carbs and sodium). So in his mind, it must be because he’s “losing muscle.” So what does he do? He trains with more volume and intensity. He goes to failure more often, uses a ton of set-extending techniques like drop sets, rest/pause, and supersets for 90-120 minutes sessions using short rest intervals. The higher volume and intensity both dramatically increase cortisol levels. Cortisol is already elevated more when you diet down (since it’s involved in energy mobilization). And this chronic output of cortisol greatly increases the risk of losing muscle since cortisol breaks down muscle tissue. You also create a lot more muscle damage. Under normal circumstances this would be fine since you need the damage to grow. But if you create so much damage that you can’t repair it all before protein synthesis comes back down (24-36 hours after your workout) you might lose muscle! When you’re dieting down, you shouldn’t try to use your lifting workout to burn more calories (by increasing volume), nor should you panic and jack up the volume. If anything, when you’re dieting your capacity to tolerate volume and adapt is lower. You need to do less, not more. Just make sure you push hard on those sets. The Loss of “Tightness” or Joint Stability This is likely the main cause of strength loss while dieting down, especially in the initial phase of dieting. The more stable a joint involved in a lift is, the stronger you’ll be. If the joint is more stable there’s less of a strength leak. Also, if the body feels “unsafe” it won’t allow you to use all of your strength potential. When you’re on a fat loss regimen you lose… Subcutaneous fat Intramuscular fat Muscle glycogen Intramuscular water Extracellular water When you lose intramuscular fat, muscle glycogen, and intramuscular water you “deflate” your muscles. As a result, these muscles aren’t pushing as much on the joints. The bigger the muscles are, the more “packed” the joint is, even passively. This makes the joint more stable. When that happens, you’ll lose strength on the multi-joint movements, mostly the pressing movements – the shoulder is an
Origin: Tip: Does Getting Ripped Make You a Weakling?
Tip: 4 Exercises You Aren’t Doing (But Should)
 If you have a decent training program, you’re likely doing some variation of the squat, deadlift, overhead press, and pull-up or row. What’s missing? The exercises that help you become more proficient at these lifts. Here are four exercise that’ll increase your mobility, improve your balance, and strengthen your underused muscles. 1 – The Dumbbell Sumo Plié Squat How To Do It Get in a wide stance with your toes pointed out and heels planted firmly into the ground. Hold a dumbbell at crotch height and squeeze your shoulder blades tightly together to establish a strong, flat back. As you squat down, drive your knees out and back. At no point should your knees roll forward, nor should there be any space between your crotch and the dumbbell. Come to a full pause at the bottom and focus on the stretch through the inner thigh. Maintain tightness as you straighten your knees and come back to a standing position. Why You Need It The sumo plié squat is an excellent way to gain mobility in your squat and train your glutes and adductors to fire simultaneously. The relationship between the adductors (inner thigh muscles) and glutes play a huge role in stabilizing the knee when squatting. Your adductors pull your leg in toward the body and your glutes are responsible for hip extension, abduction, and external rotation. When your adductors are overly tight or weak and your glutes aren’t firing properly, your knees will cave in under a heavy load. This generally happens when these muscle groups aren’t in sync and you have improper timing when recruiting the glutes or adductors. 2 – The One-Arm, One-Leg RDL How To Do It Start with both feet together and shoulder blades tightly squeezed. Hinge at the hips by bringing one leg back. This should be the leg on the same side as the arm that’s holding the weight. Maintain a neutral head position by keeping your chin tucked and focusing on a spot on the floor about a foot away from your grounded leg. Stop the movement when your hand is even with the knee of your grounded leg. Use your glutes to drive your hips forward and come back to a standing position. At no point should there be any rounding in your lower back. Why You Need It This will help prevent your hips from shifting during the deadlift, which is common. Most of us have one leg that’s stronger than the other, so compensation will naturally occur under a heavy load. If you’re not sure what this hip shifting this looks like, here it is: To avoid a hip shift, strengthen your hinge pattern unilaterally to reduce muscular imbalances. The one-arm, one-leg RDL not only strengthens your glutes, hamstrings, and spinal erectors, but also improves pelvic stability and balance. 3 – Pike Push-Up How To Do It Begin on all fours with your legs straight, hips elevated, and palms slightly turned in. Bend at the elbows and lower your head down toward the floor as you keep your hips high. Once the top of your head reaches the floor, “scrape” your nose along the ground and continue moving forward. Pause when you feel yourself about to fall forward. Drive back to the starting position by keeping your nose right next to the floor for as long as possible. The goal is to drive yourself directly backward creating upward rotation through your shoulder blades. For shoulder health, drive your elbows out when lowering and tuck them in towards the body as you become more parallel with the ground. Why You Need It It’ll help your overhead press. The overhead press requires lots of mobility through the thoracic spine to get the bar into a proper finishing position. You drive the bar up and backward, then fully lock out the elbows with the bar above the head. Many people can’t get into this position because they lack the mobility or kinesthetic awareness to create upward rotation and elevation of their shoulder blades. The pike push-up addresses a lack of mobility because you have to press yourself back toward your legs to complete a rep. This forces your shoulder blades to upwardly rotate and elevate when completing the press. 4 – The 45-Degree Inverted Row How To Do It Set a bar up a little above waist height. Hold it using an underhand grip and position your body at about a 45-degree angle in relation to the bar. Use a supinated grip (palms up) so that your elbows are forced into your sides when pulling. Pull yourself up towards the bar so that your upper abdomen/ribcage comes into contact with it. Lower yourself down slowly, focusing on maintaining tightness through your core. Why You Need It The mid-back is often neglected during pulling exercises. Too often, people overuse their upper traps when rowing or their biceps when doing chin-ups. This decreases the amount of strength they could actually get out of their lower traps, rhomboids, and lats. To get your back to grow, you need to make the line of pull easier and work your muscles from a different angle. The 45-degree inverted row allows you to focus on
Origin: Tip: 4 Exercises You Aren’t Doing (But Should)
The Ultimate Body Transformation Agent
![]() C3G (cyanidin 3-glucoside), the main ingredient in Biotest’s Indigo-3G®, is both a marketer’s dream and a marketer’s nightmare. It’s a dream in that it’s a naturally-occurring substance (an anthocyanin) found in blueberries, blackberries, acai berries and all kinds of other dark-colored fruits and vegetables under God’s sun. There’s absolutely nothing scary about it. You can’t take too much of it, it doesn’t have any negative side effects, it won’t cause anyone to fail a drug test, and mothers won’t panic when they see it in a medicine cabinet or gym bag. But like I said, it’s also a marketer’s nightmare. That’s because C3G represents an embarrassment of nutritional and physique-enhancing riches. It has so many beneficial effects on the human condition that it’s hard to know which one(s) to focus on. You risk confusing people, or worse yet, causing a certain degree of skepticism. Take a look at the following list of research-backed C3G benefits. Which ones would you choose to highlight if you had to choose? C3G enhances the uptake of glucose by myotubes, causing calories to be preferentially used by muscle fibers instead of being stored as fat. C3G raises levels of adipokinectin, which regulates glucose levels and increases fatty acid breakdown. C3G decreases levels of leptin, a hormone directly connected to body fat and obesity. C3G improves endurance by increasing the production of chemical intermediates involved in the production of ATP, the cell’s energy currency. C3G increases insulin sensitivity. C3G limits fat gain. C3G, taken before a workout, helps shuttle energy from pre-workout nutrition directly to muscle cells. C3G enhances the activity of brown adipose tissue (which is metabolically active and calorie-burning). C3G induces the transformation of white adipose tissue to brown adipose tissue. C3G increases mitochondrial number and function. C3G prevents mitochondrial dysfunction. C3G limits abdominal obesity. C3G reduces systemic inflammation. C3G reduces triglycerides. C3G lowers blood sugar. C3G reduces cholesterol. C3G reduces chances of developing cancer. C3G improves survival rates of cancer. C3G improves skeletal muscle endurance by increasing levels of ATP. C3G improves night vision and helps prevent eye fatigue. C3G promotes liver health and fortifies it against damage from alcohol. C3G reduces risk of heart attack. C3G mimics the life-extending benefits seen in calorie restriction diets. C3G reduces inflammation in fat cells, causing them to shrink. C3G compares favorably in laboratory experiments with acarbose, a prescription glucose-disposal drug. C3G sews and makes all its own clothes, speaks fluent Latvian, and took second prize in the tango division of the ballroom dancing championships. Okay, not so much with the last one, but see what I mean by an embarrassment of riches? The list of C3G’s actual biochemical pathways that allow it to do all the things that it does is also diverse, but each has broad health implications – hence the long list of benefits. C3G and the Cellular Master Switch First and perhaps foremost, C3G has profound effects on a chemical called adenosine monophosphate kinase, or AMPK. It’s found in every cell in the body and serves as the body’s master regulating switch, determining in large part how fat you are, how muscular you are, and even how long you’ll live. According to at least one study involving human types, ingesting C3G increases the production of AMPK by a factor of 2.88. In turn, these increased levels of AMPK cause a huge up-regulation of a “transcriptional activator” known as PGC-1 alpha, which then increases exercise capacity, fatigue resistance, and oxygen uptake, which all contribute to additional muscle mass (assuming all other factors are copacetic). Oh yeah, in addition to being a metabolic switch, AMPK can make cancer cells stop sucking on the energy teat. Once it’s activated, cancer cells end up starving themselves because the energy lifeline’s been cut. C3G Mimics the Actions of the Most Powerful Hormone Insulin is the most powerful hormone we make. C3G has insulin-like properties in that it activates insulin receptor substrates, which in turn activate insulin-signaling proteins. These signaling proteins then stimulate glucose uptake by skeletal muscle tissue. The take-home point here is that you could – assuming you’ve got your exercise and lifestyle ducks in order – actually eat more food than what’s required for maintenance and have any weight gain go to muscle instead of fat. But C3G’s insulin-like properties don’t stop there. One of several laboratory experiments involving C3G showed two dosage-related drops in blood sugar of 33% and 51%, prompting the authors of the study to remark how favorably it compared with Acarbose, a powerful pharmaceutical glucose-disposal agent. C3G Sends Fat Cells to Fat Camp As mentioned above in the list of C3G’s effects, it also activates adipokinectin, which acts directly on fat cells.
C3G (cyanidin 3-glucoside), the main ingredient in Biotest’s Indigo-3G®, is both a marketer’s dream and a marketer’s nightmare. It’s a dream in that it’s a naturally-occurring substance (an anthocyanin) found in blueberries, blackberries, acai berries and all kinds of other dark-colored fruits and vegetables under God’s sun. There’s absolutely nothing scary about it. You can’t take too much of it, it doesn’t have any negative side effects, it won’t cause anyone to fail a drug test, and mothers won’t panic when they see it in a medicine cabinet or gym bag. But like I said, it’s also a marketer’s nightmare. That’s because C3G represents an embarrassment of nutritional and physique-enhancing riches. It has so many beneficial effects on the human condition that it’s hard to know which one(s) to focus on. You risk confusing people, or worse yet, causing a certain degree of skepticism. Take a look at the following list of research-backed C3G benefits. Which ones would you choose to highlight if you had to choose? C3G enhances the uptake of glucose by myotubes, causing calories to be preferentially used by muscle fibers instead of being stored as fat. C3G raises levels of adipokinectin, which regulates glucose levels and increases fatty acid breakdown. C3G decreases levels of leptin, a hormone directly connected to body fat and obesity. C3G improves endurance by increasing the production of chemical intermediates involved in the production of ATP, the cell’s energy currency. C3G increases insulin sensitivity. C3G limits fat gain. C3G, taken before a workout, helps shuttle energy from pre-workout nutrition directly to muscle cells. C3G enhances the activity of brown adipose tissue (which is metabolically active and calorie-burning). C3G induces the transformation of white adipose tissue to brown adipose tissue. C3G increases mitochondrial number and function. C3G prevents mitochondrial dysfunction. C3G limits abdominal obesity. C3G reduces systemic inflammation. C3G reduces triglycerides. C3G lowers blood sugar. C3G reduces cholesterol. C3G reduces chances of developing cancer. C3G improves survival rates of cancer. C3G improves skeletal muscle endurance by increasing levels of ATP. C3G improves night vision and helps prevent eye fatigue. C3G promotes liver health and fortifies it against damage from alcohol. C3G reduces risk of heart attack. C3G mimics the life-extending benefits seen in calorie restriction diets. C3G reduces inflammation in fat cells, causing them to shrink. C3G compares favorably in laboratory experiments with acarbose, a prescription glucose-disposal drug. C3G sews and makes all its own clothes, speaks fluent Latvian, and took second prize in the tango division of the ballroom dancing championships. Okay, not so much with the last one, but see what I mean by an embarrassment of riches? The list of C3G’s actual biochemical pathways that allow it to do all the things that it does is also diverse, but each has broad health implications – hence the long list of benefits. C3G and the Cellular Master Switch First and perhaps foremost, C3G has profound effects on a chemical called adenosine monophosphate kinase, or AMPK. It’s found in every cell in the body and serves as the body’s master regulating switch, determining in large part how fat you are, how muscular you are, and even how long you’ll live. According to at least one study involving human types, ingesting C3G increases the production of AMPK by a factor of 2.88. In turn, these increased levels of AMPK cause a huge up-regulation of a “transcriptional activator” known as PGC-1 alpha, which then increases exercise capacity, fatigue resistance, and oxygen uptake, which all contribute to additional muscle mass (assuming all other factors are copacetic). Oh yeah, in addition to being a metabolic switch, AMPK can make cancer cells stop sucking on the energy teat. Once it’s activated, cancer cells end up starving themselves because the energy lifeline’s been cut. C3G Mimics the Actions of the Most Powerful Hormone Insulin is the most powerful hormone we make. C3G has insulin-like properties in that it activates insulin receptor substrates, which in turn activate insulin-signaling proteins. These signaling proteins then stimulate glucose uptake by skeletal muscle tissue. The take-home point here is that you could – assuming you’ve got your exercise and lifestyle ducks in order – actually eat more food than what’s required for maintenance and have any weight gain go to muscle instead of fat. But C3G’s insulin-like properties don’t stop there. One of several laboratory experiments involving C3G showed two dosage-related drops in blood sugar of 33% and 51%, prompting the authors of the study to remark how favorably it compared with Acarbose, a powerful pharmaceutical glucose-disposal agent. C3G Sends Fat Cells to Fat Camp As mentioned above in the list of C3G’s effects, it also activates adipokinectin, which acts directly on fat cells.
Origin: The Ultimate Body Transformation Agent
Tip: The Surefire Way to Build Biceps
 To build your biceps, like any muscle, you’ll need to work them through their full contractile range. This means doing a variety of exercises that’ll overload them in all positions: shortened, lengthened, and mid-range. Incline dumbbell bicep curls are what most people use for the lengthened position, which makes sense at first. Only problem is, they don’t overload the lengthened position. At the bottom, the biceps are stretched but there’s no lever arm. As you curl, the lever extends further away from the body increasing the amount of mechanical work being done by the biceps. So, while you may fully lengthen the biceps into a loaded stretch, you haven’t overloaded this portion of the range. The mid-range is where most of the work is being done. The Solution: Low-Cable Curls The line of pull from the low cable means that the biceps are working hard out of the starting (lengthened) position. The resistance profile of the lift also does a good job of mimicking that of the muscle throughout the entire range. At the bottom, the lengthened position is challenged. As you curl up into the mid-range (your strongest position), the lever lengthens slightly, then at the top (weaker position) the lever drops off a little. This makes the exercise extremely effective throughout the entire range because it places optimal levels of tension at each point on the strength curve. Nothing Is Perfect The one drawback of this exercise (compared to the incline dumbbell curl) is a lack of stability. Sometimes when people first try the low-cable curl, they struggle to keep their shoulders stable. This causes them to start swinging their shoulders or shrugging up, which creates momentum and takes tension off the biceps. Try to “lock the shoulders down” to focus all of your attention on the biceps. With incline dumbbell curls, you have a bench to drive into and provide artificial stability throughout the shoulders. This makes it easier to focus on only working the biceps. So I often teach people the incline dumbbell curl first to build a habit of putting the biceps in a lengthened position while also programming some scapular stability work. Then they progress to the low-cable curls for enhanced biceps growth once they can control the
Origin: Tip: The Surefire Way to Build Biceps
Tip: This Plank Isn’t For Pantywaists
 Are you still busting out traditional planks like your life depends on it? Well, hovering a few inches off the floor on all four limbs probably isn’t going to get you where you want to be. Sure, the plank is one of the most basic core exercises for developing muscular endurance. And while there’s a lot of evidence this can help with low-back pain and posture, most of life doesn’t happen when you’re planted statically on your toes and elbows. Try increasing the intensity of your planks by adding load and throwing in an anti-rotation component. Resisting extension and rotation will carry over far better to just about everything, from walking to landing a right hook. Do this drop set: A1. Iso Row Plank (left): 10-30 seconds A2. 3-Point Plank (left): 10-30 seconds Rest 30 seconds A3. Iso Row Plank (right): 10-30 seconds A4. 3-Point Plank (right): 10-30 seconds Rest for just 30 seconds between A2 and A3, but for everything else go straight from one set to the next. Then after A4, rest as needed before you start the whole thing all over again. Do three rounds. This move will also hit those obliques and QLs (quadratus lumborum) harder too. With an iso row plank, using a wider stance will allow you to use more weight, but feel free to go narrower if you’re chasing more instability. Start with the weight, drop it, then keep holding. It’s that
Origin: Tip: This Plank Isn’t For Pantywaists
D is for Detox (and the Dummies Who Do It)
 There are articles a human just shouldn’t have to write. For instance, no one should have to write articles explaining why children shouldn’t eat Tide Pods. Neither should anyone have to write about why taking an ocean swim while wearing an 84-pound weight vest isn’t a good idea. Not using a thermometer orally once it’s been used rectally? Also shouldn’t need an article. And I certainly shouldn’t have to write an article about how damn stupid “detoxes” are for either weight loss or, groan, detoxifying your liver. Yet here we are. There isn’t a week that goes by where I don’t overhear two or more morons talking about their latest detox product or regimen, and I’m not just talking about Oprah and Gwyneth. Anyhow, maybe you and I can do our part to end this madness. Share this article on social media. Print it out and staple it to the forehead of detoxifiers. Do whatever you have to do to help stop this idiocy. Through the Mouth or Up the Butt? The people who drink or, alternately, force-feed their rectums strange teas, dubious supplements, or weird herbal concoctions are worried about the environmental toxins we’re all being exposed to on a daily basis. I get it. That makes sense. But it might make me feel better about the efficacy of these detoxifying substances if they could at least name a few of the toxins their products are supposed to target. Back in 2009, some researchers interviewed ten companies that manufactured detox products and they couldn’t name a single toxin. They kind of remind me of old-time actor Marlon Brando in the movie, “The Wild One,” only without the cool: Mildred: “Hey Johnny, what are you rebelling against? Johnny (Marlon Brando): “What’ve you got?” The foolishness of the detox people is in the notion that we need juices or enemas or long periods of fasting to do what the body is largely capable of doing itself. These people don’t think our livers, kidneys, or lungs are up to the task. But I’ll give them this: It’s probably true that our bodies have never before had to contend with anything like the modern-day chemical onslaught, but drinking teas or lemon juice laced with condiments isn’t going to help. Bioaccumulation is a Real Thing Some people really do need an actual detox, but these are people who have swallowed or injected too much alcohol, benzodiazepines, opioids, cocaine, methamphetamines, ketamine, heroin, or fentanyl, or maybe those who use the ol’ swimming’ hole next to the factory that bleeds lead, mercury, hexavalent chromium, or arsenic. Exposure to too much or too many of the preceding needs medical intervention (activated charcoal in the case of drug overdoses and chelation in the case of heavy metal poisoning), not dandelion tea. We are, however, in danger of “bioaccumulation” from a class of chemicals known as persistent organic pollutants, or POPs. Examples of these POPs include dioxins, PCBs, chlordane, heptachlor, and a whole bunch of high-value Scrabble words. These POPs accumulate over time and are stored in body fat. Perversely, they might not even pose that much of a problem until you start to diet, when a surplus of the chemicals are suddenly released willy-nilly into the bloodstream, which can offset a lot of the benefits of fat loss and make you feel like one of those poor comrades that were forced to clean up Chernobyl after it blew. But there are ways to limit your exposure to these things. How to Do a Legitimate “Detox” As mentioned, the body generally does an excellent job of mopping up unwanted substances. The liver processes a bunch of it, ultimately excreting it through urine via the kidneys or feces via bile from the gallbladder. Other substances leave the body through the air we exhale or possibly even through sweat, although that’s still controversial. Regardless, the body wouldn’t mind a legitimate helping hand. Here are some “detox” methods that actually work: Eat organic produce when possible to avoid the POPs that invariably reside in their skin or outer surfaces. If you can’t afford or find organic fruits and vegetables, consider peeling the skin away. Of course, peeling removes a lot of the healthful nutrients and polyphenols, so you could, alternately, wash them. The trouble is, washing isn’t as easy as just sudsing them up with dish soap. If you really want to do it the right way – the laboratory-tested way – soak them in a baking soda solution. Mix about two tablespoons of baking soda (you can get a 3 pound bag for about 8 bucks) into a gallon of water. Then soak your fruits or vegetables for 8 to 12 minutes (12 minutes was the most effective duration tested by scientists) or until your patience runs out. Buy frozen or canned fruits and vegetables. The washing and blanching that manufacturers do to prepare fruits and vegetables supposedly removes 80 to 90% of the pesticides. Eat lots of fiber. It “captures” a lot of the POPs while they’re still in the digestive tract. Eat cruciferous vegetables (broccoli, cauliflower,
Origin: D is for Detox (and the Dummies Who Do It)
Question of Strength 59
 Peaking for Powerlifting Q: I’m a competitive powerlifter and have a meet in six weeks. Tell me about peaking. What should I do with carbs and deloading? A: A lot of the information we read about peaking for a competition revolves around “supercompensation.” You dramatically increase training volume and intensity for 7-14 days then, one week out from the competition, you bring training stress way down and increase carbs to supercompensate. This leads to an increase in performance. Sounds sciency and smart. But does it really work? Well, it depends. If you’re an endurance athlete, it might. It seems to work pretty well for swimmers. But if you’re a strength athlete, it won’t do anything. It’ll give the illusion of working, but it really doesn’t. Here’s why. First, when we talk about supercompensation we’re really talking about increasing glycogen storage in the muscles. The theory? By dramatically increasing training volume and reducing carb intake, the body will upregulate the enzymes responsible for storing glucose. When you flood your body with tons of carbs and reduce volume for 3-7 days before an event, the body will store more glycogen than it normally would if you had not done things to “deplete” it. In theory, by storing more glycogen (supercompensation) you have more fuel available for your event and you’ll perform better. This can work if your sport is dependent on the amount of stored glycogen you have. Endurance sports might benefit from higher glycogen storages, and glycolytic sports certainly would. But strength sports like powerlifting and weightlifting are not at all dependant on glycogen stores for performance since the main fuel in these sports is ATP-CP. While glycogen supercompensation might help the bench press and possibly the squat by providing an increase in passive joint stability – as noted in https://www.t-nation.com/training/question-of-strength-58″ target=”_blank”>Question of Strength – it’s certainly not the main driver of performance. Does that mean you shouldn’t deload? No, you should. But you must understand what the deload will do so you can plan it properly. It also means you shouldn’t do a stress week or two (7-14 days) prior to the deload to create a supercompensation effect. You can’t supercompensate the nervous system. You can’t supercompensate the endocrine system or your muscle mass. Just because you’re trashing those systems by training too much for a short period of time, it doesn’t mean that these will rebound even higher. The nervous and endocrine systems don’t function like your glycogen storage. Here’s what happens during a deload and why it can give the illusion of supercompensation of neurological resources. First, You Need to Understand Two Things 1. The connection between cortisol and adrenaline Cortisol increases the conversion of noradrenaline into adrenaline. The more cortisol you produce, the more adrenaline will increase. Four main training variables can lead to an increase in cortisol (thus adrenaline) during training. Those are… Volume: The more energy you need, the more cortisol you release. Intensiveness: The closer to the limit you’re pushing your sets, the more cortisol you produce. Psychological stress: Mostly related to the amount you’re lifting. Neurological demands: Learning new exercises, using more complex movements, or doing a complicated workout structure. 2. Beta-adrenergic downregulation When you overstimulate the beta-adrenergic receptors, they downregulate. In layman’s terms, this means when you’re producing a boatload of adrenaline that connects to the beta-adrenergic receptors, these receptors can downregulate. As a result, you respond less and less to adrenaline. Since adrenaline increases strength, speed of contraction, and motivation (among other things), if you respond less to it, strength and power will go down. On the other hand, the more sensitive your receptors are, the more strongly you respond to adrenaline and the more force your muscles will be able to produce. Now Let’s Connect the Dots If you dramatically increase training intensity and volume (stress week), you produce more cortisol. This leads to a very high level of adrenaline. This high level of adrenaline can downregulate the beta-adrenergic receptors, decreasing strength potential. After that stress week, you feel like crap and your performance drops. Then you deload, reduce volume, intensity, and maybe even frequency. You drop assistance exercises, which decreases neurological demands too. This all leads to a decrease in cortisol levels, and in return, a much lower level of adrenaline. The beta-adrenergic receptors now become much less stimulated and they recover their original reactivity. Now you respond to your adrenaline again. You regain your strength and motivation. You think, “My deload worked, I supercompensated!” No, you didn’t. You just recovered the responsiveness to adrenaline that you lost by doing too much! A study by Fry et al.
Origin: Question of Strength 59
Tip: Garhammer for Strong Abs
 Drop sets are always part of a bodybuilder’s program, but you don’t see them used often for ab training. Well, you should. As a refresher, a drop set is where you start with a heavier weight or percentage of your own bodyweight, then drop to something a little easier and continue until you reach near-technical failure. Here’s one way to do it for abs: The “Lower” Ab Blast A1. Decline Bench Garhammer Crunch x 8-15 A2. Flat Garhammer Raise x AMGRAP Do three rounds of these. What does AMGRAP mean? As many GOOD reps as possible. Don’t keep cranking away with bad form. Garhammer raise variations are great for hitting the function of the lower portion of your rectus abdominis, working it hard in its active range (through posterior pelvic tilt). They were invented by sports scientist John Garhammer, PhD, and popularized by the late Charles Poliquin. Using them as a drop-set is a good way to combine a more challenging, higher load variation with an easier version. This means you’ll hit the golden rep range for building those abs, achieve a longer time under tension, and fatigue more motor units. If these are too easy, then straighten your knees more. You can also vary the incline of the bench (more incline = harder). Be sure to keep your toes pointed inwards and focus on working the active range at the top – think butt off
Origin: Tip: Garhammer for Strong Abs
Get Bigger, Feel Better: 7 Smart Exercises
 What’s the point of being big and strong if you’re always hurting? Nobody cares about your deadlift numbers if you throw out your back every time you sneeze. And your barrel chest isn’t very impressive if you can’t lift your arms high enough to put on deodorant. Sure, various bumps and bruises are inevitable, but training should enhance your quality of life, not detract from it. Most of us begin lifting because we want to feel better, look better, and get strong. But why do so many of us forget about the “feel better” part? It doesn’t mean you need to stop training hard. Strength and muscle are the cornerstones of resilience and longevity, and the best prehab and rehab method is smart training. Choose exercises that build strength and muscle while simultaneously improving overall function. Here are seven of the best muscle-building, joint-sparing exercises that all lifters should be doing. 1 – Dumbbell Squeeze Press The barbell bench press is the king of all upper-body exercises, but it has a couple of drawbacks. For starters, it’s not that great for pec development. Since the bar inevitably hits the chest on each rep, it restricts a full range of motion. So the pecs offer little to no help after the first third of the movement. It’s also notorious for wrecking many lifters’ shoulders. While the dumbbell bench press is a worthy alternative, the squeeze press has shoulder-saving, hypertrophy-inducing benefits too. It involves squeezing two dumbbells together as hard as possible throughout the duration of each rep. The squeeze press has three advantages: It creates maximum tension. As opposed to relying on gravity alone, the squeeze press adds “inward” tension that amplifies the involvement of the chest, reinforces a strong mind-muscle connection, and lengthens time under tension to a skin-splitting degree. It helps with bench press mastery. It’s a good teaching tool for the barbell bench press. For most lifters who aren’t strength coaches, the classic cues that accompany the barbell bench press are gibberish. The squeeze press is arguably the best non-verbal tool for reinforcing factors like elbow positioning, full-body tension, lat involvement, and “bending” the bar. It’s shoulder and wrist-friendly. The neutral grip and constant inward tension allow for more “wiggle room” in terms of external rotation and promote optimal shoulder packing/centration of the glenohumeral joint. Plus, the squeeze press doesn’t require heavy loading to produce a meaningful training effect, which makes it a good option for lifters training around shoulder pain. 2 – Barbell Overhead Shrug There’s no denying that upper traps – the type that resemble two softballs on each side of the neck – puts the finishing touch on the power look. Problem is, most lifters train the upper traps solely via scapular elevation, or “shrugging,” despite the fact that their most vital function is upward rotation. Since upward rotation is one of three movements that the shoulder blades need to go through to lift the arms overhead, it’s pretty important. Most go-to trap exercises – namely, the barbell shrug and its derivatives – can do more harm than good for those who struggle with bad posture and overly depressed scapulae. In particular, there are three red flags that occur upon the descent of a shrug: 1. The bar/dumbbells pull the shoulder blades down into scapular depression. 2. The upper traps are lengthened, which makes them less effective upward rotators. 3. The downward rotators of the scapulae become overactive. Combine that with how they’re most often performed – through a small ROM and with unnecessarily heavy loads – and the result is internally rotated shoulders, an inability to lift the arms overhead, and, consequently, a laundry list of postural problems, mobility limitations, and shoulder pain. Overhead shrugs are a better way to train the traps. Here’s why: They work the traps in alignment with their most vital function: upward rotation. Since the upper arms are abducted above 90 degrees, the overhead shrug puts the scapulae in an upwardly rotated position while still allowing for the same “shrugging” motion to occur. They’re an exceptional trap builder. One of the best ways to hypertrophy a muscle is to isolate it while doing its true function. The overhead shrug fits the bill perfectly since it minimizes levator scapulae activity, a “shrug” muscle commonly associated with shoulder dysfunction, and isolates the upper traps more effectively. They’re a game changer for shoulder health and performance. Overhead shrugs can be a godsend for individuals who can’t lift their arms overhead since they strengthen all of the muscles that work on the scapulae (the upper, middle, and lower traps, as well as the serratus anterior) while promoting optimal overhead mechanics. 3 – Two-Arm Landmine (or Viking) Press Most lifters have no business pressing a barbell overhead. Due to mobility limitations, a weak anterior core, poor
Origin: Get Bigger, Feel Better: 7 Smart Exercises
