 Wrecked Metabolism? Q: Some people say really strict diets – like the ones you do for bodybuilding competition prep – will wreck your metabolism. Is that true? And if so, how do you fix this issue? A: It probably won’t, at least not in the way most seem to think. There are definitely some issues you can induce with extreme dieting and exercise, but “wreck” is probably too strong a term. That assumes you broke something. The metabolism doesn’t break. In fact, it’s doing exactly what it’s designed to do. Let’s get some definitions out of the way, because that’s where most of the confusion starts with these types of discussions. You’ve likely heard of the admittedly vague and non-medical terms like “adrenal fatigue,” “starvation mode,” and “metabolic damage.” These are more marketing lingo than medical terminology. But that doesn’t mean they don’t have some utility. In medicine there’s often dysfunction before disease. For example, if you have a fasting blood sugar level above 126 on two separate occasions, then I can diagnose you with diabetes. However, if you have a blood sugar above 100 but below 125, what do I call that? You don’t yet have diabetes, but you obviously have some dysfunction. We call these a lot of different things in medicine: prediabetes, dysglycemia, impaired glucose tolerance, or something else. Same thing with the metabolism. When you have difficulty sleeping, insatiable hunger, unstable mood, unpredictable energy, uncontrollable cravings, and you’re no longer responding to the same calorie deficit BUT your blood labs and vitals are all normal, what do we call that? There’s obviously something going on, but we can’t put a diagnosis on it, can we? So, we use some descriptive terms like metabolic compensation, metabolic resistance, metabolic dysfunction, or metabolic damage. Or like you, we just say, “Damn, I think I wrecked my metabolism!” You didn’t. What happened is a predictable phenomenon and we know some (although not all) of what it’s about. Part of it is what research calls “adaptive thermogenesis.” What Happens During Adaptive Thermogenesis A competition diet is well-known for inducing a very wide calorie cap. You cut calories down and you expend a lot of energy through weight training and/or cardio. In the same way not changing your car’s oil or filling up with gas will cause the engine to conk out, the body does not respond well to this large energy discrepancy. In response it will increase hunger, reduce motivation, lower energy and (most insidiously) decrease its metabolic output. It does that in many ways: It reduces resting energy expenditure through downward regulation of thyroid and other hormones. It increases hunger and cravings. It sneakily causes you to move around less the rest of the day. If you normally get up and walk around 100 times per day you’ll find that it’s now only happening 25 times per day. If you move in your sleep that will stop as well. You’ll also burn less during exercise, something research calls “constrained caloric burn.” What’s worse, after the show, when you no-longer have the external motivator and would prefer to eat like a human being, you’re primed to gain all that weight back plus some. I’ve come to call this the “metabolic credit card effect” –– you get short-term results, but you pay steep metabolic penalties later. Anyone that’s seen a first-time figure competitor blow up like a helium balloon post competition knows this well. Is that a wrecked metabolism? I suppose you could describe it that way, but another way to look at it is your metabolism is doing just what it’s designed to do. It feels it needs to recover that debt. After all, it evolved in a feast and famine reality and it thinks it’s doing you a favor by mitigating the famine and maximizing the feast. How to Limit Metabolic Compensation The good news is there are some ways to reduce metabolic compensation. Here are some things to do: Do your best to maintain as much muscle as you can. The metabolic rate will not slow as much and be more resistance to fat regain. This means to make weight lifting the dominant part of your fitness regime during fat loss. Cardio becomes a little more important after weight loss, when the metabolic rate has lessened. You may want to save your cardio for after, rather than during the competition diet. Eat more protein, see the first point above about maintaining muscle mass. And probably increase the amount of protein as a percent of total calories. Do this during, but perhaps more importantly, after fat loss. Cycle the calorie gap, having times where you’re in a strong deficit and other times where you’re in no deficit at all. The recent MATADOR study (minimizing adaptive thermogenesis and deactivating obesity rebound) showed this strategy got better results, had less metabolic adaptation, and much longer lasting results. Don’t eat like an asshole when it all ends. Focus on blander foods and less variety of them. Doing the traditional
Origin: Question of Nutrition 9
Author: ondriving
Tip: 6 Quick Tips for Complete Pec Development
 Building a Complete Chest I naturally had great shoulder strength early on, and that translated over into virtually all of my pressing (flat, incline, overhead, etc). The drawback? Because I was delt-dominant, my chest lagged behind. There’s always going to be some muscle groups that will be subpar compared to others, no matter how much specialization you do for them. But I do believe in giving everything the ol’ college try. So let’s talk about some principles you should be adding to go from being bird-chested to pectacular. (Totally cheesy, but I’m rolling with it.) 1. Train chest early in the week or whenever you’re fresh. This shouldn’t be an issue with most gym bros. Monday is International Chest Day, after all. 2. Get the chest out in front. With all pressing and flye movements you need to set the scapula deep into retraction and depression. Think about getting the shoulders down into your back pockets, and keeping the sternum high. When you look at this from the side, you’ll see that the pecs get into a deeper stretch, which will increase their activation, and you’ll reduce the involvement of the anterior delts. A little “hack” here is to use a rolled up towel in the middle of your back to facilitate a deeper setting of retraction. The towel is a pretty strong reminder to hold it there as well. 3. Push to the centerline of the body. This can be an internal cue to help establish better mind-muscle connection for the pecs as well. In all of your pressing, think about moving the arms to the centerline of the body to maximize pec activation and shortening. For a lot of guys who press in order to “train the movement” for strength, they simply press straight up. But if you want to get the pecs to contract as hard as possible during a press – and you do for hypertrophy purposes – then think about driving the hands towards the center of your torso. The external cue for this, if you’re pressing with a bar, is to think about bending the bar in half so that it would end up in a “U” shape. Just make sure you hold that deep scapula retraction and depression to bias the pecs in the pressing. Don’t let the shoulders roll forward at any time. 4. Know that leanness matters. There’s no “inner pecs” really. That’d be the sternal area of the pecs. And here’s the real reason why a lot of guys think they need more mass in there: they carry too much body fat to see the separation between the pec muscles. If you want that bad-ass pectoral “split” that runs down the middle, then don’t be fat. 5. Understand arm angles for complete pec development. The pecs have three different areas: the clavicular pec or upper chest where the fibers are attached to the clavicle; the sternal or middle portion of the pecs that attach to the sternum; the abdominal head of the pectorals which originates from the external oblique, often called the lower chest. If you want to bias a certain area of the pecs, you need to be aware of the angle of the humerus to the pecs themselves. This, and not the angle of the bench, will dictate what area of the pecs is the most activated and doing the brunt of the work. Sternal Pecs You hit this area more when the arms drive from the side of the body to the centerline of the torso. Upper Pecs You hit this area more when the arms drive at a 45-degree angle upwards, towards the centerline, in relation to the torso. Lower Pecs You hit this area more when the arms drive towards the hips and the centerline in relation to the torso. Prioritize movements based on what area of the pecs you’re trying to bias over the others. 6. Stress the pecs at different lengths. Not all movements stress the pecs equally in the range of motion. An incline press or flat press stresses the pecs maximally at the mid-point in the range of motion. A dumbbell flye places the greatest amount of torque on them in the bottom position where they’re maximally lengthened. And a pec-deck or cable crossover tends to stress them more in the fully shortened position. It’s a good idea to stress the pecs through all of these different ranges so that no fiber is left behind. So how would this look in program design? Day 1 Hit the sternal pec area: Do the dumbbell bench press for two drop sets of 8/8/8. Take the first 8 reps to failure Reduce the weight Take another 8 reps to failure Reduce the weight Take another 8 reps to failure Repeat one more time Hit the upper and lower pecs: Superset the low-to-high cable crossover with dips. Do 8-10 reps on cable crossovers to failure Do as many reps as you can on dips with bodyweight Repeat one more time Day 2 Hit the upper pecs: Use an incline dumbbell press, barbell press, or Hammer Strength incline press (shown in video). Do 10-12 reps to failure Rest 60 seconds Then try to get half the number of reps you achieved on the first set Rest 3 minutes Repeat one more time (technically this ends up being 4 total sets) Hit the sternal and lower-pecs:
Origin: Tip: 6 Quick Tips for Complete Pec Development
50 Reps for Size
 Years ago I saw strongman competitor Derek Poundstone doing 100-rep work and asked him why he was doing it. One of his main reasons? Mental toughness. Different kinds of work in the gym require different mindsets. A 20-rep set of squats – with a maximum load for that rep range – is brutally hard. It requires mental and physical toughness. Ultra high-rep work (50 reps and up) is no different. It requires a tremendous amount of intestinal fortitude and mental strength to lock yourself into that set and see the whole thing through. And this type of brutality works great as a finisher. The Main Requirement For Progress Most guys who complain about a lack of progress just don’t train hard enough to make any program work. That’s why they gravitate towards the “volume” approach. They’ll do a whole bunch of sets with a bunch of reps left in reserve. This isn’t hard training; it’s “junk volume” and it sure as hell isn’t going to drive growth or strength gains. At some point you have to train hard enough to force your body to adapt. You have to apply stress to the muscle. There’s literally no way around it. To get past a plateau, you have to train harder than you’ve ever trained before. Ultra high-rep work is one tool to help you do just that. The Benefits It’s not just about the mental toughness. Here’s what else it can do: Metabolic Stress High reps create quite the pump. And bodybuilders have been using the pump for a long time. It’s not just a fleeting cosmetic effect, it’s a tool for muscle growth. Metabolic stress, due to an increase in cellular swelling and potential for additional motor unit recruitment (through metabolic acidosis), can be a driver for muscle growth. Metabolic stress may increase growth hormone as well through the increased lactate response. High-rep work, done properly, is the driver for metabolite accumulation. EPOC This stands for “excess post-exercise oxygen consumption” and has been called the “after burn” effect. If you train really hard, you increase the thermic effect of activity, especially when that activity is more anaerobically driven like sprints or hard lifting. EPOC is referring to the uptake of oxygen above your resting levels after you’ve completed the workout. An increase in oxygen consumption has an energy requirement, so this means you’re still burning calories at an elevated rate after the training session is over. Very high rep work is a great way to induce some EPOC and achieve that energy-burning effect after you leave the gym. While the “after burn” of high intensity interval training (or a really intense lifting session) is a bit overstated in terms of post-training caloric expenditure, it’s still a benefit. Joint Pain Relief While this may not be scientifically proven, over the last several years I’ve had a tremendous amount of people express to me how very high-rep empty barbell curls alleviated their constant and nagging elbow pain when everything else they’d tried had failed. I’ve considered the obvious, like an increase in blood flow moving excess inflammation out of a joint or connective tissue. Or simply strengthening the forearm flexors and extensors in a more balanced way. The point is, if the root of your elbow pain exists between the elbow and wrist, this may alleviate some of that achiness. Now let’s get into the nuts and bolts of ultra high-rep work. 50-Rep Finishers Your goal: Shoot for all 50 reps in one set. Can’t do it? Then break them up into rest/pause sets. In this case, complete the reps using one of these approaches: Do as many reps as possible. Take 10 deep breaths and go again. Repeat this until all 50 reps are done. Break up the 50 reps into 2 sets of 25 reps with 30 seconds rest between. But remember, the goal is to get all 50 in one shot. Now notice that there are loading options for most of these. Why? Because not everyone is at the same strength or strength endurance level. It also allows for a bit of progression and some goal setting. Barbell Curls Some lifters will need to use an empty 45-pound bar for these; others may need to slap on some baby plates and use 50-65 pounds. If your soul is still intact after 50 reps, add weight. Behind the Neck Press Use a 65-95-pound loaded barbell. Seated or standing is fine. We’re working shoulders in metabolic stress fashion – that’s the main point. If you’re truly beastly, you could do the Bradford press, with the bar just barely skimming the top of your head on the crossover. But that would be absolutely torturous. Excellent. I’ll allow it. For those who’ll quip about the behind-the-neck press and shoulder impingement, then do them in front of the neck. Or fix your shoulder mobility. Goblet Squats Find a dumbbell that’s a quarter of your bodyweight. So if you weigh 200 pounds, that’d be a 50-pound dumbbell (or kettlebell). Now do goblet squats for 50 reps. This can be a “broken” set. You can stand and catch your breath as needed, but you can’t put the dumbbell down or sit.
Origin: 50 Reps for Size
Tip: What a Bug Can Teach You About Diet
 Beware of Supernormal Stimuli Foods High reward foods are very calorie dense and often very tasty. They’re generally high in added fats and/or sugar, and the reward properties of these foods may also be enhanced through the use of salt or monosodium glutamate (MSG). High reward foods are “supernormal stimuli,” sometimes called a supernormal releaser. The term, which is from ethology (the study of animal behavior), refers to a behavioral phenomenon whereby animals respond more intensely to stimuli that are exaggerated versions of the normal stimuli with which they evolved (1,2,3). Here’s a fun example. The Australian jewel beetle has a body that’s big, long, and brown. The males are hard-wired to like certain features of the female, namely largeness, brownness, and shininess. So what’s really large, brown, and shiny? A beer bottle. That’s right, the males attempt to copulate with a type of discarded brown beer bottles called “stubbies.” Just as animals respond more strongly, and often preferentially, to the exaggerated (supernormal) stimuli, humans can respond similarly to exaggerated versions of foods. This isn’t to suggest you might mate with a pork chop. It just means these high-reward foods can act as supernormal stimuli and can lead to maladaptive eating behaviors that hinder fat loss and promote fat gain. Here are two of them: Consistent and continued consumption of high-reward foods (the supernormal stimulus) can render whole foods (a normal stimulus) less appealing or unappealing. The influence of supernormal stimuli has changed what people think is a “large” portion size for a single meal. Research in 2006 replicated a study that was done in 1984 in which participants were asked to serve themselves an amount they considered to be a typical portion of each item on a buffet table (4). The 2006 study found that peoples’ perceptions of what they consider to be normal portion sizes have changed in the past 20 years. As you might guess, they’ve grown larger. Much larger. The researchers called this “portion distortion” (5). Exaggerated portion sizes can serve as a supernormal stimulus that distorts your perception of appropriate amounts to eat at a single meal. How to Use This Info Keeping the above two points in mind, not only can high-reward foods cause you to be less satisfied by whole foods (and therefore make adherence to a diet that emphasizes whole foods more difficult), but also more likely to eat larger portion-size meals. Given this phenomenon, it makes sense to minimize exposure to high-reward foods, or at least be continually aware of portion
Origin: Tip: What a Bug Can Teach You About Diet
Tip: 4 Lat-Building Exercises You’ve Never Tried
 Slap some muscle on your back with these innovative moves. Do 3-4 sets of 10-15 reps on each of these. X-Stretch Lateral Lat Pulldown Do you have trouble feeling your lats work? Here’s a surefire way to get them activated, pumped, and ready for gains. What to do Set up a high cable, grab the handle and sit sideways on the ground with your working side closest to it. Using an underhand grip, focus on the negative part of the exercise – the stretch of the lats – by leaning sideways towards the cable machine. Squeeze the lats and sit upright as you pull it back toward you. Palpate (touch) your lat with your non-working hand to help you feel it in the right place. Tip: Remember to keep your chest up throughout the movement. Angled Single-Arm Pulldown You might already do a chest-supported row in your workouts, but what about a chest-supported pulldown? This will put you in a totally different angle than any regular pulldown and hit your lats in a whole new way. What to do Set the handle high on a cable machine. Get an incline bench set up in front of it. Position yourself in a way that allows you to fully stretch your lats when leaning forward and extending your arm overhead, then push your shoulder blade back and down all while creating tension in the lats. Brace your core by hugging the bench with your non-working arm. Don’t allow the shoulder to roll forward (humeral glide). Tip: Squeeze your adductors (inner thighs) together to maintain stability throughout your body. Alternating Side-Dominant Lat Pulldown Take your standard lat pulldown, but emphasize one side per rep for an even stronger contraction. What to do Using an overhand grip, initiate the pull from the shoulder blade – pushing it down and back towards your back pocket. Keep your elbows stacked under your wrists. Keeping your upper back extended and chest up, pull harder with one side, concentrating on feeling your lat contracting on that side. While you focus on one side, allow the opposite side to assist in the movement. Tip: Don’t allow your torso to lean sideways as you perform the movement. Unilateral Chest Supported Row You already know how to do a one-arm row. This variation will help you get an even stronger mind-muscle connection with your working lat. What to do Set up an incline bench to support your torso, about 30 degrees. Anchor your arm to one dumbbell by pushing away from it to create stability throughout your body. Row with the opposite arm and rotate it from neutral to underhand grip. Tip: Squeeze your inner thighs together on the bench to create tension throughout your body.
Origin: Tip: 4 Lat-Building Exercises You’ve Never Tried
Tip: 3 Exercises That Beat Boring Planks
 The front plank is a popular exercise to promote core stability. Fair enough. It has some benefits and there certainly are ways to make it more difficult. The problem is, holding any static position for more than ten seconds is boring and most guys avoid doing them. There’s a better option – something that’s much more challenging. You could hold a plank for just 10 seconds (or less) and then do several more holds interspersed with very short rest periods in-between so that the total time under tension adds up to a minute or longer. That’s where the exercises below come in to play. They provide a more intense static contraction than the standard front plank, and you don’t need to hold each rep for any more seconds than you have fingers on both hands. 1. Ab 45s I first came across this exercise in the book, “Underground Secrets to Faster Running,” by Barry Ross. No matter how strong you think your core is, Ab 45s will humble you! Here’s how you do it. Lie on your back with your knees bent and hook your feet under something stable, like a machine or two heavy dumbbells. Or get a training partner to hold your feet down. Scoot your butt as close to your heels as possible. Extend your arms out fully overhead and keep them in line with your torso throughout the set. Raise your head and trunk up to a 45-degree angle. Make sure to bring your arms along with you, keeping them fully extended and in line with your torso. Hold that position for a solid 5-second count and then lower your head and trunk back to the floor. Take a breath at the bottom and repeat the process. Build up to 5 sets of 5 reps with 5-second holds, and gradually work your way up to holding each rep for 10 seconds. 2. Reclining Field Goals If starting from the bottom-up is too tough, try going from the top-down with this exercise. I discovered this one in Nelson Montana’s e-book, “The Bodybuilding Truth.” According to Montana, abdominal development is genetically determined and classic movements such as sit-ups and leg raises are ineffective for the abs but extremely effective for the psoas (hip flexor) muscles. Montana believes that the abs respond best to contraction, not movement, and are stressed to a much greater degree when attempting to stabilize the core. You’ll understand what “attempting to stabilize” means once you try the exercise. Sit on the ground with your legs bent to about 90 degrees and your feet flat on the floor. Tuck your chin into your chest, round your back, and grasp the outside of your knees. Now lean back until your arms, still holding your knees, are straight. Make sure to keep your chin tucked in and back rounded. Once your arms are fully extended, slowly raise them up until they’re pointed directly overhead. If you find it difficult to maintain balance, you can move your feet out a bit to make it easier. The closer your feet are to your hips, the more challenging the exercise is, and vice versa. Hold the contraction for 5-10 seconds and repeat. Work up to the point where you can do 10-12 reps. This exercise requires no equipment and can be performed anywhere. Drop to the floor right now and give it a shot. You’ll be surprised at how challenging it is. A word of caution: It’s not uncommon to cramp on these isometric exercises. Make sure you’re well hydrated and once you start to struggle, stop. Listen to your body. If you try to push on, you’ll cramp, which is your body’s way of forcing you to stop. Take it slow and gradually ramp it up over time. 3. Superman Back Extensions This is a great antagonist movement for the above moves. Do it on a back hyperextension or glute-ham raise machine. Extend your arms fully overhead and keep them in-line with your torso throughout the set. Raise your upper body up until it’s parallel to the ground and hold that position for a strict 5-count. Then lower back down and repeat. Build up to 5 sets of 5 reps with 5-second holds, and gradually work your way up to holding each rep for 10 seconds. Programming All of these exercises make for great finishers. You can pair the ab exercises with the back extension in a superset fashion, or you can alternate between doing an ab exercise at the end of one workout and the back extension at the end of the next
Origin: Tip: 3 Exercises That Beat Boring Planks
Tip: 3 Ideas to Help You Understand Technique
 The Causes of Bad Technique In my work with athletes over the past 25 years, I’ve isolated only three causes of incorrect technique for any given lifting skill: 1 – You don’t understand what correct technique is. You have sufficient physical attributes to perform the skill, but not the necessary cognitive understanding. 2 – You lack the mobility for the skill in question. During my former life as a martial artist, I totally understood how to kick a 7-foot tall opponent in the face, but (much to my chagrin at the time) I lacked the requisite flexibility. In the gym, sometimes people understand how to arch their low back during a squat, but their hip structure doesn’t allow an arched lumbar spine during a deep squat. This is a problem without a solution, but if it’s short muscles/connective tissue that prevents proper technique, you can work on lengthening those tissues until proper form is possible. 3 – You’re not strong enough to use correct technique. If you have bad technique using a heavy weight, but good technique with a light weight, you understand and have adequate mobility to correctly perform the lift in question. The solution is to get stronger. The Stages of Technique Acquisition I categorize technique acquisition into three successive categories: Incompetent: You don’t understand how to perform the movement correctly. The errors you make are unrelated to how much weight you’re using. Unstable: As long as the weight you’re lifting is well within your abilities, you look great. Once the weight becomes too challenging, however, your technique falls apart. For example, if you’re trying to bench a challenging weight, you cut your range of motion, your ass comes off the bench, yada yada. Stable: Your technique always looks the same, regardless of how much weight is on the bar. If you try to bench more weight than you can handle, you simply miss the rep. A few thoughts on this schema: Having stable technique is only beneficial if it’s stable GOOD technique. If you stabilize poor technique, it’ll be a bitch of a job to relearn it. For lifters at the first two levels, as you pursue ever-increasing challenges (more weight, more reps, etc.), there’s an inevitable tendency for your otherwise good technique to erode. Sometimes this is okay (such as cutting your ROM a bit on benches), and sometimes it’s not (such as rounding your lower back on a heavy deadlift). Either way, if you hit a new lifting PR but did so with shaky technique, dial it back a notch or two and do what I call a “consolidation cycle,” which simply means, take a month or so to hit that PR with form you’re happy with. The Stages of Learning This is a useful way to conceptualize the process of attaining mastery: Unconscious Incompetence – You suck, but you don’t know it. Conscious Incompetence – You still suck, but now you know it. This stage must occur before meaningful change can take place. Conscious competence – Now you’re capable of correct technique, but it takes a lot of mental horsepower and your form is still “unstable” (using the classification scheme I presented above). Unconscious Competence – This is the mastery level. Your technical skills are so refined, so deeply entrenched, you actually find it difficult to do them incorrectly. When someone asks you how to do the skill in question, you struggle because it’s been so long since you’ve given it any thought.
Origin: Tip: 3 Ideas to Help You Understand Technique
5 Push-Ups for High Performance
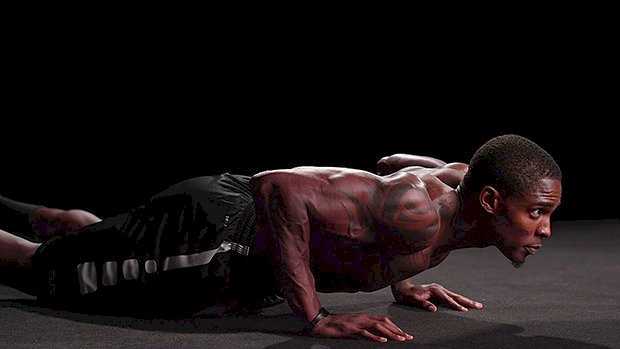 A push-up is not just a push-up. You can do them a myriad of ways, but most people only do them one way. Sure, some variations are better than others, and some might even be more harmful than helpful depending on your experience level, injury history, and obviously, your goal. Whether you want to improve your shoulder health, improve your bench, develop core strength, or increase your explosive power, these five variations will help you reach your goal. 1 – Banded Push-Up Most athletes need upper body explosive power. In the quest for improved performance, many athletes unfortunately end up injured because they choose high-risk methods and exercises. While exercises like plyometric push-ups (clapping push-ups, box push-ups, etc.) can be great, they can also be harmful. With a background of shoulder injury, doing plyometric push-ups will cause a lot of stress in the landing and deceleration phase. Many add to this stress by dropping from way-too-high boxes, increasing the stress even more. If you’re one of those athletes who has to be smarter about your exercise selection, but you still want to increase your explosive power, go for banded push-ups. To increase explosiveness, you need to do exercises with the intent of being as powerful as possible through the WHOLE range of motion. Ballistic training methods like med-ball throws are perfect for this, but in the world of push-ups, the resistance band does the trick. There are basically two ways to do this exercise. Either with a pause in the bottom position or repeatedly, without pause. The former will train explosive starting strength, the latter will improve reactive power. 2 – Staggered Push-Up Usually, all regular bilateral strength exercises are performed symmetrically. In most sports, symmetrical actions and positions seldom happen, especially in contact sports. So you set yourself up for weakness if you only train symmetrical exercises in the gym. There’s no need to go all “sport specific” and perform all kinds of circus acts, but SOME exercises should aim to prepare your body for non-symmetrical impact. For the upper body you can do this with staggered push-ups. Just get into your regular push-up-position, but with one hand placed higher than usual (toward the head) and the other hand placed lower than usual (towards the hip). Staggered push-ups are a great exercise for improved shoulder stability, athletic preparation and performance. Give it a try! 3 – Shoulder Press Push-Up Even though most push-up variations are based on the regular up and down movement, there’s no need to be limited by this plane. You can and should use push-up variations to develop strength and stability in other planes. The shoulder press push-up is a hybrid of the vertical (think: shoulder press) and horizontal (think: bench press) movement. Beside strengthening this movement pattern, you’ll also develop good scapular control and make your shoulders healthier. This variation will especially be valuable if you have weak or “inactive” serratus anterior muscles. It’s a killer exercise for the serratus muscle! Go high rep with this and you’ll feel them in the days to come. Over time this stimuli will improve the upward rotation capacity in your shoulders, which is a win for your shoulder health and your performance. To do it, start in a wide-foot position with the hips held high. Lower yourself as far forward as possible. When the forehead almost touches the ground, press yourself back to start position while you keep the head close to the ground. 4 – Hoover Push-Up Most push-up variations equally load the right and left shoulder and arm. In real life and sports, one side is usually loaded more than the other, and your ability to handle asymmetrical load is important for optimal performance. The one-arm push-up is a good tool, but it can also be a bit too much for some athletes. You want to train the capacity to handle more load on one side at a time, but you also want to minimize the injury risk. Most people will be able to perform the one-arm push-up with training, but I prefer the hoover push-up since it’s easier for beginners. To do it, start in a regular push-up-position with a fairly wide hand placement. Lower as usual, and when in bottom position move your body to the left, over the left arm. Pause for a second, then move to the right side before you get back to center and press up to start position. The hoover push-up looks pretty easy, but it’s harder than you think. You have to keep the body tight in a plank position and stabilize the upper body more than usual. You’ll feel it! 5 – Elevated One-Legged Rack Push-Up Most push-ups are done with the hands flat on the ground. This is fine for most people, but if you have issues at the wrists, elbows and/or shoulders you might need to keep the wrists in a more neutral position. A simple way to work around such issues is to do push-ups with a barbell. The elevated rack push-up is a great
Origin: 5 Push-Ups for High Performance
Tip: Soreness – Good or Bad?
 Is Soreness An Indicator of a Good Workout? It’s a simple question, but the answer is a little tricky. Generally speaking, no, being sore after a workout doesn’t necessarily mean it was an effective workout. And also generally speaking, no, you don’t have to get really sore to build muscle. But There Are Nuances… As many T Nation coaches have pointed out, there are many levels of soreness. You can feel a little tight or swollen and experience what Christian Thibaudeau calls an “enhanced feeling” in the worked muscles. You definitely know what you trained the previous day, but you’re not really hurting. On the other end of the spectrum, you can find yourself saying “ouch, ouch, ouch” with every stroke of your toothbrush after a tough chest workout. That’s severe soreness. And you can even feel so sore that you can’t train – that’s extreme soreness and a sign that you messed up since that one workout has interfered with several of the following workouts. You should probably experience that “enhanced feeling” a day or two after a tough workout, but you don’t necessarily have to. What all the “soreness is bad” coaches are referring to is that debilitating soreness, which is a sign you may have taken things a little too fast or too far (too many sets/reps, or too heavy a load). Here Comes Another Big But… BUT if you tried a brand new exercise, a new set/rep scheme, or a new tempo (like lowering a weight very slowly), you should probably expect some level of soreness. If you don’t feel something, then you probably sandbagged it. Or maybe you haven’t yet established a good mind-muscle connection with the new exercise or method. What the “soreness is bad” coaches are also saying is that you shouldn’t be chasing soreness i.e. trying your hardest to get sore because you think it’s the only sign of a productive workout. That often leads to switching exercises too often. You never really get to progressively overload the exercise, because the moment the new movement stops making you sore, you switch to something else that makes you hurt again. That’s a mistake. Thibaudeau has even said that when initial soreness stops, the real progress can begin. And let’s not forget that your diet can influence how sore you get from training. If you’ve cut your calories and carbs down low, a familiar workout may get you sore again. But you’re probably not growing from it given the caloric deficit. The Best Sign of Progress… is Progress See how tricky it can be? So the lesson is to expect some “enhanced feeling” or mild soreness, especially after you try something new, but don’t train just to get sore. If you do have some moderate to severe soreness, it’s also a good idea to train that muscle again the next day. Nothing hard, just do a couple of light sets and get a mild pump in the sore muscles. This can accelerate recovery and maybe even lead to more muscle growth. Finally, remember that the best sign of progress is progress. After a few weeks or months, are you lifting heavier, doing more reps with the same weight, or “owning” a weight that used to beat you to death? Are you bigger without being fatter? Then you’ve progressed, whether you felt sore or
Origin: Tip: Soreness – Good or Bad?
The Missing Half of Your Deadlift
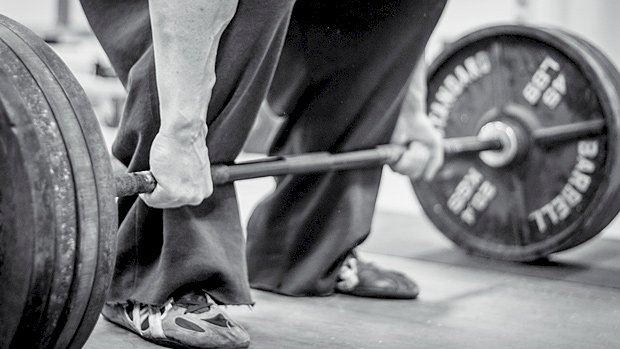 When JL first started powerlifting, he sucked at the deadlift, so he sought out the best. Chuck Vogelpohl became his training partner and his understanding of the deadlift changed forever. Sprinkle in a lot of coaching time with Louis Simmons, Dave Tate, Steve Goggins, and Eddie Coan, and JL turned into a professor of the deadlift. His best pull in a meet is 804 pounds and you don’t pull over 800 pounds without picking up a few tricks of the trade. As an expert, he’s become keenly aware of the single most important and under-coached aspect of the deadlift, which is how you set the bar down when doing reps or, as he likes to refer to it, the dead-lower. It’s the thing that almost all lifters are f*cking up and the reason their pull is stuck. So set yourself up for success by mastering the fundamental concepts that have been hiding from you in plain sight. Once you master the initial setup and the basic mechanics of the lift, you’ll quickly see that the greatest opportunity to improve comes from putting the bar down better. Mistakes Made When Lowering the Bar If you’re not methodical about the way you put the bar back down, you’re messing with your next rep. At best, you’re being inefficient. At worst, you’re putting unnecessary stresses on your joints and practicing sloppy mechanics. And that’s just not how people get strong and then stay strong. Here’s a list of the most common technical errors you’ll see when it comes to lowering the bar, or the steps that immediately precede it. Mistake 1 – Trying to be a gymnast When you’ve reached lockout, do you stop moving, or do you continue to extend through the spine? If you keep moving, be aware you get no extra credit for doing a back bend at the top of your deadlift. Just f*cking stop when the hips reach extension. The deadlift is a simple movement. Your hips move, your knees move, and even your ankles move. But nobody said anything about your lumbar spine. The truth is, many people fake hip extension by cranking on their lower back. Think of it this way: If your hips have stopped moving but you’re still driving forward, that’s how you know it’s your back moving. This nasty habit releases both lat and anterior core tension so that the big muscles that keep you safe are now relaxed. This increases your risks without any further improvement in performance. It’s not a great trade-off, especially since it’ll compromise your next dead-lower before it’s even started. Think of this as setting up the setup for your setup. Mistake 2 – Squatting the bar down from the top Quad-dominant people love to do this, but shooting your knees forward is a sign of a weak posterior chain and it’s a good way to hurt your back. If you’re intent on moving anything truly heavy, you need to keep it as close to your center of mass as possible. Shooting the knees forward and sliding the bar down the quads like they’re a ramp will launch you into shitty deadlift land. That makes things less efficient and compromises your ability to move some real weight around. What you want to do is hinge back and once the bar has cleared the knees, you squat down. The video contrasts “ramping the bar” with good form: Mistake 3 – Forgetting to squat in the bottom Telling people to squat at the bottom has helped us teach thousands of people to dead-lower correctly. A deadlift is nothing more than a Romanian deadlift (RDL) until the bar passes the knees, at which point you squat. As with any squat, the knees and butt must move down. People confuse this and forget the squat part, which causes major issues. Look at it this way: Assuming you’re not a contortionist, forgetting to squat down will exhaust your range of motion at the hips before the bar has touched down. With no more hip flexion to give, further movement has to come from somewhere. And if your hips and knees aren’t moving BUT the bar is still travelling down, that’s your spine doing the work, homie! You can’t lift massive loads safely if the movement comes from the sacroiliac (SI) or lumbar spine instead of the hips. You’ll also have to readjust everything to be in good position to pull your next rep off the floor; either that or crush your back picking it up in the same way you just set it down in. That’s more work, or more wear and tear, to get the same job done. The Rules on Dropping the Bar (Don’t be a Douchebag) You’re 40% stronger eccentrically than concentrically. This means if you’re not strong enough to lower the bar correctly, you shouldn’t be picking that weight up anyway. Now, if you’re in a meet or going for a max attempt, we’re cool with you letting all the tension out and doing a controlled drop before you celebrate a massive PR. This will happen at most four times per year. Generally speaking, though, don’t be a douchebag and drop the bar from the top. We don’t care if you have bumpers on the bar (which just means you aren’t very strong because you can’t go over 500 with bumpers), but don’t ever, ever, let go of
Origin: The Missing Half of Your Deadlift
