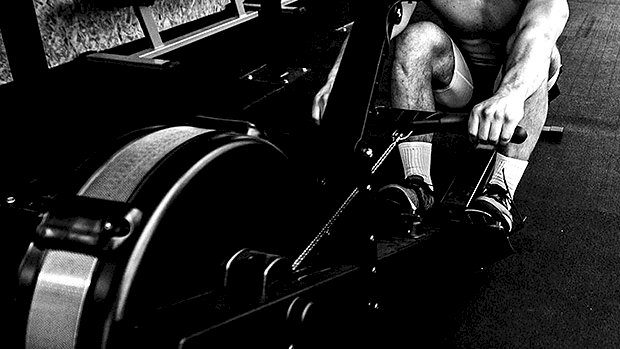
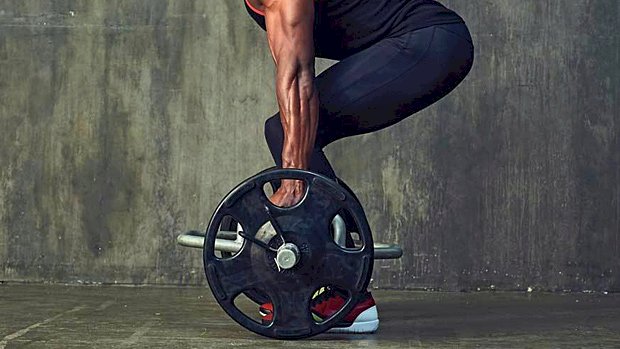
 Conditioning Matters Even More Now I realize there are some differences between 25 and 40, and probably a lot of differences between 25 and 50, but not as many as you might think, especially if you have at least 10 years’ worth of training experience. But you can’t train hard if merely pulling your pants on makes you wheeze. You need to do cardio or metabolic conditioning or whatever term you feel comfortable with. How do you expect to work hard if your lungs don’t have the sass to carry on? Moreover, your cellular batteries – the mitochondria – start to wear out, get lazy, take extended vacations in Cabo, or die as you get older. They need a kick in the pants so they get to multiplying, and that’s what intense exercise provides. Fear not, though, because you don’t have to devote hours and hours to all that tedious, conventional aerobic training stuff where you sit on a stationary bike for an hour as your panini-ed prostate swells up to the size of one of those sand-filled Bulgarian bags. Options That Don’t Suck At least three times a week, get on the treadmill, rower, or yes, stationary bike for a measly 10 minutes for some HIIT-style training. Focus on all-out efforts of 20 seconds, followed by 60 seconds of “active recovery.” On a treadmill, that might mean setting the speed at a leisurely 3 miles per hour and then cranking it up as fast as your little stubby legs allow for about 20 seconds, after which you’d drop the level back down to 3 again for a minute or two before you do another round. You could do the same thing on a stationary bike or rower, or you might prefer short sprints followed by walking-recovery periods. Alternately, you can crank up the incline on the treadmill to the Himalaya setting, or as high as it goes, and trudge uphill, Sherpa like, for 30 to 60 seconds before zeroing out again. This type of training has been shown to increase mitochondria. That, coupled with the increase in endurance you’ll experience, will allow you to lift as hard as you need
Origin: Tip: Over 40? Build Your Work Capacity
Author: ondriving
Tip: Slow Cook Your Biceps for Growth
 Biceps Rotisseries Let’s “slow cook” your biceps, as well as the brachioradialis, via a lot of rotation and change in hand position. The Protocol Dumbbell Reverse Curl:6-8 reps with an estimated 12-rep max weight Dumbbell Hammer Curl:6-8 reps (same weight) Dumbbell Curl:6-8 reps (same weight) Dumbbell Cheat Curl:6-8 reps (same weight) 90-Degree Alternating Pronation/Supination:6-8 reps (after last cheat rep) 90-Degree Isometric Hold:Hold for as long as possible (after last supination and pronation) You’ll use the same weight throughout and there’s no rest between the variations. Rest 90-120 seconds and repeat. You’ll likely have to drop down a set of dumbbells to do a second series. (You’ll only need two “sets” of this at the end of your workout.) Leave your ego at the door for this one. This protocol is straight-up metabolic stress, skin-splitting pump work! If you need to use 15-20 pound dumbbells, then so be it. Now isn’t the time to try and impress the Gym Shark girl next to you with huge weights. Weight Selection is Key on the First Exercise You want to have several reps in reserve. If you go too heavy on the reverse curl and get too close to failure, you won’t last and won’t hit the rep targets on the movements that follow. Trust me, by the third or fourth movement, it’ll get plenty hard. Note on the Cheat Curl You want to hip hinge just a little and “pop” up powerfully. Pause the contraction and then do a very slow and focused
Origin: Tip: Slow Cook Your Biceps for Growth
4 Ways to End Back Day With a Bang
 One of the things that separate the wolves from the sheep in the iron game is back development. It’s easy to train the stuff you can see in the mirror. It gives you the “warm and fuzzies” that come from immediate gratification. But some of the largest and most impressive muscular structures – with the biggest potential for growth – reside on the back side of the body. A guy who puts in years grinding away on his upper back and lats – embracing the aching stretches and the powerful pulls – will end up with a physique that ultimately blows away the one developed by the dude who’s just pressing, flying, and curling his way to mediocrity. So let’s get into the good stuff. Use these four lat-dominant finishers to level up your lat game and end your back day with a bang! 1 – The Rack Pull-Up Marathon Fellow T Nation contributor Paul Carter has sung the praises of rack pull-ups here before. If you’re after more width, this is a monster. This finisher uses the rack pull-up as the foundation and, from there, we’re just going to manipulate leverage and body position to create a nasty mechanical drop set. Set up a bar in a Smith machine or rack at upper-chest height. Set an incline bench out in front of you to prop up your straight legs. When you’re at the top of the pull-up, your thighs should be as close to parallel to the floor as possible. Then do the following: Rack Pull-Ups:max reps Modified Behind-The-Neck Rack Pull-Ups:max reps Modified Rack Pull-Ups:max reps Feet-Elevated Scap Depressions:max reps Use straps. Don’t take any rest between any of the above exercises, outside of what it takes to transition. On the second and third exercises, use as little lower-body assistance as necessary to complete the reps. 2 – Pulldown Lollapalooza This is an efficient mechanical drop set requiring only a high pulley and a rope attachment. You won’t even have to change the weight. Do the following: Straight-Arm Pulldowns:12-15 reps to failure (upright position) Straight-Arm Pulldowns:max reps (bent over position) Bent-Over “J” Pulldowns:max reps Hybrid Motorcycle Row/Face Pull:max reps Bent-Over Lat Pulldowns:max reps Take no rest between exercises. This protocol has a nice flow to it and you’ll appreciate the pump. 3 – Twelve Angry Reps If you have access to a dual-adjustable pulley or freedom-type trainer, give this one a shot. You’re going to hold the reps constant from exercise to exercise while also adding a bit of weight at each transition. Do the following: Straight-Arm Pulldowns:12 reps (use about a 15-rep estimated max weight) Split Stance High Rows:12 reps (add a plate beyond what you used in the first exercise) Half-Kneeling Lat Pulldowns:12-plus reps (add a plate beyond what you used in the second exercise) Half-Kneeling Lat Pulldown ISO Hold:for max time Take about 10 seconds or so to transition between exercises, recover just a bit and change the weight, with the exception of the last exercise where you’ll take 20 seconds to recover from the previous movement. 4 – DUDS (Double-Up Drop Sets) Don’t let the “DUDS” acronym fool you: they’re far from a dud finisher. Pick literally any lat pulldown variation and do this: Do an all-out set to failure (5 to 8 reps) Cut the weight in half and double the number of reps (10 to 16) Immediately cut the weight in half again and double the number of reps (20-32). If you need to take mini 10-second breaks to finish, go ahead. I’d suggest doing it on a well-designed pullover machine. When to Use These These are finishers. They’re not meant to replace heavier, progressive-overload back work. Start your back workouts with the big, basic exercises (rows, chin-ups, pull-ups, lat pulldowns, etc.) and chase rep and/or weight personal records. The four protocols above are metabolic-stress type work and should come at the end of a workout and only be done for ONE set. Don’t abuse these; maybe sprinkle them in every other week or
Origin: 4 Ways to End Back Day With a Bang
Tip: Facts On Fat Burning Supplements
 The fat burning supplements category is quite broad. Tons of different products are being sold with the claim of helping you lose fat faster and more easily. Fat loss supplements are formulated to do one of the following: Increase metabolic rate or energy expenditure via increased beta adrenergic (adrenaline) activity Increase metabolic rate or energy expenditure via a higher T3 (thyroid hormone) production Increase fat mobilization via inhibition of the alpha-adrenergic receptors Increase fatty acid transport and/or utilization of fat for fuel Improve insulin sensitivity Activate the mitochondrial uncoupling protein 1 (UCP1) There might be other mechanisms (like reducing fat absorption) but these are the main ones. So let’s break each of these down. Increased Metabolic Rate Via Beta Adrenergic Stimulation This is done with products often labeled “stimulants” so think ephedrine, synephrine, and the like. Caffeine can even be included here, indirectly. These work, and they do increase energy expenditure which leads to fat loss. But their effect is fairly small. An old study looked at the effect of the ephedrine/caffeine stack. It improved metabolic rate/energy expenditure by 5%. That’s maybe an extra 100 calories per day. It can still have an affect and help get that last bit of fat off when you’re dieting down for a contest, but it’s no miracle. The main reasons stimulants “work” is that they blunt appetite, which makes you eat less and makes it easier to follow a diet. It also gives you more energy when you’re tired from dieting down. If you have more energy, you’ll move more and train harder which will also help you lose fat. But overusing stimulants come at a price. First they lead to an increase in cortisol, and most of us already have too much of that. But more importantly, when you chronically overstimulate, the beta adrenergic receptors can easily become desensitized (they don’t respond well to adrenaline anymore). When that happens it’ll actually become harder to lose fat and you’ll also have less energy and motivation. Ultimately, you’ll start to feel worse and worse. This category of product is best left for losing the last few pounds. I only recommend using them for a few weeks, which is why they need to be the very last thing to add in a regimen. Increased Metabolic Rate/Energy Expenditure Via Higher T3 Production The T3 thyroid hormone is in large part responsible for elevating your metabolic rate. The body produces mostly T4 which is then converted to T3. To boost T3 levels you can either increase overall thyroid hormone production or increase T4 to T3 conversion. To boost overall thyroid production the best thing to do is to provide the body with enough raw material to make these hormones. Specifically iodine and tyrosine. As such, supplements containing both can help a bit with thyroid production. As for T4 to T3 conversion, one of the best things you can do is decrease stress levels. Chronically elevated cortisol can impair that conversion. Zinc deficiency will also be problematic because zinc is required for the conversion to take place. Rhodiola and raspberry ketones, which are in Hot-Rox® Extreme, can indirectly increase that conversion too. Increased Fat Mobilization Via Inhibition of the Alpha-Adrenergic Receptors We have two main types of adrenergic (adrenaline) receptors: the beta and alpha receptors. The beta receptors are the “on” switch. When activated they increase heart rate, CNS activation, energy mobilization (including fat) and muscle strength. These are the receptors being targeted by most stimulants. The alpha receptors are the “off” switch. When activated, they shut down energy/fat mobilization, slow heart rate, decrease CNS activation, etc. Some supplements are antagonists of the alpha adrenergic receptors. This simply means that these supplements block the alpha receptors. If you block them, your body continues mobilizing energy for longer. There’s a theory that stubborn body fat sites (where you have problems losing fat the most) have more alpha and less beta adrenergic receptors, making it much harder to mobilize fat there. Yohimbe HCL/yohimbine, which is also found in Hot-Rox® Extreme, is an antagonist of the alpha receptors. For that reason it can work for increasing fat mobilization, especially in stubborn regions. Just be aware that if you’re overly stressed or planning to do a monster CrossFit-like workout, yohimbe might not be a great idea: even without stimulants these kind of workouts will increase adrenaline so much that you can run into trouble. The best use for a yohimbe-containing product is before steady-state cardio. It’s not a magic pill, but it can help get rid of the stubborn body fat when that’s all you have left. It works WITH exercise – it’ll make the exercise more efficient at mobilizing fat. By itself it will have a small impact, and it’ll be a lot more effective with cardio than weight training. Increased Fatty Acid Transport and/or
Origin: Tip: Facts On Fat Burning Supplements
Tip: 1 Dumbbell, 4 Nasty Finishers
 The term “finisher” might bring back memories of Mortal Kombat and Sub Zero freezing opponents solid before punching their heads into tiny ice cubes, but in reality it’s just a short, intense effort at the end of a training session. Finishers are often framed as a great way to build work capacity and torch fat. While that’s not untrue, one of the lesser known benefits of well-designed finishers are their ability to help build muscle. A strategically designed finisher will provide all three of the mechanisms for muscular hypertrophy: mechanical tension, metabolic stress, and muscular damage to particular muscle groups. People often make two big mistakes when doing finishers: They don’t use exercises with enough loading. This basically leads to a glorified step aerobics session. Or… The movements chosen are too complex or loaded too heavily. The quality goes out the window as the heart rate goes up. When too much fatigue sets in, reps get ugly, range of motion decreases, and things go south. You can avoid those drawbacks with these four finishers. They’re made up of movements that are low on the complexity side, but pack a big punch since you’ll likely be able to handle substantial weights for an extended duration. This systemic stress will challenge your lungs and give you the stimulus needed to build more muscle. 1. Goblet Squat + Goblet Carry + Goblet Squat Grab a heavy dumbbell or kettlebell and knock out 10 goblet squats. Without putting it down, walk with it in the goblet position for 40-60 yards, then finish with 10 more goblet squats. Let your heart stop beating out of your chest, rinse, and repeat 2-3 times. Not only does this punish the legs, but with each round taking 75-90 seconds, the upper back and abs get torched from the duration of the hold. Not a challenge? Increase the weight on the next round. 2. Dips + Goblet Squat Countdown Using a dumbbell that’s half your bodyweight, do 10 goblet squats, then 10 bodyweight dips. Then 9 of each, then 8, and continue down to 1. Rest when needed but keep it to a minimum. When you start a set, try to complete all of the required reps. Holding the dumbbell in the goblet position becomes increasingly challenging as the fatigue in the triceps accumulates from the dips. This adds up to a lot of work (55 reps each of dips and goblet squats) in a relatively short amount of time, with constant stress on the triceps throughout, making it a solid choice if getting bigger arms is on your to-do list. 3. Goblet Squat + Hammer Fist Battling Ropes Set a timer for 10 minutes. Grab a dumbbell or kettlebell that you can hit 12-15 goblet squats with. Do 10 goblet squats and 20 seconds of hard rope waves. Work to get as many rounds in as possible. Your biceps, legs, lungs, and forearms will all be equally smoked. Be sure to keep the speed on the ropes going on each round. As fatigue sets in, you’re going to want to slow it down and just keep it moving. Take rest as necessary so you can keep the output level cranked up. 4. Chin-Up + Goblet Squat Countdown Using a dumbbell that’s half your bodyweight, do 10 goblet squats, then 10 chin-ups. Then 9 of each, then 8, and continue down to 1. Again, rest when needed but keep it to a minimum. When you start a set, try to complete all of the required reps. Use Finishers Wisely While finishers are a great exclamation point at the end of a workout, be frugal in how often you use them. Remember, this is a finisher. It’s done after the meat and potatoes of your strength training, so don’t get carried away with the “more is better” approach. When you push the envelope, you need extra recovery or you’re likely to see your performance impacted negatively in subsequent workouts. Think about adding one of these finishers in your last workout before a few days off, at the end of a training block, or at the very least, put an extra emphasis on sleep and recovery after doing one of
Origin: Tip: 1 Dumbbell, 4 Nasty Finishers
Tip: Are Protein Shakes Really Bad For You?
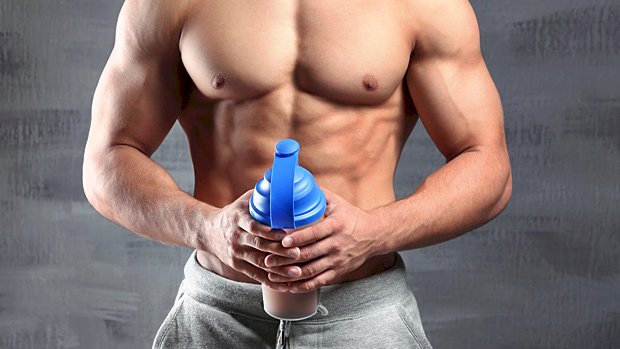 There it was, on news app after news app on my iPhone, the report about how “drinking muscle-building protein shakes” could threaten your health and reduce your life span. That kind of news gets your attention, especially if you’ve spent a good part of your adult life tapping on the bottom of a protein shake, trying to give gravity an assist in draining the last few rivulets of protein into your mouth. I looked up the study and sure enough, there it was. Scientists from the University of Fredonia recruited 12 bodybuilders. Six were designated as the control group and the other 6 were force-fed 12 gallons of protein shakes, causing all 6 to explode. No, no, no. That wasn’t the real study. I made that up. But the real study, or at least the way the real study was interpreted by the lay press, is just as ridiculous. What The Silly Monkeys Did I won’t bother going into all the minute details of the study that was so widely mischaracterized. What you need to know, though, is that Australian scientists gave several groups of mice a diet of which 18% was protein from casein. One group of mice, however, had about a third of their whole protein replaced with free-form branched-chain amino acids (BCAA). That group started to eat more than the other groups, got fatter, and then died earlier than the other groups. What probably happened is that the large amount of BCAAs in their diet caused a decrease in serotonin production, thereby increasing their appetites and compelling them to overeat. That’s it. You’re probably wondering how the hell anyone could make the deductive leap from mice that overdosed on BCAAs to humans dying from protein shakes. The answer is in the press release from the University of Sydney where the research took place. It made the observation that “BCAAs are included in all sorts of supplements for athletes,” including protein drinks. Got that? Since some protein drinks contain additional BCAAs, then protein drinks in general can supposedly damage an athlete’s health. Never mind that the study itself never said anything at all about protein supplements. Never mind that no human is going to replace about a third of his daily whole-protein intake with BCAAs. Besides, there’s nothing inherently dangerous about BCAAs. The mice were just fed a stupid amount of them and it caused them to overeat. What This Means To You What does this mean to you? Absolutely nothing. Ignore it. Ignore all the articles about it that keep popping up in your health news apps. The truth is, a good protein shake, made from a high-quality protein powder and not made in bargain-basement manufacturing companies in China from ingredients you don’t want to know about, used as a supplement instead of a meal replacement, can do some great things for a body, like: Increase lean body mass (muscle!) Increase levels of growth hormone Increase serum levels of testosterone Reduce body fat percentages Greatly increase insulin sensitivity Improve cholesterol ratios (higher HDL levels). As far as manufacturers adding BCAAs to their general-usage protein powders, it’s often unnecessary except in peri-workout situations, but it certainly won’t shorten your lifespan. Likewise, BCAAs, taken by themselves, can be tremendously effective in building muscle, as long as you don’t replace a good part of your whole protein intake with
Origin: Tip: Are Protein Shakes Really Bad For You?
Tip: Make Metabolic Drive Snickers Bars
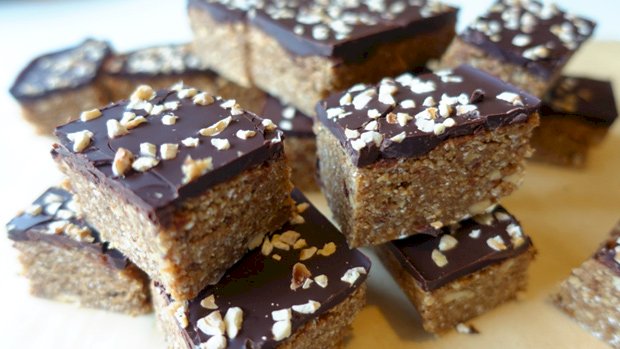 The perfect pre-workout snack should be easily digestible, have a good nutrient profile, and ideally promote vasodilation and blood flow. These bars have you covered in all departments. Any pre-exercise snack should also help trigger a positive feedback loop. Basically, the tastier it is, the more positive feelings you’ll associate with your workouts. Every time you eat it, you’ll know what’s about to go down. So let’s get to the recipe, then keep scrolling because I’ll tell you why these make an awesome pre-workout snack. Ingredients 18 Medjool dates, pitted 6 Ounces rolled oats 6 Ounces of dark chocolate bar (70% cocoa or higher) 6 Ounces crunchy peanut butter 3 Scoops (90 grams) vanilla Metabolic Drive® Protein 1/3 teaspoon salt Some chopped peanuts or hazelnuts for topping Directions Soak the dates in warm water for 10 minutes so they plump and soften. In a food processor or blender, mix the oats, salt, and protein powder together until fine. Drain the dates then add to the food processor and blitz until well combined. Save the water from the dates for later just in case. Pour the dry-ish dough into a bowl and mix by hand with the peanut butter. You’re welcome to use the processor for this, although this way keeps the crunchy peanut texture. You should find a dough has formed enough that you can easily roll it in your hands. If it’s a little wet, then add more oats. If it’s a little dry, add some of the drained date water you saved earlier. Get a small to medium cake pan ready. Don’t have one? Use a food prep container instead. Coat it with a little oil so the bars are easier to remove, or line with it with parchment paper. Press the dough to the corners of the container and give it an even thickness. Put the container in the freezer while you prepare the dark chocolate. Chop up the chocolate and melt gradually in the microwave, or if you’re fancy, do it in a glass bowl over boiling water. Bring out the container you just stuck in the freezer. Pour the chocolate evenly over the base, then add a sprinkle of chopped peanuts or hazelnuts over the top. Place in the refrigerator to set. Cut into 18 squares. Keep them stored in the fridge or at room temperature… if they last! Make Them A Pre-Workout Snack The natural caffeine and theobromine in dark chocolate act as mild stimulants, while the theobromine can also be a vasodilator. Dark chocolate also contains certain flavonoids that increase nitric oxide production. These convenient and tasty bars are perfect for any chocolate addict. Metabolic Drive® Protein is the primary source of protein, which you need training for amino acid availability. But what’s more important than the total protein content is the ratio of protein, carbs, and fats. Unlike post-workout where keeping fats to a minimum should be your goal, in the few hours leading to your workout some fats could be a good thing. A 2014 study by Yi et al. showed an almond-based snack actually beat a carbohydrate-heavy snack for maximizing exercise performance. The almonds allowed the subjects (cyclists) to sustain a higher intensity of exercise for longer. Theoretically this was due to the combination of protein and fat. The fat might allow people to sustain the energy obtained from carbs for a longer period of time – a drip-feed effect if you will. The peanuts in this recipe aid that process, whether you’re lifting, cross training, or cycling. The oats and medjool dates in these bars make for a great mix of sustainable energy too, with a little salt helping to maintain electrolyte balance. Calories and Macros Per Square 233 calories 9 grams fat 29 grams carbs 9 grams protein 4 grams
Origin: Tip: Make Metabolic Drive Snickers Bars
Tip: The Toughest Way to do EZ-Bar Curls
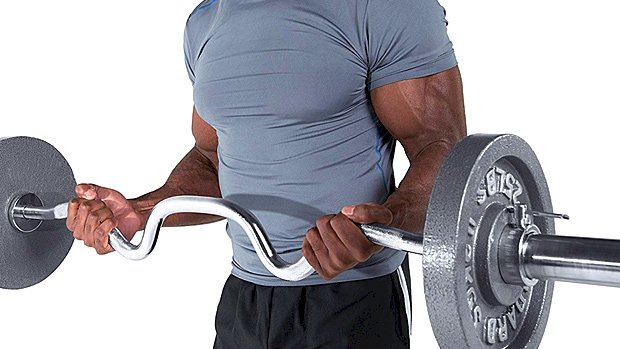 EZ Does Its This is a mechanical advantage drop set to use after your heavier biceps work. We start with the theoretical weakest exercise and then manipulate leverage and strength curve to pour on more volume and extend the set. The Protocol Bent Over EZ-Bar Spider(ish) Curl:8-12 reps (to failure) Strict EZ-Bar Curl with Shoulder Flexion:Max reps (same weight) Strict EZ-Bar Curl:Max reps (same weight) Cheat EZ-Bar Curl:Max reps (same weight) Do the first variation using weight you can lift for 8-12 reps. From there out, go for maximum reps, always using the same weight. Rest 90-120 seconds and repeat. You’ll likely need to reduce the weight a bit to do a second round. This is metabolic stress work – you won’t need a lot of load and you should only do 2 sets, tops. For the cheat curl, use a little hip hinge and pop up forcefully. Pause the contraction and use a very controlled negative. Here’s an alternative version: This one uses an EZ-bar cable attachment and a low
Origin: Tip: The Toughest Way to do EZ-Bar Curls
6 Exercises for Pain-Free Shoulder Training
 When dealing with a shoulder injury or shoulder dysfunction, you’ve got one task (other than diagnosing the injury or guessing the source of the pain): Pick the right exercises to optimize the results as best you can while avoiding pain or excessive inflammation. Here are some options. 1 – Rack Viking Press Assuming your gym doesn’t have a Viking press machine, the rack Viking press is a great alternative. It’s a pain in the ass to set up, but if you’re willing to go to the trouble, it can be an effective way to load the shoulders while still being relatively shoulder friendly. Many lifters find the Viking press to be an effective way to get strong overhead while avoiding existing shoulder issues. The advantage? It allows you to change your pressing angle to one that suits your anatomy by adjusting the height of the furthest safety pin (the one the bar is pivoting on). Pressing either overhead or horizontally with a neutral grip offers some shoulder-saving benefits too. It limits elbow flare and offers a more stable position for the shoulder to press from. More neutral-grip pressing like this could be the one simple change you make that gives immediate benefits to your shoulder health and performance. 2 – Landmine Single-Arm Press When experiencing shoulder pain, limit the amount of work you do above 90 degrees of shoulder flexion, especially if it’s a pain trigger. The angle of pressing here is effective for hitting the shoulders while the neutral grip adds to the shoulder-friendly nature too. It’s not often mentioned, but the landmine offers another benefit to cranky shoulders. The thickness of the end of the bar is like that of a fat-grip barbell. Many who experience shoulder pain claim to have less pain when using a thicker barbell. We’re not sure why, but it might similar to what we see with bottoms-up kettlebell pressing where there’s an irradiation effect with increased shoulder muscle activation. 3 – Elbow Gripped Lateral Raise Iso Overhead pressing can be a pain and inflammation trigger, but so can more isolated shoulder exercises like conventional lateral raises. Switch to performing lateral raises in the scapular plane of motion. Instead of lateral raises to the side (frontal plane), try shifting the angle 30 degrees forward. Not only do the deltoid and supraspinatus have a more direct line of pull in the scapular plane, there’s also increased activity of the external rotator muscles. If using the scapular plane isn’t enough to ameliorate pain, then you can try gripping some dumbbells in your elbows and doing iso holds instead (see video). This works great for clunky shoulders, but it’s also an excellent option for anyone who just wants to get their shoulder pump on. Bringing the dumbbells in simply shortens the moment arm and takes the wrists and elbows out of the equation. This makes it kinder on the shoulders while also helping those who have dodgy wrists or lateral elbow pain (golfers elbow). If you really want to blow up your delts, try this: A1 Lateral Raises (Scapular Plane):12-15 reps. Superset with… A2 Elbow-Gripped Lateral Raises, Max Iso:Hold for as long as possible using the same weight. Repeat for 2-3 sets, then struggle with the steering wheel to drive home. 4 – Pronating Dumbbell Press Swapping a barbell with dumbbells is an easy way to help prevent pain because the dumbbells offer freer motion and more natural shoulder movement. The space underneath the acromion process is already pretty tightly packed when you go overhead, and using a stiff barbell with an overhand grip doesn’t help. That’s not to say a barbell military press should be labeled as bad, but like most everything else, it has a time and a place. While you’re experiencing pain, though, switch to dumbbells, along with choosing a neutral or pronating grip. Adding a 1-second pause at the bottom of each rep is also a good way to minimize shoulder stress while forcing more muscle contractile components to do the lifting. 5 – Accentuated Eccentric Landmine Push Press The angle of pressing here is also relatively safe for most, providing you’re okay with the explosive nature of this move. If you’re not ready for this, just scale it back a bit by pressing with two hands and lowering with one. You’ll still get the eccentric overload, but it’ll be a little less “jerky” on the shoulder. 6 – Eccentric Lateral Raise Start doing your lateral raises in the scapular plane as explained earlier, but then combine it with some eccentric loading and you’ll get one heck of a shoulder-friendly isolator. Bending the elbows on the concentric (lifting) portion shortens the moment arm from the dumbbell to the shoulder, making the weight a little easier to handle. This also gives you the chance to focus on lifting with the elbows for pure isolation of the delts. On the way down, the moment arm lengthens to a more disadvantageous position, weight-wise, thus providing some eccentric (negative)
Origin: 6 Exercises for Pain-Free Shoulder Training
Tip: CNS Stress and Deadlifting
 CNS Stress and Trap Bar Deadlifts Are trap bar deadlifts any less demanding on the central nervous system than barbell deadlifts? Well, let’s look at what’s likely to increase the stress on the CNS when lifting. The Weight Lifted:The more weight imposed on your body (tendons, skeletal system, muscles), the greater the demand will be on the CNS. The Work Performed:I’m not talking strictly about volume here, but more about the amount of work you perform when doing a movement. Work is equal to force X distance. That’s why a partial lift is often less demanding on the CNS even if you’re using more weight. The Amount of Muscle Involved:If more muscles are involved at the same time, the CNS will be challenged more. This happens in part because normally more muscles involved means heavier weight, but also because the system needs to work harder to coordinate all of those muscles. The Complexity and Coordination Required:The more difficult the technique is, the harder the CNS will work. Technical Efficiency:The less efficient your technique, the harder your nervous system will work to properly execute the movement. A better engrained motor pattern, and a more efficient movement, is more economical on neurological resources. That’s one of the reasons why elite Olympic lifters with superb technique can snatch and clean Both speed (more precisely, accelerating the bar) and mass moved will increase the demands for force production. Force equals mass x acceleration. So the more force you need to produce, the greater the demands on the CNS. The Perceived Stress:When the body sees a lift as potentially dangerous, either voluntarily or subconsciously, it’ll produce more cortisol which leads to an increase in adrenaline production. More adrenaline production can lead to what we wrongfully refer to as “CNS fatigue” either by depleting dopamine (adrenaline is made from dopamine) or a desensitization of the adrenergic receptors due to overstimulation. Now, using this info, let’s compare the two. Traditional Deadlift vs. Trap Bar Deadlift The Weight Lifted:Pretty much everybody will lift more on a trap bar deadlift, especially if using the high-handle position. So if we’re talking strictly about using a certain percentage of your max, let’s say 85% of your max on that lift, the trap bar “wins” this one. The Work Performed:If you’re using the lower setting of a trap bar, the linear distance travelled will be the same as a conventional deadlift. However, the bar path is much straighter on a trap bar deadlift. So while the distance from point A to point B is the same, the path is “longer” on the conventional deadlift, and the muscles should be under load for slightly longer. I give this one to the conventional deadlift. The Amount of Muscle Involved:Conventional wisdom would say that since you’re lifting more during a trap bar deadlift, more muscle is involved. But that’s not the case. You’re moving more weight mostly because of a better leverage: the center of mass is in line with your body, whereas in the conventional deadlift it’s in front of you. And because of that, the conventional deadlift works the posterior chain a bit more. The trap bar, on the other hand, will work the quads a bit more. I’d say the conventional deadlift tends to recruit slightly more muscle if done properly. Why? Because it recruits the lower and upper back a bit more. So I give this one to the conventional deadlift too. The Complexity and Coordination Required:I have to give this one to the conventional deadlift. Technically speaking it’s a more complicated lift because of the bar path. You must lift up and in a backward arc to pass the knees properly. But you lift in a straight line during the trap bar deadlift. So assuming they’re both done properly, a trap bar deadlift is much simpler than a conventional deadlift. Technical Efficiency:Here it really depends on the lifter. If you’re a master technician on the conventional deadlift it’ll be no more demanding (in this category) as the trap bar deadlift. But because the trap bar is so much simpler and because most people have a very inefficient deadlift technique, this one normally goes to conventional too. But if your conventional deadlift technique is world class then both would be similar. Speed of Execution:This isn’t really lift-specific; it depends on the load and the attempt to accelerate. If you want to be anal about it, the trap bar might be a bit easier to accelerate because of the straighter bar path. Both lifts would be similar in this variable, maybe a short “win” for the trap bar. The Perceived Stress:The conventional deadlift is significantly higher than the trap bar deadlift. The conventional deadlift will load the spine a lot more than the trap bar. That’s because the load is positioned in front of you versus aligned with your body in the trap bar. Axial/spinal loading is one of the greatest stresses your nervous system can be under. So as you can see, a trap bar
Origin: Tip: CNS Stress and Deadlifting
