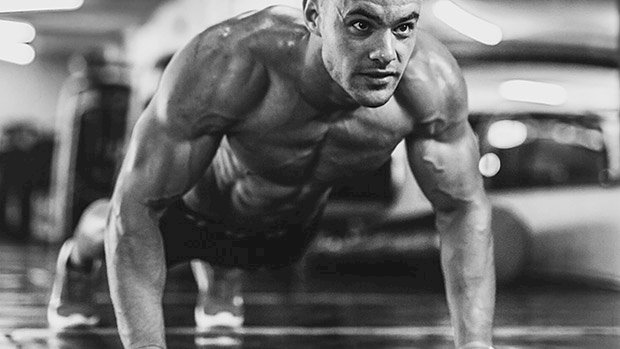
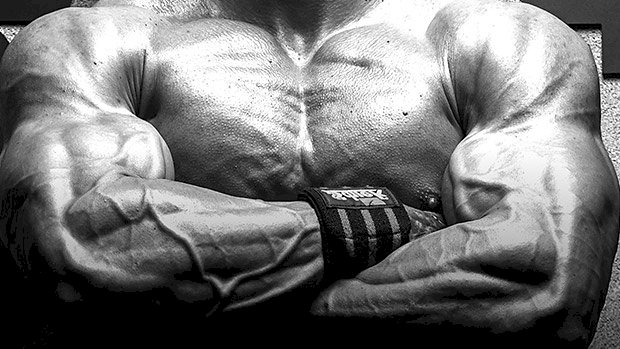
 The Staggered Push-Up Usually, all regular bilateral strength exercises are performed symmetrically. In most sports, symmetrical actions and positions seldom happen, especially in contact sports. So you set yourself up for weakness if you only train symmetrical exercises in the gym. There’s no need to go all “sport specific” and perform all kinds of circus acts, but SOME exercises should aim to prepare your body for non-symmetrical impact. For the upper body you can do this with staggered push-ups. Just get into your regular push-up-position, but with one hand placed higher than usual (toward the head) and the other hand placed lower than usual (towards the hip). Staggered push-ups are a great exercise for improved shoulder stability, athletic preparation and performance. Give it a
Origin: Tip: The Push-Up Variation You’ve Never Tried
Author: ondriving
Top 10 Mass Makers for Lanky Lifters
 You know the typical mass building advice: emphasize big compound lifts and progressive overload. However, using exercises you’re not structurally suited for can quickly turn you into a non-gainer. This is especially true for lanky, long-limbed lifters. If you want build muscle, you need to make every exercise count. Use these effective and structurally-friendly variations of the classic exercises. 1. Safety Bar Squat, Holding Rack For building mass, squats are king. However, when long-limbed hardgainers try to back squat, if often looks like an ugly good morning. Switching to a safety squat bar (holding the squat rack) is a game changer. Benefits The padded yoke takes stress off your shoulders. The bar design moves the weight forward like a front squat. This means less stress on your spine and more on your quads. Holding the rack helps you keep a more upright torso. This makes your squat look more like the pretty squats of someone with a good squat structure. It also adds some extra stability to the lift, which lets you lift more weight for more reps. Tips For big legs, don’t sit back like a powerlifter. Instead spread your knees and sit down. Drive your traps into the bar pad as you come out of the hole. If you start leaning forward to recruit more low back and hips, use your hands to push the weight back over your feet and make your quads do the work. Don’t cheat with your arms. You’re trying to build your legs, not your ego. Good alternatives: Machine squat, leg press, Zercher squat, hip belt squat. 2. Romanian Deadlift with Hook Grip While regular deadlifts are fantastic for building overall strength, Romanian deadlifts rule for packing mass onto your posterior chain. Use a hook grip or straps for this. Benefits EMG research shows it’s one of the best hamstring exercises (1). It’s hard to do, but easy to add 5 pounds a week on for a long time! Great for building your upper back and traps. Keeps continuous tension on the muscles. It’s easier on your lower back than the traditional stiff-legged or straight-leg deadlift because you maintain a neutral low-back position. By starting from a rack at the top, your body structure doesn’t matter. Tips Use straps or a hook grip so you can focus on your hamstrings, use more weight, and get more reps. Take the weight from a rack (or deadlift the first rep if no rack). Unlock your knees, then push your hips back until you get a good hamstrings stretch. Stop the downward movement just before you have to bend at your spine. Resist the urge to let your knees go forward at the bottom. This takes tension off your hamstrings and turns the lift into a quarter-squat holding a barbell. Don’t overdo the hip lockout at the top unless you’re trying to make this a glute exercise. Good alternatives: Trap bar deadlift (touch and go), back extension (45 degree), glute-ham raise. Notes: Using a trap bar for deadlifts will hit your hamstrings less, but they’re still a great total-body mass builder. Back extensions and glute ham raises are also excellent hamstring builders, but they won’t have a huge impact on total-body muscle growth. 3. Chest Dip On Rings With long arms, most hardgainers find that bench presses beat up their shoulders long before they build up their pecs. Chest dips are an amazing mass builder and they can be even better when you do them on rings. Benefits The rings allow you to have the perfect hand position for your individual structure, which reduces shoulder stress. Your chest has to work even harder to keep the rings from moving out. It’s not as unstable as you might think. Because your arms are on the straps, they’ll provide some stability. Tips Wear a long sleeve shirt so the ring straps don’t shred the skin on your upper arms. Test your natural range of motion by standing sideways to a mirror. Lean forward like you’re doing a chest dip. Now bring your elbows back as if doing a dip. Stop when you run out of range. That’s your natural range. Keep the ring height lower so you can bail yourself out with your feet if something goes wrong. At first you’ll be really shaky with these. Don’t worry, your body will quickly figure it out. Just go extra slow while you’re learning the movement. Lean forward as you come down to emphasize your pecs. Squeeze your pecs as you press down on the rings to raise your body. Dips aren’t for everyone. If they bother your shoulders, explore other alternatives. Good alternatives: Chest dip on V-bar setup, dumbbell bench press (flat, low incline or slight decline), weighted push-up. 4. Trap Bar Bent Over Row Bent over rows are a classic upper-back mass builder and they work even better with a trap bar. Benefits The trap bar moves the weight from in front of you back to your midline, which takes stress off your lower back. Because your knees don’t get in the way of the bar, you can use more legs and less low back to support the weight. The neutral hand grip of the trap bar brings the elbows closer
Origin: Top 10 Mass Makers for Lanky Lifters
Tip: Eat More, Train More – The Anabolic Toggle
 How Do You Eat for Muscle Gains Without Getting Fat? First, you have understand that the metabolism is not a great multitasker. It likes to be building up fat and muscle (anabolism) or tearing them both down (catabolism). Trying to do both at once is the metabolic equivalent of patting your head and rubbing your belly. You can do it, it’s just not that easy… unless you’re a beginner or using anabolics. The trick here is to understand you have four different metabolic toggles to pull: 1 – Eat less, exercise more. This will burn fat and muscle because it creates a pretty intense and wide calorie gap through both exercise and food. Think marathon runner or skinny fat. 2 – Eat more, exercise less. This will put on both muscle and fat through creating a calorie gap in the other direction. Think powerlifter or muscle-fat. That latter scenario is what most people try to do when they want to gain muscle. It works, but it often makes you look like you just put a jacket on top of two sweaters. It’s not the best approach or the best look. This is usually creating a 500-calorie surplus or more, and that may be too much if the training isn’t right. 3 – Eat less, exercise less. Think the little old lady in Paris who climbs four flights of stairs six times a day, but eats only half a baguette, a cup each of coffee and wine, a radish, and some cheese. She stays lean because she drives the calorie deficit through diet and moves enough to not become a skeleton. 4 – Eat more, exercise more. That’s the toggle you want. It’s the athlete toggle. Ramp up your food intake to a slight surplus so you can gain some muscle. I suggest somewhere between 15 and 20 times body weight in pounds depending on whether or not you’re a hard gainer. If you tend to get “muscle-fat” easily (like me), stay near 15 to start. Now set your macronutrients to 40-30-30 (carbs, protein, and fat). You’ll need the extra carbs. Insulin is, after all, the most powerful anabolic hormone in the body. If you can’t get that fuel in the cell, you’re not going to grow no matter how much testosterone you have. Now turn on the training intensity like you’re a banshee in a bench, squat, and deadlift competition to the death. Doing things this way will amplify energy flux, reduce fat (or at least minimize its accumulation) and put mechanical pressure on the muscle to grow. If it’s not working, SLOWLY ramp up the calories until it does. My guess is you’ll end up in a slight surplus of 200-400 calories. This is the best way to
Origin: Tip: Eat More, Train More – The Anabolic Toggle
Primer 52: The Program
 Improving your body is full of catch-22 situations: To build a lot of muscle you need to eat a lot, but that means you’ll likely gain some fat, too. To lose a lot of fat you need a caloric deficit, which often negatively affects your training and can even lead to muscle and strength loss. Training heavy will get you stronger and can make you more muscular, but it can drain you and abuse your joints and tendons. You can build muscle by doing lighter work that’s easier on the nervous system and your joints, but you might lose strength in the process. It’s also hard to mix and match the various ways you like to train, like sprinting, recreational sport, strength work, hypertrophy work, conditioning, etc. And it’s even harder trying to eat for the type of training you’re doing or have done. All of the preceding is why Paul Carter and I developed a nutrition/training approach called “Primer 52.” It is in fact similar to The 5/2 Fat Loss Diet for Lifters devised by TC Luoma that uses two days of very aggressive caloric restriction and 5 days of maintenance or even surplus eating. Primer 52, however, takes the idea further, focusing on fundamentals of advanced biochemistry and a specific combination of training and nutrition. The program is revolutionary in that it allows you do anything and everything you want to do as far as reshaping your body, either through increasing muscle, losing fat, or both. You literally eradicate all those catch-22s. But before I lay out the specifics of Primer 52, I first need to list the three muscle growth factors (MGF) that are essential to muscle growth, along with explaining the value of caloric deficits and how we can easily manipulate mTOR and AMPK. MGF 1 – You Don’t Need a Caloric Surplus to Build Muscle Yes, you read that right. The “evidence-based” coaches will want to destroy me, but I have science to back me up when I say that you don’t need extra calories to build muscle. In fact, a caloric surplus isn’t even a main variable when it comes to building muscle. It’s only indirectly involved. A couple of years ago, Dr. Stuart Phillips and a group of capable scientists from McMaster’s University recruited two groups of 20 men. Both groups were assigned a diet that gave them a 40% caloric deficit per day over 4 weeks. (All of their meals were given to them, so it was well controlled.) One group had a daily protein intake of 1.2g/kg (0.54g per pound, so about 108 grams for a 200-pound man) and the second group received about twice as much protein, or 2.4g/kg (1.1g per pound, so about 220 grams for a 200-pound man). All of the men lifted 4 days a week and did sprints 2 days a week. After 4 weeks, both groups lost a significant amount of fat (around 3.5kg or 7.7 pounds). The low protein group lost a small amount of muscle while the high protein group actually GAINED some muscle. (1) Clearly, protein is the nutritional key necessary for muscle growth, and not a calorie surplus. MGF 2 – You Need Sufficient Energy to Build Muscle This factor may at first sound like it contradicts what I just wrote about not needing a caloric surplus to build muscle, but it doesn’t. Hear me out. To build muscle you do need fuel. Constructing new muscle requires energy. You need 3 calories to synthesize 1g of protein, to be exact. There are 220g of protein in 1kg (2.2lbs) of muscle, so at the very least you’ll need 660 calories to synthesize enough protein to build a kilo of muscle. But in reality it’s much higher than that because of the daily protein turnover (you break down and rebuild muscle tissue constantly). And the more you train, the higher that turnover is. While the exact number isn’t that important, it’s safe to say that you’ll need at least 1000 calories to fuel the process of building a kilo of muscle. Again, this sounds like I’m saying you need a caloric surplus to build muscle, but you don’t. If you need more energy than you have consumed, you’ll simply dip into your reserves (stored body fat or glycogen). It’s the same thing with building muscle. If you need energy to fuel the process but you’re in a deficit, you’ll use stored energy to get the job done. This is also why the leaner you are, the harder it is to build muscle while being in a deficit. Fatter individuals have a lot more reserves and there’s no threat to your survival if you use that stored energy to fuel muscle growth. MGF 3 – You Need to Actually Stimulate Protein Synthesis It’s not enough to have sufficient protein available to build muscle and the energy to fuel the process. If you don’t trigger an increase in muscle protein synthesis, you won’t build muscle. And this is where the caloric surplus plays a role, albeit indirectly, by increasing both insulin (which happens if you eat more carbs and proteins) and IGF-1 (the liver needs insulin and growth hormone to release IGF-1). Raising insulin is important because it both decreases muscle protein breakdown and stimulates protein synthesis by increasing mTOR.
Origin: Primer 52: The Program
Tip: 40-Plus? Do More Work
 Extend Your Sets For Better Results If you’re over 40, doing 3 sets of 8 and going home is no longer going to suffice. It may have worked when you were younger and had testosteroned-up tiger blood flowing through your veins, but not so much when you’ve got a 50/50 blend of tiger blood and prune juice squirting through your plaque-riddled vessels. That’s why damn near every workout should contain an extended set, drop set, or finisher of some kind and if you’re not making an ugly, just-got-burned-by-dragon-fire face at the end of it, you didn’t work hard enough. Do strip sets on leg press or Smith machine squats. Rep out. Pull a plate. Rep out. Pull a plate. Rep out. Pull a plate. Rep out. Collapse into a fetal position. Try Paul Carter’s 10-6-10 method on an exercise or two. That’s a 10-second isometric followed immediately (using the same weight) by 6 full-range-of-motion reps done with a 3-5 second eccentric, followed immediately (again with the same weight) by 10 partial range, little grunt reps. Here’s what it looks like: Or pick a weight that you can do about 10 reps with. Look at the wall clock and note the time. Give yourself 5 minutes to do 50 reps with the same weight, taking little bitty chunks of rest in-between sets to failure. If you actually hit 50, the weight was too light. Mechanical advantage barbell curls like this work well too: A1. Reverse barbell curls for 6 to 8 reps. A2. Drag curls for as many reps as you can. A3. Standing barbell curls for as many reps as you can. You get the idea. It sounds counterintuitive and it smacks of weightlifting heresy, but you’ve got to train harder than when you were younger if you want to stay in the
Origin: Tip: 40-Plus? Do More Work
Tip: Bench Like a Beast Without Shoulder Pain
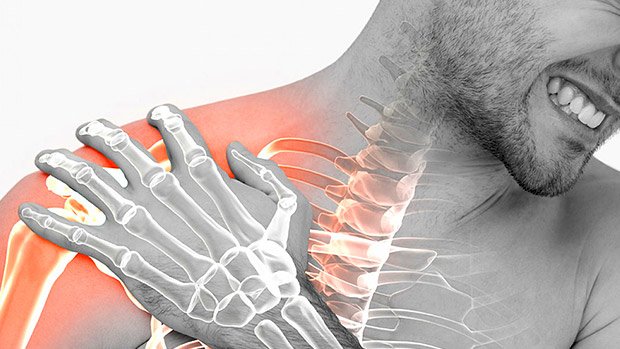 Shoulder discomfort when bench pressing is common among experienced bodybuilders and strength athletes. Most just fight through the pain because they’re afraid they’ll lose size and strength if they give it up. While benching isn’t the only way to grow your chest and triceps, it’s certainly a core upper-body exercise. Fortunately, there are ways you can bench press that help alleviate stress from the shoulder joint. Before we get into those, let’s quickly review why your shoulders might be aching: Benching is an internal rotator-dominant exercise. Many lifters are already very internally rotated since they sit for work at a computer and have weak upper-back muscles. Coupling those issues with the bench press further adds to the shoulder stress. Inefficient warm-up and poor mobility. You have to warm up if you’re going to bench, especially if you don’t want your shoulders to suffer from it. Before you even touch the bar, do some mobility drills to help open up your range of motion, and maybe perform some activation exercises with light bands for the shoulders, triceps, and upper back. 3 Shoulder-Friendly Bench Exercises You can tweak the bench press to greatly reduce the stress on the shoulders and keep the tension on the muscles you’re trying to train the first place. If you’re consistent with your warm-up and mobility drills, but still feel some unwanted tension in the shoulders when you bench, try these variations: 1 – Dumbbell Press with External Rotation This puts less stress on the shoulders as opposed to excessive internal rotation. At the top of the motion, your hands will be facing in toward each other with your shoulders externally rotated. You can turn the palms forward at the bottom or keep them neutral during the entire range of motion. 2 – Slight Decline Bench Slap a plate or two under one end of the bench. This will put you on a slight decline angle, allowing you to use the pecs more effectively while taking any unwanted stress off the shoulders. 3 – Floor Press When people are experiencing shoulder pain during the bench press, it’s usually because their mobility is limited and they’re trying to perform the press through a greater range of motion than their shoulders are ready for by bringing the dumbbells down too far. You can eliminate this completely by doing floor presses either with dumbbells or a bar. Pressing from the floor reduces the range of motion your shoulders have to go through and maintains tension on the
Origin: Tip: Bench Like a Beast Without Shoulder Pain
Tip: Ramping Up the Reverse Hyper
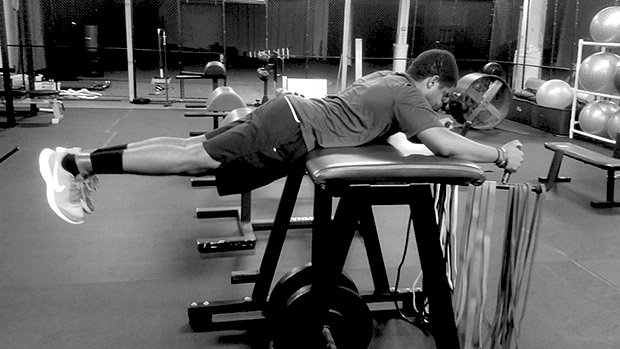 The reverse hyper can develop tremendous amounts of strength in the lower back, glutes, and hamstrings. Doing them is a great start, but you’re missing out if you haven’t tried them with an isometric hold. Lifters will often load the reverse hyper with multiple 45-pound plates and perform reps with ease, but then load a couple 25 pound plates – if that – and struggle to maintain an isometric hold for longer than 20 seconds. This is a problem because it shows a weak link in their training. It’s understandable that these isometrics often get neglected. They’re boring, difficult, and they might even hurt your ego if going heavy is always the number one priority. But if building more stability and being able to squat, deadlift, and press with more efficiency are important to you, then these need to be a part of your programming. Loading It Up When doing isometrics with reverse hypers there are two ways to add load. The first is how we typically add load, with the use of weight. The second way is to add manual resistance from a partner pressing down on the back of the feet. Using manual resistance can be a very effective method if done properly. It’s far easier to adjust the load – you either press down harder on their feet or release some. Reverse Hyper Isometric Hold – Weight Reverse Hyper Isometric Hold – Manual Resistance Single-Leg Holds You can also do the isometric holds focusing on a single leg. Either specifically one leg at a time or doing switches where you target both legs throughout the set but one leg gets more focused pressure. This is great to use if you have any muscular or strength imbalances in your legs, and can also create a more intense isometric hold. Single-Leg Isometric Hold – Manual Resistance Single-Leg Isometric Hold – Weight Single-Leg Switches – Manual Resistance Other Variations Here are some other variations that’ll intensify the movement and bring up specific weak points of the hips and trunk. Abduction Isometric Hold – Manual Resistance Adduction Isometric Hold – Manual Resistance Anti Rotation Isometric Hold – Manual Resistance Use these once you’ve set the foundation with basic double and single leg isometric holds. If your weak points are your hips, incorporating the reverse hyper isometric hold with hip abduction or adduction is a fantastic warm-up, especially the abduction on days when you have to squat or deadlift where hip abduction from spreading the floor and driving the knees out will be a necessity. Since the tension can be easily adjusted with manual resistance, I believe it’s the most effective means of doing these exercises. Not only is your partner forcing you to either abduct or adduct, they’re also pushing your feet down so you’re still getting all of the benefit of the reverse hyper isometric hold itself. What If You Train Solo? If you train alone and still want to do these exercises, you can do so by using common things in most gyms. For adduction (legs come together), you can put a foam roller or medicine ball between your feet and squeeze it. To perform the hold with a focus on abduction (legs spread out) you can take a small therapy band or double up a resistance band and wrap it around your ankles, driving outward into the band while you hold the reverse hyper position. Ways To Add It Try adding it when you do core work. The lower back and hips are, after all, part of the core. A simple progression of using isometrics could look something like this: Week 1:3×20 seconds Week 2:3×30 seconds Week 3:3×40 seconds Week 4:3×20 seconds (heavier than week 1) Other ways you can progress include adding additional weight every week and keeping the seconds the same, adding an additional set and keeping the load the same, or varying the type of hold. You might also consider keeping the holds shorter rather than longer. If your goal is true stability, a 10-20 second hold is plenty of time to build that strength up, where 40-60 seconds is a little more focused on endurance of the functioning muscles. So if you need to build that bracing strength necessary to handle bigger squats and pulls, then train in a shorter time range, focusing on maximum tension throughout the hold. Using and progressing these movements will build your strength and stability like no other movement. Start slowly and add these to your core work or at the beginning of your session and watch as you feel more stable, stronger, and powerful through your
Origin: Tip: Ramping Up the Reverse Hyper
Worthy vs. Worthless Vitamins: Your Guide
 The 30-billion dollar a year vitamin industry is suffering from existential angst right now. Their collective stomachs are all aflutter because of the publication of a new study in the Annals of Internal Medicine that says vitamin or mineral supplements offer no discernible benefits; that they don’t reduce the risk of death from practically anything and they might, in fact, harm people. (1) Now all those supplement companies are wondering if they should instead start selling roofing materials or something else useful. I’ve got no solace to give. Unfortunately for the vitamin seller, yeah, most vitamins and mineral supplements are a waste of time. Some could actually harm you. And yeah, you’re often better off getting some vitamins, minerals, and other classes of supplements from whole foods. But there are notable exceptions. In those cases, it’s unrealistic or even plain daffy to rely on whole foods to fulfill all your supplement needs. Let’s take a look at some of the most common vitamins, minerals, and supplements and see if we can make some sense of it. Multivitamins – Forget About ‘Em I don’t think there’s a single reputable study that shows they’re effective, but we don’t need studies to come to this conclusion. There are just too many problems with multivitamins: The one-size-fits-all philosophy. The human need for the 24 vitamins identified by science is based on a bell curve and while it may hold true for a 150-pound municipal worker named Phil who lives in Akron, Ohio, they might not hold true for sweaty athletes, bigger (or smaller) people, or you. Giving the same vitamin combo to every man or woman alive is like making only one size of underwear for everybody – fine for some, but uncomfortable, unworkable, and in the case of vitamin-caused skin reactions, even unsightly for others. So many possible interactions. Vitamins A, D, E, and K are fat-soluble and, as such, are best taken with food. Iron shouldn’t be ingested with coffee or tea because the tannins in them interfere with absorption. Likewise, iron blocks the absorption of zinc and copper. Vitamins E and A can gang up on K. Cherry picking and not seeing the big picture. Maybe, just maybe, these nutrients aren’t supposed to be isolated and taken by themselves. Maybe they need to be taken in whole-food form to be truly effective. Maybe the nutrients need to work in conjunction with some (or maybe even all) of the micronutrients and phytochemicals intrinsic to the whole food source for them to work. Calcium – Forget About It Taking too much calcium (more than about 1,000 mg. a day) can be a huge problem. At worst, the calcium starts to accumulate on the linings of your heart and arteries so that they look like the tiled walls of a White Castle restaurant. The excess calcium might also form kidney stones or, on the less severe end of the spectrum, cause constipation. Calcium is one example where people really would be better off getting this crucial mineral from whole food. Here’s the thing: When you get too much calcium from foods (milk-based protein powders, dairy products), a fail-safe system kicks in and the intestines start limiting further absorption of the mineral. Not so with calcium supplements. They have no fail-safe system. The more you take, the more ends up in your urine, blood, kidneys, heart, and arteries. Vitamin D – Take It! The study from the Annals of Internal Medicine found that when people who weren’t deficient in vitamin D took vitamin D supplements, they had higher risks of death from all causes, particularly cancer. It’s important to realize that this study was based on people accurately remembering and reporting what they had eaten over a period of several years, so it’s easy to be skeptical, particularly when several other studies have shown that people who took vitamin D supplements lived longer, on average, than those that didn’t take it. Sure, ideally, we’d all lie naked in the sun like harp seals for at least 20 minutes a day so we could make our own vitamin D, but that just isn’t plausible for everybody, particularly if you live anywhere north of Memphis, Tennessee (about 2500 miles north of the equator) or, for that matter, anywhere south of Santiago, Chile. (2) The sun just doesn’t get high enough during winter months in those areas for all those vitamin-D generating UVB wavelengths to benefit us. Never mind persistent clouds. The Chippewa tribe of Michigan had an old saying: “If the shadow of a groundhog is longer than it is tall, its body isn’t making vitamin D.” Alright, the Chippewa didn’t say that, but if you apply the “longer than tall shadow” thing to yourself, the advice pretty much rings true. If you can’t regularly spend a few minutes in the sun, or you’re a mole-like gym person who rarely see any lights that aren’t fluorescent, you should probably take vitamin D year-round. Vitamin B3 (niacin) – It Depends If you’re over 40 or 50, or if you’ve got cholesterol issues, think about
Origin: Worthy vs. Worthless Vitamins: Your Guide
Tip: The Athlete’s Push-Up
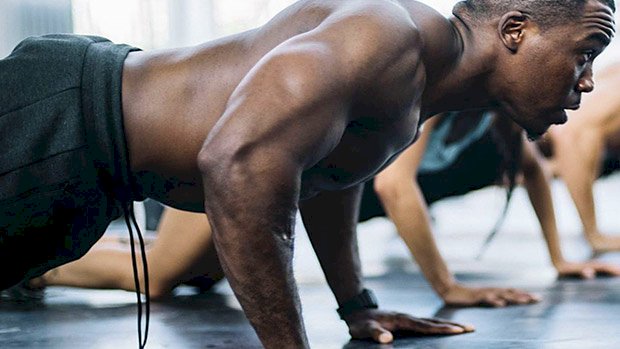 Most athletes need upper body explosive power. In the quest for improved performance, many athletes unfortunately end up injured because they choose high-risk methods and exercises. While exercises like plyometric push-ups (clapping push-ups, box push-ups, etc.) can be great, they can also be harmful. With a background of shoulder injury, doing plyometric push-ups will cause a lot of stress in the landing and deceleration phase. Many add to this stress by dropping from way-too-high boxes, increasing the stress even more. If you’re one of those athletes who has to be smarter about your exercise selection, but you still want to increase your explosive power, go for banded push-ups. To increase explosiveness, you need to do exercises with the intent of being as powerful as possible through the WHOLE range of motion. Ballistic training methods like med-ball throws are perfect for this, but in the world of push-ups, the resistance band does the trick. There are basically two ways to do this exercise: either with a pause in the bottom position, or repeatedly without pause. The former will train explosive starting strength; the latter will improve reactive
Origin: Tip: The Athlete’s Push-Up
9 Underrated Exercises You Need
 You’re probably not taking advantage of these underappreciated exercises, but you should be. They’re surprisingly beneficial. Here’s what to do, why, and some set and rep recommendations for each. 1. Stability Ball Wall Squat By using only a ball, a wall, and a set of dumbbells, this move basically offers the same benefits as a Smith machine squat… but without the Smith machine. Oh wait, you still think the Smith sucks? It’s true, the fixed bar path of the Smith machine isn’t a great way to improve your free-weight squat performance since the two movements involve different mechanics, but not everyone wants to be a powerlifter. And not everyone judges every lower-body exercise by how it relates to their barbell squat. For the purpose of building and strengthening your quads, both the Smith machine squat and the wall squat are great options. Plus, who says you can’t do both? Liking one thing doesn’t mean canceling out the other. These make for a great burnout move towards the end of a workout. Set and Reps: 2-3 sets of 12-30 reps. 2. Chest Supported T-Bar Row Many lifters don’t appreciate the unique benefits this machine offers relative to most other horizontal rowing variations. T-bar rows fit your strength curve more closely than most other rowing exercises. When doing horizontal rowing exercises, the lever arm is at its longest when your humerus is perpendicular to the force vector. So if you’re doing barbell bent-over rows or one-arm rows with your torso roughly parallel to the floor, the lever-arm is at its longest when your humerus is parallel with the floor (in-line with your torso). This is at or very close to the end of concentric portion of the range of motion. But when doing the T-bar row, the weight is getting lighter as you pull it because the higher the angle of the bar (closer to being vertical), the more weight is going into its pivot point, so it offers a mechanical advantage over the load as you pull it in on every rep. Sure, you can do T-bar rows by simply anchoring a barbell in a corner. However, the machine version is far less awkward, and the chest pad support allows you to deal with heavier loads. It also makes it more difficult to cheat. Set and Reps: 3-5 sets of 6-20 reps 3. Angled-Barbell Leaning Press with Band Back in 2011, I coined the term “angled barbell training” to represent the wide variety of great exercise options offered when using the Landmine Device (or with a barbell in a corner). I also co-produced the first DVD on the subject with Bert Sorin, the original inventor of the Landmine. And today the standard angled-barbell (landmine) press is a pretty popular exercise. That said, an underrated version of it is to simply lean your torso forward to change it from a diagonal pressing action to a vertical (overhead) pressing action. This is much like how an incline barbell press creates a different training stimulus to an overhead barbell press. I failed to cover the leaning variation in The Ultimate Guide to Landmine Presses. However, I did discuss the benefit of adding band resistance to angled barbell presses: “As you press the barbell, the weight load actually gets lighter. Since you’re getting stronger as you extend your arm (due to creating a shorter lever arm), it makes sense to add a band for accommodating resistance: the band creates a continually greater resistance challenge as you continually gain a mechanical advantage.” Just like with the standard angled barbell press (where your torso’s more upright), if you’re in a split-stance, you anchor the band underneath your front leg. If you’re in a parallel stance, you anchor the band underneath the same-side foot as the arm you’re pressing with. Set and Reps: 3-4 sets of 6-20 reps each side 4. Cable Chops (Horizontal and Diagonal) Back when I was coming up as a trainer, cable or wood chops were all the rage. Now, you’re hard pressed to find folks doing dynamic rotational training exercises like this, and it’s far more common to see anti-rotation (Pallof) presses, which I believe are overrated. Look at athletes in action and it’s obvious: the torso has an active role in rotational strength and power production in actions like throwing, golfing, batting, punching, etc. And if you want to improve your rotational ability, the principle of specificity dictates that you need to practice dynamic rotational exercises like cable chops. They’re great for teaching your torso and hips to work together to produce rotation. Set and Reps: 2-3 sets of 8-15 reps each side 5. Side-Lying Rear-Delt Flye Exercises like face-pulls, rear-delt flyes, and wide-grip rows maximally load your arms when they’re out to the sides, which is when the posterior shoulder musculature is in a shortened range. However, they neglect to strengthen the aspect of horizontal shoulder abduction when your arm is in front of, or across, your torso – when the posterior shoulder musculature is in a mid to lengthened range.
Origin: 9 Underrated Exercises You Need
