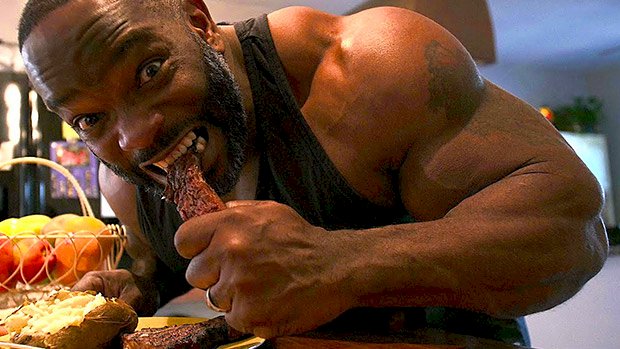
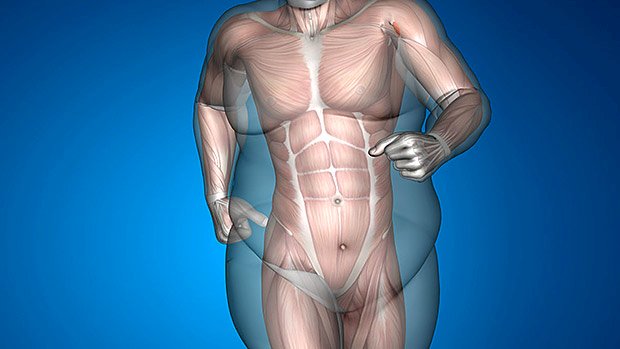
 The Testosterone Boosting Diet? Is there a way to boost testosterone, or at least optimize it, via diet alone? First off, think of testosterone like a sex and reproduction barometer. It’s partly responding to the environmental inputs. When it comes to diet, the question is: Is there enough food to drive metabolic demand? Not too little and not too much? If so, bring on the T! The metabolism wants the “goldilocks effect” when it comes to testosterone. This is why fat couch potatoes and ripped, show-ready bodybuilders have no motivation, no desire for sex, and soft, non-responsive, or less reliable erections. So, the first thing to remember is, don’t go too low for too long in any one of the macronutrients (protein, carbs, and fats). That can be a T killer. The second thing is to balance training with recovery. But this topic is a nuanced one, and I don’t want to come down too hard on any one dietary practice. I’ve seen slightly overweight individuals go on keto diets and measure notable positive changes in T levels. I’ve seen that same diet cause issues in libido, muscle gains, and erections. The discrepancy is explained by the individual. If I had to give a general rule of thumb (which is usually dangerous and stupid), I’d say… Don’t go below 20% fat. Don’t go below 30% carbs. Keep your protein above 20%. A 40-30-30 (carbs-protein-fat) ratio if you’re trying to gain muscle or compete in a sport is great. A 30-40-30 macronutrient ratio if you’re wanting to lose fat is good for most. Oh, and some studies suggest that if you’re low in magnesium, zinc, or vitamin D you may get a T boost from supplementation. ZMA® along with appropriate sun exposure and 2000-5000 IU vitamin D daily (take with your biggest meal) may be some good insurance. So to repeat… Stay away from extremes in leanness and extremes in fatness. Stay away from extreme macronutrient and calorie imbalances. Train enough, but not too much. If your T is optimized, you should feel it. Your brain will be focused and driven. Your exercise performance and recovery will be on point. You’ll be lean and feel fit. And your penis will be responsive, recharged, and
Origin: Tip: Can You Boost Testosterone with Diet?
Author: ondriving
Question of Strength 57
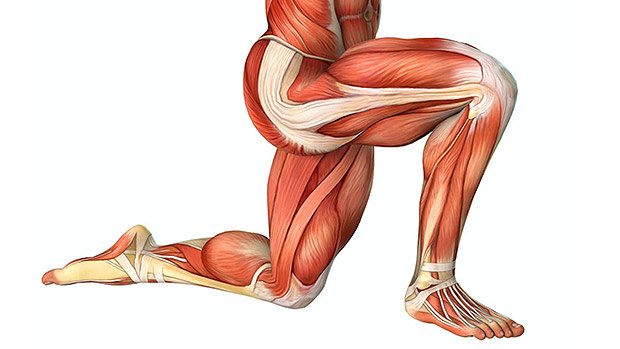
 How Limb Length Affects Training Q: You’ve said before that the front squat is a better lower-body lift than the back squat for people with long legs. How else can limb length play a role in exercise selection? A: Exercise selection is the most important training variable. Imagine if you’re a patient at the doctor’s office and the conversation went like this… Doctor:I’m going to prescribe you 200mg twice a day. Patient:200mg of what, Doc? Doctor:What do you prefer? Which medication do you feel like taking? It doesn’t make sense, right? Well it’s the same thing with training. Think of sets, reps, and training methods as the dosage and exercises as the medicine. While everybody will improve their body and performance by gradually becoming stronger on the big basics, simply doing those and nothing else will emphasize certain muscles over others, and might not end up giving you the result you’re looking for. Some people will get great pec development from the bench press while others will only grow their triceps and delts. Some will build tremendous quads from back squatting and others will build bigger glutes. Limb length relative to torso length is one of the main factors that determines which muscles receive the most stimulation. Here’s a general overview: Body Type 1 – Long Limbs/Short Torso Tend to progress more easily on pulling movements than on pressing ones Have an easier time getting stronger on the hip hinge/deadlift than on the squat Upper Body Pressing Pecs are the easiest to develop Delts are second Triceps are the hardest to develop Upper Body Pulling Lats are the easiest to develop Rhomboids, rear delts are second Biceps are third Upper traps are the hardest to develop Lower Body Training Glutes are the easiest to develop Hamstrings are second Quads are third Calves are the hardest to develop Body Type 2 – Short Limbs/Long Torso Tend to progress more easily on pressing movements than on pulling ones Have an easier time getting stronger on the squat than on hinging/deadlifting Upper Body Pressing Triceps are the easiest to develop Delts are second Pecs are the hardest to develop Upper Body Pulling Upper traps are the easiest to develop Biceps are second Rhomboid, rear delts are third Lats are the hardest to develop Lower Body Training Quads are the easiest to develop Calves are second Hamstrings are third Glutes are the hardest to develop All of this is true most of the time, but there will be some exceptions. (Arnold, for example, is long limbed and had huge biceps.) That info allows you to better select the assistance work you’re doing in a program by telling you which muscles will need added direct work. For example, I have short legs, so I don’t need any direct assistance work for the quads. They grow just fine by doing squats exclusively and I prefer to invest my training time on exercises that are actually needed to fix a weakness. However, I do need direct glute and hamstring work. You don’t need as much (if any) direct work for the muscles that are the easiest to develop, but you’ll need a lot more for those that are the hardest. Knowing this also helps us better select the big lift variations for our workouts. If I have long legs, the front squat will be better than the back squat for overall development. Why? Because with the back squat I’ll get mostly glutes and some hamstrings while with the front squat I’d stimulate the quads. A heels-elevated back squats would also do the trick. While there’s nothing wrong with good, smart programs you find on the internet, you should still give yourself some leeway in exercise selection: you can respect the spirit of a program while choosing better movements. Delt-Building Lateral Raises Q: When I do lateral raises I feel it mostly in my traps. How can I make them more effective at hitting my delts? A: Welcome to the club! I have naturally narrow shoulders and short arms which tends to favor the development of the traps over delts. But I do have a few tricks when it comes to lateral raises. Before I get into the three exercises, I must emphasize one point: to make the lateral raise effective at recruiting the delts you must focus on pushing the dumbbells AWAY, not on lifting them up. Try to bring the dumbbells as far to your sides as possible. They should only go up as a result of you pushing sideways. This tip alone should minimize trap recruitment. 1. The Backpack Raise No, you won’t be doing lateral raises while wearing a backpack (although that would likely work too) but with resistance bands looped around your shoulders to keep them down. The traps get involved when the shoulders raise up instead of just rotate. The bands, by keeping the shoulders down, help you focus on the delts better. To set up, you step on the inside of the band and hook the other end around the shoulder. Then do that on the other side with a second band. The bands’ position on the shoulder is important. You want to place it on
Origin: Question of Strength 57
Tip: The Bodyweight Superset for Big Arms
 When most people want to build their arms, they head straight to the EZ-curl bar and the rope pulldown machine. That’s a mistake. For most lifters, chin-ups and dips should form the foundation of their arm training. Here’s a superset that’ll get the job done. Chin-Up and Dip Superset A1 Chin-Up – 4 sets to near failure A2 Dip – 4 sets to near failure No rest between A1 and A2. Rest approximately 2-3 minutes between supersets. This means that you’ll do a set of chin-ups, then immediately do a set of dips without rest. That’s one round and you’ll do three more, resting a couple of minutes between supersets. Perform these exercises to near but not absolute failure. Consistent absolute failure on all sets adds disproportionate fatigue to the training effect. For the chin-ups: Choose a partial or fully underhand grip to emphasize biceps recruitment. Fully extend your elbows at the bottom with control and then reverse direction. Your scapula should move with you and not remain locked in place. Use full available range of motion at the top and bottom under control to avoid needless injury risk. Squeeze at the top and then repeat. For the dips: Use caution as they can put your shoulder in a compromised position and aren’t suitable for those with injured shoulders or poor joint mobility. Ensure the ball of the joint doesn’t glide forward from the socket in the bottom of your dip, which would result in the ball pushing repeatedly against your biceps and rotator cuff tendons. Descend to a depth you can control and then extend elbows to lockout. Some trainers emphasize remaining upright for more triceps focus, but more forward torso lean may allow more shoulder comfort and will still smash triceps while engaging more chest. Remember, classic-era bodybuilders used bodyweight compounds as the foundation of arm training. Though prominent bodybuilders of the ’60s and ’70s lacked the sheer mass (and abdominal distention) of modern pros, Arnold and his contemporaries never lacked for world-class
Origin: Tip: The Bodyweight Superset for Big Arms
The 5 Greatest Rowing Exercises
 Are you a powerlifter? Increase your row and you’ll bench more. Do you fight? A stronger row means harder strikes and a tighter defense. Just training for life? A stronger row will improve shoulder health, posture, and general performance. Done correctly, the row variations below are probably all you’ll ever need in this exercise category. So whether you need to build a foundation, work around a low back or shoulder injury, or simply have forgotten the basics, one or all of these exercises will literally get your back on track. 1 – T-Bar Row The T-bar row is a true classic and one of the best overall row exercises. Yes, it’s the one you saw Arnold perform in Pumping Iron. It requires you to use your lower back and hips to stabilize the trunk while you perform rows using your upper back muscles. So, in addition to building pulling strength and your upper back, the T-bar row also develops lower back strength and stability. Start with a light load and place your body in a tight and stable position. Focus on generating force from the ground (by pressing the heels out to the sides to activate the hips) and keeping the abs engaged (pull the ribs down and hold what’s in effect a plank position). That’ll force you to pull with the right muscles instead of just compensating with your lower back. 2 – Chest-Supported Dumbbell Row Besides being more low-back friendly, the chest support makes it hard to cheat and use momentum. This annoying fact will damage a lot of egos and is probably the reason why some lifters often prefer seated cable rows – they make it easy to use a lot of body English. To do the chest-supported row, you need to actually support yourself with your chest and not just lie flat down on the bench. Take a look at how I place my hips in the video and you’ll notice that I adopt a solid stance, thus creating tension from the feet, through the hips, through a stable spine (ribs down, abs engaged to not hyperextend and “leak force”), all the way to the chest. You need a tight body position to get the most out of the exercise and pull with the muscles that are supposed to be doing all the pulling. Too many people mess this up and wobble all around. 3 – One-Arm Dumbbell Row This is probably the best overall barbell/dumbbell row exercise. Sure, it builds your ability to lift things from the ground, but it also improves your defensive abilities against an opponent who’s trying to pull you down or knock you off balance. It does all that by enhancing thoracic spine rotation and extension while building stability in the rest of the body. You really have to use all your core muscles to fight the body’s inclination to rotate and side-shift, meaning you’ll create actual, real-life, functional core strength. Even though this is a classic, many butcher it by failing to achieve full body tension, which leads to energy leaks. Aside from keeping a solid stance, the most important technical aspect is to push the supporting hand hard into the bench while you pull. This “diagonal” tension makes the lift stronger and safer. 4 – Inverted Row Most people struggle to perform this correctly because it requires being able to activate the right muscles. If you can’t pull yourself all the way up to touch the bar, you simply lack upper back strength, period. If this applies to you, no wonder your shoulders hurt when you do bench press, push-ups, or pull-ups. Another great aspect of the inverted row is the need for posterior chain involvement. The entire backside needs to be activated at the same time, which is different from a lot of movements where you just focus on the plank and the “front core.” Getting used to stabilizing your backside in this way will improve your performance in other lifts and activities as well. Oh, and it’s one of the safest pulling exercises you can do when your low back is messed up. 5 – Standing One-Arm Cable Row The ability to perform resisted diagonal and rotational movements is crucial to human functions like walking, running, climbing, and throwing. The trouble is, regular/classical strength training lives primarily in the land of bilateral and symmetrical loaded exercises, with little thought given to rotation. Obviously, some exercises include anti-rotation tendencies, but few traditional exercises involve actual rotation qualities. The standing cable row is a great introduction to rotational training. While the main focus is on the row, it will improve and train thoracic/upper body mobility and core/hip stability. This makes the body more fluid and
Origin: The 5 Greatest Rowing Exercises
Tip: Strict Diets vs. Your Metabolism
 Can You “Break” Your Metabolism? Some people say that a really strict diet – like one you do to get ready for a bodybuilding show – will wreck the metabolism. Will it? Well, it probably won’t… at least not in the way most seem to think. There are definitely some issues you can induce with extreme dieting and exercise, but “wreck” is probably too strong a term. That assumes you broke something. The metabolism doesn’t break. In fact, it’s doing exactly what it’s designed to do. Let’s get some definitions out of the way, because that’s where most of the confusion starts. You’ve likely heard of the admittedly vague and non-medical terms like “adrenal fatigue,” “starvation mode,” and “metabolic damage.” These are more marketing lingo than medical terminology. But that doesn’t mean they don’t have some utility. In medicine there’s often dysfunction before disease. For example, if you have a fasting blood sugar level above 126 on two separate occasions, then I can diagnose you with diabetes. However, if you have a blood sugar above 100 but below 125, what do I call that? You don’t yet have diabetes, but you obviously have some dysfunction. We call these a lot of different things in medicine: prediabetes, dysglycemia, impaired glucose tolerance, or something else. Same thing with the metabolism. When you have difficulty sleeping, insatiable hunger, unstable mood, unpredictable energy, uncontrollable cravings, and you’re no longer responding to the same calorie deficit BUT your blood labs and vitals are all normal, what do we call that? There’s obviously something going on, but we can’t put a diagnosis on it, can we? So, we use some descriptive terms like metabolic compensation, metabolic resistance, metabolic dysfunction, or metabolic damage. Or like you, we just say, “Damn, I think I wrecked my metabolism!” You didn’t. What happened is a predictable phenomenon and we know some (although not all) of what it’s about. Part of it is what research calls “adaptive thermogenesis.” What Happens During Adaptive Thermogenesis A competition diet is well-known for inducing a very wide calorie cap. You cut calories down and you expend a lot of energy through weight training and/or cardio. In the same way not changing your car’s oil or filling up with gas will cause the engine to conk out, the body does not respond well to this large energy discrepancy. In response it will increase hunger, reduce motivation, lower energy and (most insidiously) decrease its metabolic output. It does that in many ways: It reduces resting energy expenditure through downward regulation of thyroid and other hormones. It increases hunger and cravings. It sneakily causes you to move around less the rest of the day. If you normally get up and walk around 100 times per day you’ll find that it’s now only happening 25 times per day. If you move in your sleep that will stop as well. You’ll also burn less during exercise, something research calls “constrained caloric burn.” What’s worse, after the show, when you no-longer have the external motivator and would prefer to eat like a human being, you’re primed to gain all that weight back plus some. I’ve come to call this the “metabolic credit card effect” –– you get short-term results, but you pay steep metabolic penalties later. Anyone that’s seen a first-time figure competitor blow up like a helium balloon post competition knows this well. Is that a wrecked metabolism? I suppose you could describe it that way, but another way to look at it is your metabolism is doing just what it’s designed to do. It feels it needs to recover that debt. After all, it evolved in a feast and famine reality and it thinks it’s doing you a favor by mitigating the famine and maximizing the feast. How to Limit Metabolic Compensation The good news is there are some ways to reduce metabolic compensation. Here are some things to do: Do your best to maintain as much muscle as you can. The metabolic rate will not slow as much and be more resistance to fat regain. This means to make weight lifting the dominant part of your fitness regime during fat loss. Cardio becomes a little more important after weight loss, when the metabolic rate has lessened. You may want to save your cardio for after, rather than during the competition diet. Eat more protein, see the first point above about maintaining muscle mass. And probably increase the amount of protein as a percent of total calories. Do this during, but perhaps more importantly, after fat loss. Cycle the calorie gap, having times where you’re in a strong deficit and other times where you’re in no deficit at all. The recent MATADOR study (minimizing adaptive thermogenesis and deactivating obesity rebound) showed this strategy got better results, had less metabolic adaptation, and much longer lasting results. Don’t eat like an asshole when it all ends. Focus on blander foods and less variety of them. Doing the traditional burger, pizza, and cheesecake binges will trigger the
Origin: Tip: Strict Diets vs. Your Metabolism
Tip: Change Your Attitude About Achy Joints
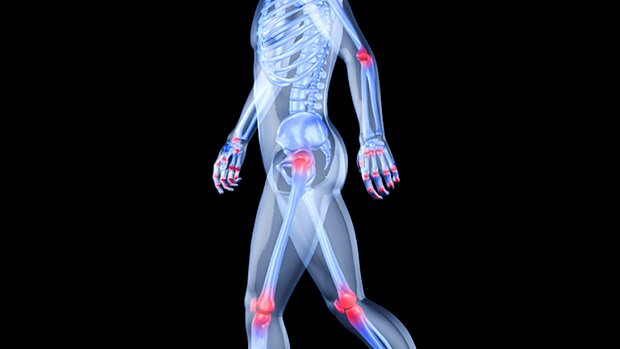 Screw Your Achy Joints If you’re over 40, it’s no excuse to let up. Everyone who’s been doing any serious lifting for at least 10 years wakes up in the morning feeling like they spent the previous day trying to ride the back of Bodacious the bucking bull, and was flung clean over the stands into the deep-fried Twinkie concession stand. Get over it. Sure, you can do your stretching, that hot Yoga where they treat you like a pork dumpling, or whatever rehab exercises fit the situation, but for the most part, you’re always going to hurt. The Two-Part Plan For Recourse 1. Simply get smart about it. Do exercises that don’t hurt the particular joint; use grips or foot positions that allow you to train with no pain; do a reduced range of motion, or lower the weights with a slower tempo. A good 4-second descent should take the strain off any angried-up tendon. And also… 2. Say goodbye to sets under 5 reps. This is your one, big, lifting concession to Father Time. You should forget about doing sets for fewer than 5 reps. There’s just no need to use such heavy weight, and the risk of suffering an injury that you can’t work around, like tearing tendons or ligaments that just aren’t as spry as they used to be, is just too great. No worries, though. You can stay plenty strong by devoting some time to sets of 6 to
Origin: Tip: Change Your Attitude About Achy Joints
Tip: Two Sumo Deadlift Myths, Destroyed
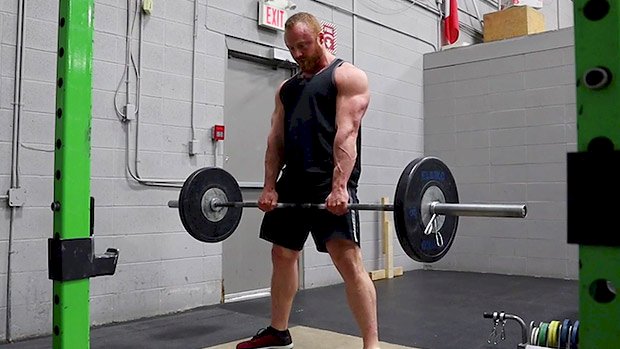 There are two big reasons to use sumo deadlifts: To build a powerful posterior chain and to lift as much as humanly possible. Training for the former means focusing on glutes and hamstrings, along with upper and lower back muscles. A good hinge pattern hits all of these. But let’s address the second reason. For high-level powerlifting competitors (those trying to lift as much as humanly possible), it’s fine to use any technique within the rules that’ll allow you to lift the most. If this means a squatty sumo, so be it. Adjustments made for a competition squat, bench, and deadlift are to maximize leverages to get the highest one-rep max total possible. But those adjustments are often different from proper training technique, and they’re even counterproductive to maximizing the training effect for strength and hypertrophy. They often create injury risk, accepted by competitors trying to win. Think exorcist-level bench arch or round-back deadlifts. For those of us sumo deadlifting for the other reason, let’s dispel the two biggest myths and fix the flaws in this lift to make it a safer training tool that’ll get us better results. Myth 1 – Your feet need to be as wide as possible. A lot of lifters think their feet need to be spread as wide as the plates will allow, but that’s a good way to drop a plate on your toes. Really, your feet just need to be outside of your arms and hands in order to be a sumo. Take a look. Granted, a wider stance feels great for some and has leverage advantages which shorten the distance from ground to lockout. But some people’s hips just aren’t mobile enough to get into a wider position. Wider isn’t necessarily better. If you get your legs just outside your arms, this is called the “hybrid sumo” or “semi-sumo” and it’s a perfect option to gain the benefits of deadlifting. Some clients I’ve worked with can’t get into a conventional stance (arms outside of legs) without rounding their lower back. This is caused by a limited hip flexion range in a narrow stance, which makes the semi-sumo a better solution. A semi-sumo stance can also prevent knee valgus or inward collapse. This is another common problem that arises when placing your feet too wide. In this case, your knees don’t remain stacked above your feet because your hips can’t externally rotate wide enough. Or it’s possible you aren’t focusing on creating torque with the hips to pull the knees into the wider position. This may lead to knee pain and injury over time if not addressed. Myth 2 – You need to sit low in a squat. Deadlifts are a hip hinge pattern. There will be some people who can squat their sumos and lift more weight while experiencing zero pain. For the rest of us, let’s make a simple adjustment and get a better effect. When lifters set up with low hips that jump up before the weight leaves the ground, this usually indicates a loss of back and core tightness. Your hips and hamstrings are seeking the tension you failed to create during the setup. There’s no problem with beginning in a squat position then pulling the hips high and getting wedged in before lifting, but issues arise when the hips jump in an uncontrolled manner as the lift is initiated. So, when setting up, firmly grasp the bar and pull it into your shins. Pull the shoulder blades together and create a flat neutral spine. Then elevate your hips until you feel coiled tension in your hamstrings. When you feel this tension, your hips are like a loaded spring ready to snap forward and generate more power. In a recent seminar, Tony Gentilcore described this process as creating a “lifter’s wedge.” A Recap and a Few Additions Your sumo deadlift shouldn’t look like a squat. Your hips shouldn’t drop to the level of your knees. Your feet don’t need to be as wide as possible, and your lower back and knees shouldn’t hurt as a result. Now that we’ve got those essentials out of the way, let’s tack on a few other notes: Pull the slack out of the bar. You can do so by pulling on it without enough power to lift it off the ground. This should create tension through your body and a stable spine. Then initiate a smooth but powerful push with your hips forward toward the bar. Lock out by squeezing your glutes under your ribcage and avoid hyperextending your lower back. Control the negative (lowering) portion. Just remember that heavy weight will come down quickly. Some lifters can touch-and-go smoothly between reps with tight form. Others need to reset every rep to maintain good form. Avoid bouncing the weight between reps. Use the style to best maintain excellent form, maximize training effect, and walk away healthy. Avoid rounding at the back. Some lifters argue that a rounded back is safe and makes them stronger. They’re usually referring to some roundness of the thoracic (mid-upper) spine, done by skilled and experienced powerlifters to lift more in training and competition. A practiced core brace with a rounded thoracic spine and flat lumbar is often a
Origin: Tip: Two Sumo Deadlift Myths, Destroyed
Tip: Fix Your Rounded-Back Deadlift
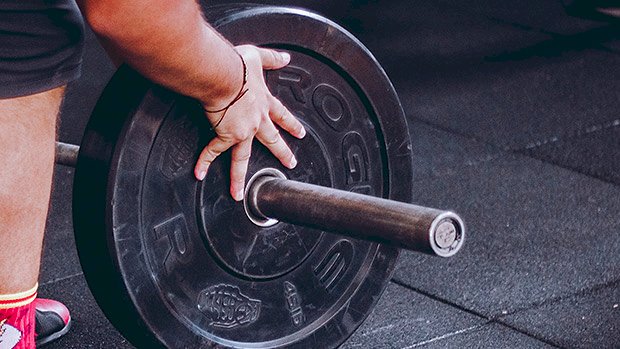 Rounded deadlifts are an epidemic. You can’t scroll through Instagram for two seconds without seeing some bro attempting a max effort deadlift with their spine bending like a accordion. A little rounding in the thoracic spine is actually okay, but most people round over at the lumbar region which turns an epic one-rep max attempt into a cringy display of a nearly snapped low back. Lumbar flexion during deadlifts occurs because of one of the following (or a combination): Weak or unsustained intra-abdominal bracing Weak spinal erectors Loss of tension in the upper back How to Fix It Here’s an odd trick I learned from powerlifter Greg Nuckols that fixes all of these common causes. (And this trick can be used for the squat as well.) Take a band and anchor it to a heavy weight in front of your deadlift setup. You won’t need a strong band. A light band goes a long way with this drill. Where you anchor the band will depend on how tall you are as well as your deadlift variation. If you’re doing a stiff-legged deadlift or an RDL where you’re more hinged over, you’ll need to anchor the band closer. If you’re doing something more upright like a conventional or trap-bar deadlift, the anchor should be further. Wrap the band around your neck and do a few sets with this setup. You’ll feel your entire posterior chain light up. Why It Works The band will pull on your spine from the top down. The tension reminds you to stay tight while strengthening your spinal erectors. This will fix both low back and upper-back rounding. Thanks to the band, your deadlift is now stable, safe, and no longer a joint-crumbling eyesore. For programming, do these before your actual working sets. Or if you struggle heavily with rounding your back, you can do all your sets with this setup. Your spine will thank
Origin: Tip: Fix Your Rounded-Back Deadlift
Stretching Gone Wrong
 Tight hips? Stretch them out! Shoulder pain? Stretch out those pecs. Bad ankle mobility? Give your calves a good stretch. You’ve heard this advice before. You’ve been told by a personal trainer, physical therapist, or internet “expert” that stretching is the ultimate solution to all of your musculoskeletal woes. Over the years, static stretching has been dubbed somewhat of a panacea for a myriad of aches and pains. While it can be beneficial in certain scenarios, there are also many instances in which it could actually be harmful – especially if you’re stretching a muscle group into oblivion and getting no relief. Whether it’s a warm-up, a cooldown, or mobility work, some people look for ways to throw stretches into every workout. Many will even use assistance: bands, weights, partners, you name it, anything to get a deeper stretch. Sure, they may feel relaxed in that position, but it may not be eliciting the effects they actually need. Does Static Stretching Increase Range of Motion? This is why a lot of lifters stretch. If you want to get a better squat, or move like a gymnast, surely you need to stretch, right? The short answer is yes, it helps, but only if you do it consistently. Static stretching is really effective at improving range of motion (ROM) acutely. If you stretch your hamstrings for 30-plus seconds, you’ll stimulate the central nervous system, which will allow you to ultimately achieve a greater range of motion. Doing this consistently will help your body feel safer in an end range, allowing the muscles to extend a little bit more. The downside? If you aren’t stretching regularly, those effects will be limited. And to expect someone to stretch 3-5 times per week in perpetuity seems unreasonable. So yes, stretching CAN help improve your ROM in the short term, but studies show it doesn’t last. Researchers tested a 6-week stretching protocol to see if it would create lasting adaptations in ROM after a 4-week cessation. In the first 6-weeks during the stretching protocol, the mean knee ROM increased by an average of about 10 degrees. Unfortunately, as soon as the participants stopped stretching, their ROM returned to their baseline scores (Willy et. al. 2001). As such, stretching is only effective insofar as someone does it all of the time. It’s effective for creating temporary changes in the central nervous system to yield greater muscle extensibility, but it isn’t the way to go if you’re looking for a more sustainable improvement. A Better Approach Slow eccentrics (negatives) are preferable to develop long-term changes in range of motion. Interestingly, a study showed that eccentric training of the hamstrings actually increased the fascicle length of the biceps femoris (Potier et. al. 2009)! Effectively, eccentric exercise altered the architecture of the muscle. This would likely create a longer-lasting change than simply stimulating the nervous system, which is what we see with static stretching. Controlled eccentric exercises done once or twice per week can yield some pretty incredible changes in the end range. Eccentrics also give the added benefit of building strength in a movement, which makes it preferable to static stretching. For example, I might have someone with tight hamstrings do tempo Romanian deadlifts with a pause. Take a look: This will create a tremendous stretch in the hamstrings under load. Simply control a movement on the eccentric or lowering phase for 3-6 seconds with a 1-3 second pause in the bottom. A few sets of this is enough to leave you sore for days. Additionally, you’ll find that they’re stronger at end range. Is Stretching Beneficial for Tightness and Pain? It seems logical to stretch an area that feels tight. Stretching the muscle will help it relax, right? Well, not necessarily. Tight muscles can occur in two different scenarios: a muscle can be tight and weak or tight and strong. While these instances seem to contradict one another, I’ll explain how that happens. Our bodies have many different strategies of compensation. In the first case, for example, you might feel tension in your hamstrings because you actually have extremely weak hamstrings (and typically a weak core as well). The hamstrings become tight as a means of protecting the hips. In this case, eccentric training of the hamstrings is again the perfect remedy. Barbell good mornings would be a great option for building your hamstrings. By strengthening the muscle in question, you can effectively get the central nervous system to relax and feel safe enough to contract that muscle. Static stretching would certainly not be beneficial in training a weak muscle. While it may provide acute relief, in a few hours the tension will likely return to its original state. Conversely, a muscle that’s tight and strong may be compensating for another weak area. Let’s consider the latissimus dorsi. Men often have extremely tight lats. It can get so bad that they’re unable to lift their arms all the
Origin: Stretching Gone Wrong
Tip: The 50-Rep Leg Day Finisher
 High-rep finisher sets have their place in bodybuilding. And they’re not just for building mental toughness. They also create metabolic stress (the pump) which is one of the primary drivers of muscle growth. Just finish off your workout with one 50-rep set. Use short rest-pauses if needed toward the end: do as many reps as possible, then take 10 deep breaths and go again. Repeat until all 50 reps are completed. Or you can break this into two 25-rep sets with only 30 seconds between the two sets, but the goal is to get all 50 in one shot eventually. Here’s Chelsie Lysenchuk using goblet squats as a leg day finisher: Find a dumbbell that’s a quarter of your bodyweight. So if you weigh 200 pounds, that’d be a 50-pound dumbbell or kettlebell. Now do goblet squats for 50 reps. Remember, this can be a “broken” set. You can stand and catch your breath as needed, but you can’t put the dumbbell down or sit. If you’re truly sadistic, do these in pump/piston rep style where you don’t lock out. Those will hurt a lot and increase the metabolites a hell of a lot faster than doing full-range reps with a lot of breaks during the
Origin: Tip: The 50-Rep Leg Day Finisher
