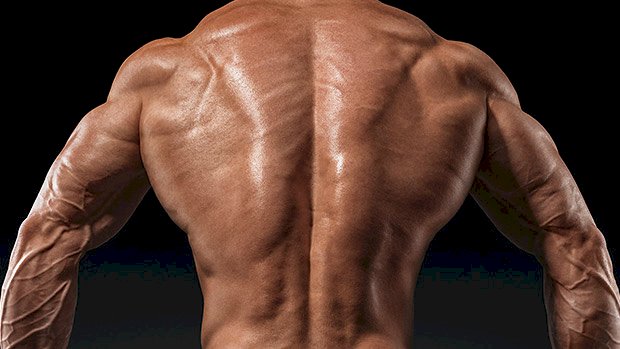
 Meathead bodybuilders learned through experience that feeling a muscle work during an exercise had a direct relationship to the development of that muscle. The greater the mind-muscle connection, the greater the development. It took science a while to catch up, as usual. But now it’s more or less accepted, in the “evidence based” practice of picking shit up and putting it down, that the mind-muscle connection plays a crucial role in bodybuilding. So what interferes with establishing a solid mind-muscle connection? How do you strengthen it? Can it be taken too far? Let’s dive in. Problem 1: Cue Overkill To get a strong mind-muscle connection, you first have to feel comfortable doing the basic exercise. The complexity of the exercise will determine how long that takes. If you play video games you know that the first levels are what allow you to master the skills of the game. There’s a lot of thinking involved and your reaction times are slow. But the longer you play, the less you have to actually think about the buttons on the controller. This happens with exercises too. It’s required for learning basic technique and also required for learning how to create tension in a target muscle. But once you’ve gotten it down, it’s no longer a challenge to initiate that mind-muscle connection. It just happens. Problems arise when crappy personal trainers give too many cues. You’ve probably witnessed this. The lifter is performing a slow squat while the trainer is barking a zillion different cues at him: “Sit back with your butt, brace your abs, bend at the knees, keep the chest out, twist your feet into the floor, drive back against the bar, head up, hold your farts in, sing a Barney song…” It’s absurd. And most of these cues are wrong anyway. The lifter is going slow because he has too many things to process while trying to move somewhat naturally in an unnatural state – squatting with a heavy barbell on his back. Do you think this many cues will increase the mind-muscle connection? Nope. And this type of mental overload can be a distraction that actually makes the lifter weaker because he’s neurally programming in the most inefficient way possible. But this scenario doesn’t just happen with a trainer. It can happen in your own head when you’re trying to remember every technical detail you’ve ever heard about a lift. If you feel overwhelmed by movement cues, then pare it back to the ones that allow you to execute the movement in a way that feels natural. Practice the exercise that way, then as you acquire more movement mastery, focus on feeling the target muscles work. Problem 2: “Train Movements, Not Muscles!” Getting a strong mind-muscle connection, at a very basic level, means you’re dictating proper tension distribution and increasing activation in a muscle. Interestingly, this is what bodybuilders refer to as “isolating” a muscle. While it’s true that you can’t isolate a muscle in totality, you CAN make sure that certain areas of musculature produce more tension than others. Yet we keep hearing this sentiment over and over again: “Don’t train muscles! Train movements!” This is overly simplistic thinking, even for pure strength athletes. Think of an advanced lifter who’s developed a technical problem in his movement pattern. More often than not, it’s caused by those muscles he hasn’t spent any time developing. Those are the crux of the problem. Lifters of all types who focus only on movement development are going to end up with very dominant muscle groups surrounded by a litany of weak links. Not a good thing for strength athletes. Smart lifters understand the importance of training movements AND training muscles. Smart coaches understand this concept too. Problem 3: Going Too Heavy Progressive overload is still your bread and butter when it comes to building muscle. If you’re not moving more weight for more reps six months from now, then you’re probably not growing much. But the context of that overload matters greatly. A 500-pound bench presser who’s using his pecs, triceps, delts, and upper back as contributors to the lift, will find that he’s using far less weight once he focuses the mind-muscle connection on his pecs. This means he’s shifting tension away from everything else and forcing the pecs to do the majority of the work. When this happens there’s less overall musculature contributing to the lift, but there’s far more tension on the pecs. Dave Tate tells a story about how he was using 150-pound dumbbells for pressing when he was focused on strength development. But once he focused on the mind-muscle connection of his pecs, he was down to using the 70’s. His overall loading went down, but his actual muscular development went up. With a strong mind-muscle connection, you’re progressively overloading a specific muscle. Not a movement. To achieve that, you have to put aside your “more weight” mentality and work within the framework of “more tension on the muscle” and add loading from there. If
Origin: Mastering the Mind-Muscle Connection
Author: ondriving
Tip: Lat Width – The Hard Way
 If you’re after more lat width, this finisher is a monster. Now, it’s not meant to replace heavier, progressive-overload back work. Instead, think of it as metabolic-stress work, which should come at the end of a workout and only be done for a single set. Don’t abuse it; just do it every other week or so. The Rack Pull-Up Marathon This finisher uses the rack pull-up as the foundation and then manipulates leverage and body position to create a nasty mechanical drop set. Set up a bar in a Smith machine or rack at upper-chest height. Set an incline bench out in front of you to prop up your straight legs. When you’re at the top of the pull-up, your thighs should be as close to parallel to the floor as possible. Now do this: Rack Pull-Ups:max reps Modified Behind-The-Neck Rack Pull-Ups:max reps Modified Rack Pull-Ups:max reps Feet-Elevated Scap Depressions:max reps Use straps. Don’t rest between any of the above exercises, outside of what it takes to transition. On the second and third exercises, use as little lower-body assistance as necessary to complete the
Origin: Tip: Lat Width – The Hard Way
5 Things to Stop Doing in the Gym
 1 – Setting the Shoulders and Leaving Them There When it comes to pulldowns, chin-ups, rows, or any other upper back dominant movement, you first engage your back muscles by drawing the shoulders away from the load. That’s like, rudimentary. The mistake is in the details: So, holding a set shoulder position places the rhomboids and lower traps in a long isometric hold that’s sure to fade as the set progresses. Give your muscles the chance to reset in-between reps to allow them to relax, get circulation, and re-contract, which will sustain your efforts. Resetting in-between reps will also help you to develop some much needed scapular mobility. 2 – Freaking Out About Spinal Flexion The idea that all hell breaks loose the second your spine bears load in anything but mild extension is ridiculous. There are entire competition events (think about tire flips in CrossFit or the Atlas stones in strongman) that hinge on a lifter’s strength while in spine flexion. We talk so much about a neutral or slightly extended spine that it can actually cause a bit of harm to a well-intended lifter. To lift the most possible weight, many powerlifters actually find a stronger pulling position when setting up with a rounded thoracic spine. It reduces the amount of horizontal space needed for a lockout and finishing strength, which can prove advantageous in competition under the heaviest loads. None of this is to say that missing deadlifts by using unfavorable form is something I endorse to the general public. Sure, keep a neutral spine when possible, but the phobic resistance to any exercise that may involve spinal flexion – like sit-ups or crunches – needs to die as soon as a lifter has reached a decent level of competency and athleticism. You won’t crash and burn the second you do a trunk flexion. It may even do fairly well in strengthening your anterior chain. Just don’t be stupid about it. The same thing applies to squats. Take a good, deep squat as an example. We may be so concerned with our spine staying flat when doing a bodyweight squat that we contort our body through bottom end ranges to respect this “rule.” The result is a high butt and a torso that’s pitched way too far forward. Forget about the hips and back for a minute; this flat-spine obsession ignores the fact that the knee joint literally never gets exposure to the deep flexion necessary to get a full ROM. The result is extreme weakness in squats, other loaded movements, and even in day-to-day life. No one wants that. 3 – Adding Weight to Pull-Ups We strength coaches and experienced lifters all shake our heads when we see a poor quality squat or deadlift, but we never even flinch when we see rotten pull-ups. If I had a Bitcoin for every time I saw a pull-up with excessive body English, thoracic spine flexion, shoulder glide, and knee tuck, I’d be a very rich man. The kicker is that these same people progress this movement by adding significant loads. Who are they kidding? Chances are your bodyweight, especially if you weigh over 200 pounds, is more than enough to create an ample challenge for pull-ups and chins, provided you’re doing them with good form: You’re hardly training your back anymore if your shoulders aren’t able to depress during the movement, your chin “reaches” for the bar, and your range of motion is compromised. I can’t say this enough: Check your ego at the door and stop doing weighted pull-ups. They’re hardly a progression if you can’t make them look like their bodyweight counterparts. 4 – Playing Mr. Natural, Ignoring Proper Footwear/Gear The idea that you’ll always be able to create the perfect tripod position with your feet (where the foot creates an arch and the heel, ball of the foot, and toes are firmly planted on the ground) when squatting or deadlifting with load is something that’s more applicable in theory than it is in practice. There just aren’t many coaches who have the stones to say it. Anyone can assume the right foot position when unloaded, and that mistakenly gives many coaches the idea that clients can do their whole workout in socks. Things change when you’re trying to move hundreds of pounds, though. Under challenging loads, the body will start succumbing to its habits and predispositions. If you’re someone with foot pronation or fallen arches, that probably means they’ll show up to torment you at some point in your ramp toward a heavy squat or pull. So we can stupidly try to cling to the idea that a shoeless squat is exactly the training tool you need to get better, or we can give our feet the support they need for more stability. We have to decide whether the goal of our workout is to have the best performance by the numbers, or to have a performance that actually addresses our weak links. Decide and adjust accordingly. The same rings true when discussing the use of belts. First, they’re not an accessory. They create a surface for the trunk muscles to brace against, thus helping protect the spine. Wearing a
Origin: 5 Things to Stop Doing in the Gym
Tip: Big Arms, No Weights
 Most gyms now come equipped with suspension straps, but rings also work for this killer superset. Suspension Strap Skull Crusher and Curl A1 Suspension Strap Inverted Skull Crusher – 4 sets of 10-12 A2 Suspension Strap Curl – 4 sets of 10-12 Take no rest between the skull crusher and the curl, then rest approximately 90-120 seconds between supersets. Choose an angle of moderate difficulty until you’ve gained proficiency and can increase the challenge. For the triceps portion:Maintain a stable shoulder angle as you control the descent into end-range elbow flexion, mirroring a skull crusher, and then reverse into elbow lockout and repeat. For the suspension strap curls:Maintain neutral body position with arms extended 90 degrees from your torso. The elbows will try to drop as the more powerful lats instinctively try to turn the movement into more of a row. Defend against this by maintaining strict position of the humeri by elevating your elbows. This keeps tension on your biceps, thus delivering an intense stress and
Origin: Tip: Big Arms, No Weights
The Missing Deadlift Variation
 The one-leg deadlift is an incredible exercise that can boost symmetry and build single-leg strength – all while minimizing loading. That means it’ll take good care of your low back, strengthen your core, and make you a sugar-footed ninja. Too bad that it’s so often a disaster. It’s time to lay down some guidelines for perfect execution and fix some common problems. 1 – The Problem of Balance Back in 2000, a major fitness magazine showcased a version of the one-legged Romanian deadlift (RDL) where the rear leg was lifted way off the ground, sort of like one of those old drinking-bird toys. The rest of the world just seemed to follow suit without really questioning why. Here’s the thing, though – the one-legged RDL wasn’t designed for balance training; it’s for building single-leg strength. The “rear leg lifted high” variation might be fine for warm-ups and general mobility, but when it comes to strength training, you’re better served by stripping the balance demands away and focusing on strength. The Fix Keep your rear foot on the ground using the kickstand method: Here are three effective alternatives: Drag it In this variation, you’ll keep your rear foot lightly touching the ground and slide it straight back. Your challenge is to slide the foot straight back without any weight transfer on it. Float it Here you have two options for keeping weight off of the passive leg – either by setting up a “kickstand” as shown in the first video or by using one of Ian King’s original variations. Get it out of the way Clear the passive leg without giving up balance by doing the corner-leg version. 2 – The Problem of Hip Rotation Even though the hips are supposed to remain level (indeed, countering the forces of rotation provides much of the value here), almost everyone will externally rotate the unloaded leg. This is usually due to a lack of awareness, but may also be the result of insufficient hip internal rotation. Most of the rear-foot-on-the-ground variations described above will deal with this but there’s some additional work to be done. The Fix Pause after the eccentric (lowering) portion of the lift to check your position. Are you able to tell whether you’re level? To check in on position, make sure the rear knee and foot are both pointed down toward the ground. Also, make sure that your thighs are touching or – to bastardize a deadlifting cue from the great Ed Coan – “seal up your taint.” 3 – The Problem of Initiating Lift-Off with the Back Initiating the lift with leg drive is something that should be happening with any deadlift variation. However, once the one-legged RDL became known as a functional training exercise, people stopped (or never started) caring about great fundamental mechanics, which is pretty ironic. It’s common to see people arch their backs to get the weight moving. This compensation is an easy trap to fall into – especially when you’re holding a teeny, tiny weight. The Fix Oscillate the first 2 inches of the lift. This surprisingly challenging drill requires you to flex and extend the knee with a tiny range of motion. You’ll practice initiating the movement and reversing it over and over again with only a 2-inch range of motion. If you’re doing this right, your low back will be silent and your quads will be screaming. 4 – The Problem of Lateral Shift and Rotation You might be able to execute very clean reps with a light load. However, you can do all sorts of things with a light load. Once you put some real weight in your hands – particularly with a barbell – you might notice that countering any extra movement becomes more difficult. The Fix Shift the load laterally. This is a subtle tweak that can make a big difference. When you’re on one leg, your center of mass has to be stacked. But it can’t be stacked on top of air. For proper alignment, you have to do two things: Shift your bodyweight laterally to stack your center of mass over the middle of your planted foot. Line up the middle of the bar with the middle of your shin (on the loaded leg). 5 – The Problem of Insufficient Demand Once your form is in place, don’t forget to load the movement. The Fix Add load and/or range of motion. If you’re going to push boundaries, your first step is to figure out where those boundaries are. While adding weight is an obvious choice, you may also want to add range of motion by growing this into a hybrid movement – somewhere between an RDL and a full-range of motion deadlift. You can do this simply by completing the RDL (hinge) portion of the movement and then adding some knee flexion. To make balance even less of a factor, you can perform this as you would a rack pull. This will allow you to load things up with a barbell and reset your balance and positioning at the bottom of every rep. Is the RDL Really Worth the Trouble? In spite of the huge value of the one-leg RDL (and variations), I actually spent a long time not programming it. The time involved in getting
Origin: The Missing Deadlift Variation
Tip: Drop The Bro Splits If You’re Over 40
 Grown Men Don’t Need Bro Splits You’re not 15 anymore. The traditional bro split where you train one body part each workout (usually 5 workouts a week) isn’t efficient or effective, especially for an adult with a job who actually communicates with real-live women in their non-pixilated form. Your muscles recover in about two days, so why let them go fallow for a whole week? Besides, what happens if life intervenes and you miss a day or two one week? That mucks up the whole schedule and you might not train the same body part for another 8 to 10 days instead of 7. A Split That Makes More Sense You’re much better off doing an upper body/lower body split where you work out 4 days (or even 6 days) a week: Monday:Lower Body Tuesday:Upper Body Wednesday:Off Thursday:Lower Body Friday:Upper Body Saturday:Off Sunday:Off As Charles Staley pointed out in his The Single Most Effective Workout Split, this upper/lower split does a couple of things: It makes the best use of time. Since muscles recover in about two days, muscles trained on Monday should be trained again on Wednesday. If you don’t, you’re losing ground. You get to train muscles more often with fewer workouts. With a bro split, you work out 5 times a week and each muscle gets hit once. With an upper/lower split, you work out 4 times a week and each muscle gets worked
Origin: Tip: Drop The Bro Splits If You’re Over 40
Tip: A Quick Fix For Better Lats
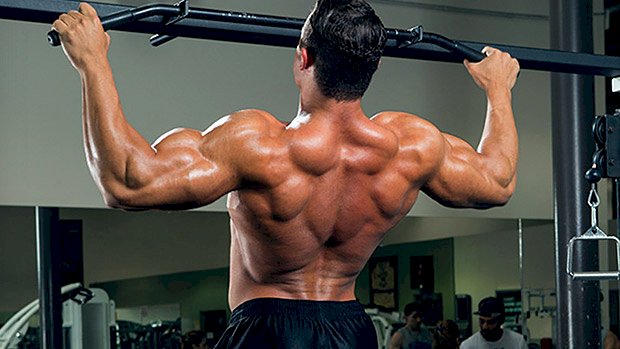 The Problem Lifters often can’t engage their lats while doing pull-ups. As a result, they may experience elbow pain, tendonitis, and neck pain. To top it off, they’ll assume that the pull-up doesn’t add size to the back – because in their case, with their form – it won’t. What could be causing this problem? Well, the obvious answer is that the wrong muscles are getting used and the tension is getting placed on the shoulders and arms instead of the back. The not-so-obvious thing is, when pulling ourselves up, we rely heavily on our grip being at its strongest towards the index and middle fingers, but never really think about how that will impact our shoulder position. The Solution A great coaching cue is to tell people to lift up their index fingers as they perform a set of pull-ups. Not only does this put the shoulders into a better position, it’ll also make it infinitely harder for someone to power through with their biceps, which in turn will make them better at pull-ups and give them stronger, bigger lats. Most people that experience shoulder/arm/neck issues struggle to match their normal max set of pull-ups with the index fingers lifted, so this is a great way to check if you’ve been using the correct muscles. If you’re only one or two reps off that’s fine, but if you find your reps are cut in half or you really struggle to do one, then there’s room for improvement! Regardless of your level, I’d recommend always throwing it into your warm-ups for lat/upper body pulling days because it’s just a great activation tool. By putting focus on the right muscles, hopefully you’ll avoid running into any issues with your pull-ups in the long run. Longevity is the key to
Origin: Tip: A Quick Fix For Better Lats
Tip: The Glute Exercise for Athletes
 The glute bridge is basically a hip thrust performed with your back on the floor instead of on a bench. By using a resistance band as shown in the video below, the exercise will incorporate more of the muscle fibers involved in gait by requiring the hamstrings to contract at both ends. Bilateral Band-Resisted Bridge This changes the exercise into more of a performance-oriented challenge for intermediate and advanced athletes. It does this by increasing the contribution of the body’s deep longitudinal system. This is the line of interdependent muscles from the lower leg to the hip responsible for healthy gait. This modification and its progressions make for a great activation or warm-up for all deadlift and hinge-patterned movements, as well as antero-posterior patterns with contralateral loads. (That’s a bloated way of saying sprints and single-arm dumbbell lunges or step-up variations.) They’re also great for helping to ingrain movement skills such as upper and lower body disassociation and multi-planar hip stability. Here are several ways to make it even tougher: Progressions Band-Resisted Sprinter’s Bridge When performing the exercises, stabilize the foot with a powerful arch by digging the tip of the big toe into the floor. This prepares the lower body for sport and training by exciting the intrinsic foot muscles and calling for greater neural drive into the
Origin: Tip: The Glute Exercise for Athletes
Tip: The Barbell Curl That’ll Make You Puke
 Arthur Jones (1926-2007) was the inventor of Nautilus machines in the 1970s, and MedX strength-training equipment in the 1990s. If you have read any of Jones’s one-set-to-failure bodybuilding material, you will probably remember his unique way of painting pictures with words. The following paragraphs were taken from his early writings – which detailed the proper way to perform a set of barbell curls. Note: When this material was written, Jones recommended two sets of most exercises. Even so, you will quickly get the feel of how Jones applied high-intensity training. Barbell Curls by Arthur Jones Select a weight on a barbell that you can curl in good form for 6 repetitions. Then, make yourself do 10 repetitions, or tear your arms off at the elbows trying. Keep the lifting strict and emphasize the lowering. Do not just drop the barbell to the bottom. Resist it the entire way. At the bottom, immediately begin another repetition, smoothly. Imagine from a side view, that during each repetition, your head, shoulders, and buttocks remain stable forming a vertical line. No leaning forward or backward, no arching of the lower back, no movement of the head and neck. Only your hands and forearms are tracking up and down. This set should be so hard that the last repetition requires from 3 to 4 seconds on the lifting and another 3 to 4 seconds on the lowering. Afterwards, you should be breathing like a steam engine, dark blue in the face, and so weak that you have to sit down to keep from passing out. The barbell curl is not an arm exercise. At least, it’s not an arm-only exercise – although it will soon give you biceps like a gorilla. Rather, it is an every-damned-thing exercise, if it’s performed properly. Done correctly, and heavily enough, the leverage is so great when the weight is in the halfway position, it works your back as much as a set of heavy deadlifts, and the pull downwards is so strong on your shoulders that it works the entire shoulder girdle intensely. The energy output is so great that it causes you to sound like a locomotive – thus building overall heart and lung efficiency and increasing the rib-cage size nearly as well as a set of breathing squats. Rest, just long enough to get your breathing close to normal and repeat a second set of 8 repetitions with the same resistance. King Kong could not do more than two sets during the same workout. Thus, if you can, then you are not doing them correctly. In fact, if you even consider doing a third set after finishing the second set, then you did not do those two sets properly. You should feel like puking after the second set – and a lot of serious guys do. If you do not, then give up. Get the hell out of the gym. You do not have what it takes to succeed in training. I am not joking about this, not even slightly. Throughout your overall-body routine you must constantly walk a very fine line. The line between sickness and collapse… and simple, but complete exhaustion. You must stay just on the far side of that line, constantly on the bare edge of being nauseated. This is especially true in regard to barbell curls. Outright hard work. That’s my summation of barbell
Origin: Tip: The Barbell Curl That’ll Make You Puke
6 Meathead Myths – Debunked
 Before the digital age, the world of strength training was based on in-the-trenches experience. While many coaches and bodybuilders were spot-on with the training principles they developed, others pushed dogmatic beliefs that, somehow, still exist. Today their ideas are often treated like training mandates – as if they’re based on scientific fact. But ideas don’t become factual just because they’re peddled by a lot of people. Words don’t become truths just because they’re repeated over and over again. So let’s take a look at some common myths and set the record straight. Core Training Myth:Compound lifts, like squats and deadlifts, provide all the core training you need. Fact:Building a midsection that’s strong and aesthetic requires dedicated core/ab training. It’s a tough pill to swallow for many lifelong meatheads, but the reality is the compound lifts aren’t “all the core training you’ll ever need.” The fact is, most (if not all) lifters need dedicated core work to address weaknesses, imbalances, and postural issues to stay healthy and build strength over the long haul. Plus, carving out a set of abs that double as a cheese grater requires specific training that, like any other muscle group, aligns with the foundational principles of hypertrophy. There are two primary reasons why the compound lifts fall short: 1 – For Function The core should be trained to resist unwanted movement at the spine. A strong core creates a stable base that allows you to produce more force and, as a result, lift more weight. Likewise, core strength is crucial for training longevity. It plays a lead role in preventing the spine from folding up like an accordion. For these reasons, performing “anti-movement” exercises is pivotal for a strong and resilient core. Anti-extension exercises (planks, ab wheel rollouts) train the core to resist lumbar extension. Anti-rotation exercises (Pallof presses, chops/lifts) prevent unwanted rotation at the spine. Anti-lateral flexion exercises (suitcase carries) force the body to resist side-bending at the trunk. 2 – For Aesthetics The core should be trained with hypertrophy as the goal. Many lifters squat, deadlift, and press their hearts out, only to remain stuck with a midsection as soft as a stack of double-stuffed pancakes. The problem is, developing abs requires dedicated training that stimulates hypertrophy via mechanical tension, muscle damage, and metabolic stress. This calls for three things: Exercises that can be progressively loaded over time Exercises that facilitate a strong mind-muscle connection Slow reps within a controlled range of motion to emphasize time under tension Workout Time Myth:Don’t train for more than 60 minutes. Fact:Train as long as you need to attain the right results, regardless of time. Many old-school lifters used to train for 2-3 hours, venture off to do 6-8 hours of intense manual labor, and then top the night off with a ribeye and a couple of beers – all while maintaining impressive physiques. Somewhere down the line, though, a theory arose that the body releases a fatal amount of cortisol as soon as a workout exceeds 60 minutes, at which point the muscles disintegrate into an atrophied pile of dust. Even though research and anecdotal evidence show there’s no merit behind these claims, most lifters remain wary of staying in the gym for more than an hour, lest they start sweating out buckets of estrogen. Can you make progress if you only have 30-45 minutes to train? Definitely. Is it optimal? Probably not, especially if you’re a stronger lifter with more years of training under your belt. The reality is that you need more time to train. For example, let’s say there are two lifters who want to work up to a 3-RM. Lifter A has been training for a year and can deadlift 225 pounds, whereas Lifter B has been training for 20 years and can deadlift 600 pounds. Example ramp-up sets for Lifter A: 95×8, 135×5, 165×3, 185×1, top-end set at 205×3 Example ramp-up sets for Lifter B: 135×8, 225×5, 275×3, 315×1, 365×1, 405×1, 455×1, 495×1, 525×1, top-end set at 545×3 Lifter A can get to his top-end set after four ramp-up sets, whereas Lifter B needs nine ramp-up sets to accomplish the same task. Lifter B will also need longer rest periods between sets, additional ramp-up sets for accessory work, and will spend more time loading and unloading plates. Add in the fact that Lifter B (who’s likely older and more injury-prone) will need a more thorough warm-up, and that’s 30-40 minutes gone. Don’t waste time in the gym, but don’t race against the clock, either. Time is a guide – not a be-all and end-all. Doing quality work and eliciting a powerful training effect trumps all else. Exercise Order Myth:Do the compound lifts first, accessory work second, and isolation exercises last. Fact:Determine exercise order based on individual needs and goals. The compound lifts are the best bang-for-your-buck exercises, so doing them when you’re fresh makes
Origin: 6 Meathead Myths – Debunked
