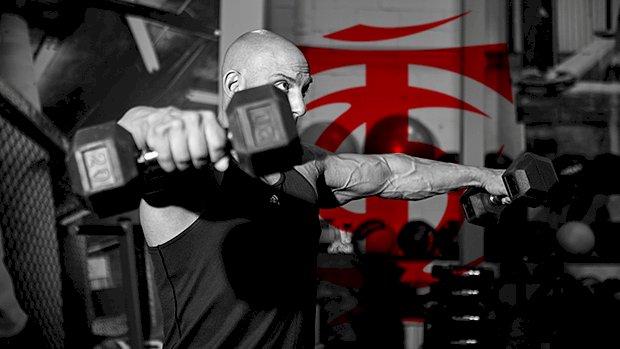
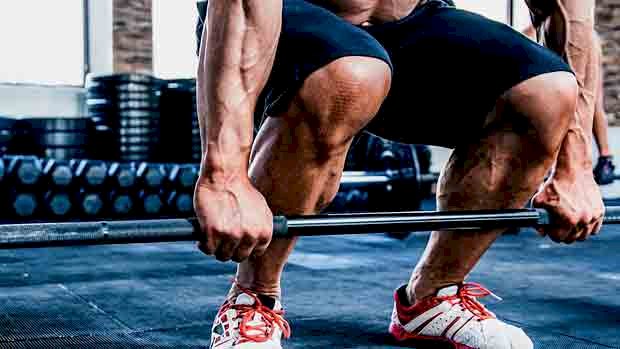
 To make the lateral raise effective at recruiting the delts (and not just the traps) first focus on pushing the dumbbells AWAY, not on lifting them up. Try to bring the dumbbells as far to your sides as possible. They should only go up as a result of you pushing sideways. This minimizes trap recruitment. Here are three alternative exercises to try: 1. The Backpack Raise No, you won’t be doing lateral raises while wearing a backpack (although that would likely work too) but with resistance bands looped around your shoulders to keep them down. The traps get involved when the shoulders raise up instead of just rotate. The bands, by keeping the shoulders down, help you focus on the delts better. To set up, you step on the inside of the band and hook the other end around the shoulder. Then do that on the other side with a second band. The bands’ position on the shoulder is important. You want to place it on the AC joint, not on the trap. If the band is on the trap it will actually increase the recruitment of the trap by creating a greater mind-muscle connection with that muscle and a reactive contraction because of the pressure. You’ll still need to focus on pushing the dumbbells away instead of lifting them up, but the bands will make that a lot easier. 2. The Handcuff Raise with a Mechanical Drop Set For this one you’ll use a short resistance band looped around your wrists, like handcuffs. Use a band with only a small amount of resistance; no need to go crazy here since you’re only using it to shift the tension to the medial delts. Choose dumbbells that are a bit lighter than what you’d normally use for 10 strict reps. Let’s say a weight you could do 12-15 quality lateral raises with. The first step of the mechanical drop set is to do partial lateral raises with the band and dumbbells. Go as high as the band will allow, which should be around a third to a half of the way up. Do as many good reps as you can. Then immediately drop the band and do regular lateral raises with dumbbells only. Shoot for 8-10 reps. Then, drop the dumbbells and put the band back on and do partial reps (like in step one) with only the band. Don’t rest between each step of the mechanical drop set. If you want to set your medial delts on fire, this is the exercise for you! 3. The Incline Lateral Raise This is the “less cool” option but one that I’ve been using for at least 15 years successfully with people who have dominant traps. Sit down on an adjustable bench angled at around 30 degrees and do lateral raises from that position. Still focus on pushing the dumbbells out, not lifting them up. This greatly decreases trap activation, but you still have to focus on pushing the dumbbells far away from your side instead of
Origin: Tip: Your Lateral Raises Aren’t Working
Author: ondriving
The Best Damn Cortisol Article Ever
 Cortisol is like the boogeyman. To scare lifters away from doing extreme things, we tell them that cortisol will eat their gains. While there’s some truth to that, it’s not the whole picture. Believe it or not, there’s no hormone in the body whose purpose is to destroy the body. Cortisol has many key functions, but sometimes the hormone causes a little collateral damage when it comes to looking good naked. Let’s take a closer look. The Functions of Cortisol I call cortisol the “readiness hormone” rather than the stress hormone. Its main purpose is to make sure you’ll be capable of facing any potentially threatening situation. It increases wakefulness, focus, energy, and drive. It does so by raising adrenaline. Cortisol increases the level and activity of an enzyme called Phenylethanolamine-N-methyltransferase (PNMT). This enzyme converts noradrenaline into adrenaline. It’s through this action that cortisol increases adrenaline, which has a direct impact on your state of mind. It increases heart contraction strength and rate. This helps with oxygen transport to muscle and the clearance of metabolites. This is also done via the increase in adrenaline. It increases muscle contraction strength. This is the third impact of increased adrenaline. It mobilizes stored energy. It does so to keep you from running out of fuel when you’re fighting a sabre-toothed tiger or fleeing from it. This is a non-selective process, meaning that all potential energy sources can be broken down and mobilized by cortisol: muscle and liver glycogen, fatty acids from body fat, and amino acids from muscle tissue. It helps you maintain stable blood sugar levels. It increases blood sugar when it’s too low (along with glucagon and growth hormone). It inhibits the immune system. This happens so you’ll have more resources to fight the enemy. Just like in Star Trek when the captain would say, “Divert all available energy to the deflector shields” in the midst of a battle, the body does the same when cortisol tells the body it’s facing danger. For example, during times of fight the immune system will be inhibited. As soon as cortisol goes down, it’ll be brought back to full force to repair the damage from the battle. Note: You can’t dissociate cortisol from one of its functions. When it’s elevated, all of the six things above will happen. So, cortisol is actually quite necessary. It’s essential to have a boost in cortisol when you’re fighting a tiger, deadlifting a PR, or trying to tackle a running back. But if it stays elevated for too long it can have negative effects. Let’s take a look at how that affects our muscle growth, fat loss, recovery, and well-being. Cortisol and Muscle Growth When cortisol becomes chronically elevated it can severely hurt muscle growth via several mechanisms: It directly increases muscle breakdown. The amount of muscle you build depends on the difference between protein breakdown (catabolism) and protein synthesis (anabolism). If you increase protein breakdown (which cortisol does) it becomes a lot harder to be in a significantly positive balance. It decreases nutrient uptake by the muscles. This makes it harder to shuttle amino acids to the muscle to build new tissue and restore muscle glycogen stores. It increases myostatin. Myostatin is a myokine (protein) released by the muscles which limits muscle growth. The more myostatin you produce, the less muscle you can build. By increasing myostatin, chronic cortisol elevation will limit your potential for growth. Over time it can decrease testosterone levels. Testosterone and cortisol are both made from pregnenolone. If you overproduce cortisol, you can decrease the amount of available pregnenolone that would otherwise make testosterone. It slows muscle tissue repair. Repairing damaged muscle tissue after a training session is heavily dependent on the immune system. Chronic cortisol elevation weakens the immune system making muscle damage repair less efficient. Note that after a workout, protein synthesis is elevated above baseline for 24-36 hours (although significantly only for 24-30 hours). This is the timeframe you have to repair the damage and add new tissue. If your immune system is weak, it might take you the full duration just to repair the damage you caused. This means you don’t have time in that enhanced state to add muscle. It’s a predicament that can make muscle growth a very slow process. Cortisol and Fat Loss If you’re familiar with coach Poliquin’s body composition analysis approach (biosignature, bioprint, metabolic analytics) you know the system claims that excess cortisol leads to abdominal fat storage. But if you remember what the functions of cortisol are, you might see a contradiction here. After all, one of the functions of cortisol is to mobilize stored energy (including fat), not store it. Cortisol is, in fact, a fat loss hormone, at least when produced in a pulsatile manner. But that doesn’t mean chronic cortisol can’t
Origin: The Best Damn Cortisol Article Ever
Tip: Do You HAVE to Count Calories?
 Is there a way to avoid overeating without having to count calories? Or is it just a “go by how you feel” and “adjust as you go” thing? Well, the intuitive approach to eating can work great IF you’ve had enough experiences in the trenches of weighing, measuring, and adjusting your food. Intuition is not magic; it’s a natural consequence of experience and practice. If you don’t have the experience and practice, you can’t possibly develop intuition. Based on that, you can definitely use the “go by how you feel” approach. I like to use a combination of subjective and objective measures. The subjective measure I use is called HEC (hunger, energy, cravings) or SHMEC (sleep, hunger, mood, energy, cravings). These are acronyms I came up with to help my clients have a window into their hormonal functioning/balance. If your HEC or SHMEC is in check, your hormonal system is likely balanced and the approach you’re using is going to be far more sustainable. The objective feedback comes from body composition results. Here’s Something to Consider Those eating low calories and burning a lot of calories (dieters) and those eating a ton of calories and burning none (couch potatoes) both suffer from HEC/SHMEC being out of check. That’s because both of these metabolic states, when taken to the extreme, are a stress to the system. What does the metabolism do when it encounters a significant stress? It tries to get back to balance. It does so by making you move less (less energy, less motivation) and eat more (increased hunger and cravings). Remember, most stressful things the body encounters will turn on our ancient survival software – the starvation response. Now that you understand, you have a tool to know if you’re going too far with things. Be aware also that the EMEM (eat more exercise more) system of eating can easily move into an EMEL (eat more exercise less) regime if you’re not careful. (More info here: The Anabolic Toggle.) There are several things we know that can keep a lid on the compensatory mechanisms of the metabolism. First, make sure you’re balancing any training with plenty of rest and recovery. Athletes train hard, eat plenty, and spend a lot of time resting and recovering. You should do the same. Control those stress hormones. They’re highly correlated with increased food-seeking behavior. Another trick is to raise your calories the smart way. What a lot of people do is go for burgers, pizza, nut butters, and guacamole. These foods make it easier to increase your calories, but they also make you eat more at the current meal and crave the same kinds of foods at future meals. This is why I’m not a fan of cheat meals and refeeds done with highly palatable hedonistic foods. Keep your food choices on the blander side. The combination of salt, sugar, starch, fat, and alcohol will light up the reward centers in your brain like the Rockefeller Center Christmas tree. Use these three tips: Read the hormone signals (HEC and SHMEC). Pay attention to rest, relaxation, and recovery. Keep to a more bland diet.
Origin: Tip: Do You HAVE to Count Calories?
Tip: The Coffee for Lifters Only
 Lifter’s Coffee Experienced lifters need three things in the morning: quality protein to support muscle growth, collagen to soothe and heal those abused tendons/joints/ligaments, and coffee… because coffee is delicious. Protein:You already know why you need protein, and you probably know that a blend of whey isolate and micellar casein is the best all-around choice when it comes to muscle-building protein powders. Collagen:Often made from cow hides, collagen is protein too, but it’s an incomplete protein. However, it’s been shown in studies to beat the pants off glucosamine and chondritin when it comes improving joint health. (See: Fix Tendons and Joints with This Protein.) So while collagen isn’t a muscle-building protein source, it’s still great for people who lift heavy things for fun. Coffee:Besides that whole delicious thing, multiple studies on coffee consumption show that java actually increases the lifespan via several mechanisms, including having protective effects on DNA and reducing inflammation. While all types of coffee can help extend your lifespan, even soulless decaf, light roast coffee may be better than medium and dark roasts. The roasting process reduces the amount of the antioxidant, chlorogenic acid. The lighter the roast, the shorter the roasting time, the less exposure to air, and the more of that good-for-ya chlorogenic acid survives. So let’s put all those things together – muscle-building protein, joint-healing protein, and light roast coffee – to make what I call “lifter’s coffee.” Ingredients 16 ounces of coffee, preferably light roast 1 Scoop (30g) Metabolic Drive® Protein, vanilla 1 Scoop (10g) Vital Proteins collagen peptides, unflavored Instructions Make 16 ounces of coffee as you normally do. Add coffee to blender or a big mug. Add protein powder and collagen powder. Stir with a spoon for 30 seconds or blend until smooth and creamy. You may need to tilt the lid of the blender’s pitcher up a little (or leave the little cap off the lid) to allow steam to escape. Feel free to play around with the amount of coffee you use to get the flavor and texture you prefer. Option:Use chocolate Metabolic Drive® Protein for a mocha drink. Bonus:Depending on the type of coffee you buy, this drink should run you around $2.35, about the same price as a plain coffee at Starbucks. Calories and Macros Calories:147 Protein:30 grams (21 grams from whey isolate and micellar casein) Carbs:4 grams Fat:Less than 1
Origin: Tip: The Coffee for Lifters Only
Tip: You’ve Gotta Try This New Leg Exercise
 Ordinary hack squats can be hit or a miss for some lifters. In my case, after a double knee surgery, they’re a huge miss. Enter landmine hack squats, where the foot-angle alone makes a world of difference for gimpy-kneed lifters. Landmine Hack Squat Instead of having to endure the compressive forces imposed by having your feet on a platform that’s exactly perpendicular to the direction of force (as you do with any conventional hack squat), the landmine hack gives the ankles a more open angle, and that means happier knees. This creates a feeling similar to squatting with a Smith machine, without the confines of a completely fixed path. Having the weight on a fulcrum also allows you to make minor lateral adjustments to find the perfect groove. Turning around allows you to find the perfect “lean” (and right foot position) to get a great pump. How to Do It Place the bar on your upper traps and hold it steady with the other hand. It doesn’t matter what shoulder you use, but it never hurts to switch to the other side between sets. Remember to fully lean against the plates themselves, so much so that if they weren’t actually there, you’d fall backwards on your butt. It’s a trust game. Sorry. To place more emphasis on getting a brutal quad pump, get deep and don’t come all the way up – it’ll amplify the time under tension and you’ll feel the burn. Focus on sets of 15-20. A few sets of this serves as a terrific finisher on leg day, but you can also add them into a superset or compound
Origin: Tip: You’ve Gotta Try This New Leg Exercise
Tip: Alkaline Water Doesn’t Completely Suck
 You can’t throw the proverbial rock without hitting yet another obnoxious ad of some sort for alkaline water, with claims to cure all that ails ya’, from genital warts to fear of flying. It’s said to restore pH balance by “reducing acidity levels in the blood” and “reducing water cluster size, which allows water to penetrate cells more easily,” along with the fan-favorite, “eliminates mucus build-up on colon walls, thus improving the body’s ability to absorb important nutrients.” The claims go on and on, each a bit more outrageous than the last. As the name implies, alkaline water is water that’s had its alkalinity increased above that of typical water. But beyond the goofy pseudo-science claims, is it just a scam like so many others? Surprisingly, the answer is no. Before you think the Brink-man has lost his mind, let me explain. Is Your Blood Chemistry PHucked Up? Most sellers and proponents of alkaline water claim their water increases the PH of the blood (make the blood “less acidic” is the usual claim), but as anyone who’s taken Human Biology 101 knows, blood PH is very tightly regulated. Even a small change in blood PH up or down is bad mojo and likely to land you in the ER. At that point, the skeptic will understandably ignore any further claims of benefit and assume it’s a scam. That, however, may be a case of throwing the baby out with the bathwater. (Hopefully the following doesn’t end up in some alkaline-water marketing page somewhere.) The body maintains blood and tissue PH by using the buffering agents it obtains from the diet, as well as what’s stored in various tissues such as bone and muscles. Modern Western diets, however, are high in acidic foods such as animal proteins and cereal grains and often lack adequate buffering agents like fruits and vegetables, which tends to increase the acidic load on the body and create low level, diet-induced, metabolic acidosis. This in turn contributes to the decline in muscle and bone mass found in aging adults. The acid/alkaline issue doesn’t just pertain to health and anti-aging issues, though. Athletes also tend to eat more protein than normal non-exercising folks, which also can lead to low-level chronic metabolic acidosis over time. This can directly impact performance, and studies going back decades have found that the use of a buffering agent like sodium bicarbonate (baking soda) improves short, high intensity exercise that relies primarily on the ATP/PCR system, such as the number of reps athletes could perform during resistance training. Too bad it and other buffering agents have been all but ignored by too many in the cross training (e.g. CrossFit) and physique athlete communities, but their use, although effective, doesn’t replace fruits and vegetables – you know, a “balanced diet.” The take-home message is that old folks and athletes should get their protein from a variety of sources, as well as increase their consumption of fruits and vegetables while reducing their intake of cereal grain-based foods. What Do the Studies Say? While there haven’t been many studies on alkaline water, one involving 100 people found that alkaline water led to a statistically significant difference in whole blood viscosity compared to regular water post-workout in an exercise-induced dehydration state. Simply put, viscosity is considered a measurement of how efficiently blood flows through the vessels, and the study suggests that alkaline water may lead to more rapid hydration post workout. Another small, preliminary study with alkaline water found three to six months of use might benefit those with diabetes, elevated blood pressure, and high cholesterol. As they say, more research is needed. Don’t Do Baking Soda Enemas. Please While most people have heard of metabolic acidosis, one can experience metabolic alkalosis, so ingesting highly purified high-PH sources such as alkaline water, baking soda, etc., vs. getting them via balanced nutrition, can potentially be problematic. In Western societies, chronic sub-clinical metabolic acidosis is by far the more common issue, but you could conceivably find yourself in metabolic alkalosis, which includes symptoms such as nausea, muscle twitching, confusion, and tingling in the extremities or face. Again, those who eat a balanced diet and use some bicarb a few days a week or drink a few bottles of alkaline water are likely good to go, but there’s always gonna be that idiot who drinks three gallons a day of alkaline water in addition to giving themselves a sodium bicarbonate enema. So It Doesn’t Completely Suck. Now What? The reality is, alkaline water may indeed have potential benefits, but a focus on eating more foods that supply the needed buffering agents (fruits and vegetables), or using super-cheap bicarbonates, are healthier and less expensive methods of achieving it. However, if people want to down a bottle of overpriced alkaline water once in a while, I won’t make fun of them. Okay, maybe a
Origin: Tip: Alkaline Water Doesn’t Completely Suck
More Gains in Less Time: 5 Pro Tips
 Building muscle and strength is closely tied to work output per unit of time – the more work you do in a week/month/year, the better results you’ll get. So, let’s review some proven time management and productivity strategies and apply them to weight training. Here are five methods, along with practical suggestions about how to apply them to your training routine. 1 – You Can’t Have Everything on the Menu Whenever I’m asked why I never use a certain exercise or training method, it’s rarely because that exercise or method doesn’t have value. Instead, it’s because I only have so much time and energy, so I’ve got to pick my battles. Pro Tip Although it’s not possible to utilize all beneficial methods simultaneously, you can incorporate a lot more of them by performing them sequentially. Here are a few quick examples: Let’s say you train legs twice per week and you’ve identified 16 exercises that work really well for you. If you wanted to run all 16 exercises within a weekly split, you’d need to do 8 exercises per session. Obviously, this isn’t practical. The solution is to run exercises 1-8 during one 6-week training block, followed by exercises 9-16 on the second 6-week cycle. Although it might seem like you’ll lose ground on an exercise that you haven’t done for 6 weeks, the exercise-specific strength you gain on one cycle will typically be enough to maintain or even improve your strength on the exercises that were put on the back burner. Rather than trying to improve strength and muscle mass simultaneously (within the same training cycle), train these adaptations sequentially, again using 6-week cycles: For 6 weeks use sets of between 6-12 reps, followed by a 6-week cycle where you train in the 3-5 rep bracket. This way, the muscle you gain on the first cycle will support and potentiate greater strength when you return to low-rep sets. Rather than trying to build muscle and lose body fat simultaneously – a physiological stunt that tends to work only for fat beginners taking PEDs – focus on these contradictory goals sequentially. First, you’ll do a “building” cycle where you slowly gain weight (mostly muscle) by lifting hard and elevating your calories. Later, you slowly lose body weight (mostly fat) by lifting hard and reducing your calories. Rinse and repeat. 2 – Do the Important Stuff First If you run your own business and today’s agenda includes a potentially lucrative new client consult and refilling the stapler, you’d tackle that first item when your energy is highest. The stapler could be refilled any time, regardless of your energy levels. Similarly, if your top training goal is bigger arms, you’d ideally train biceps and triceps first in the week or first in a workout. You might even train them by themselves as a separate workout. Additionally, you might consider putting your best muscle groups on maintenance mode by using the minimum amount of training volume required to maintain, but not advance, their current development. Pro Tip Do your most injury-prone exercises last in the workout, rather than first. Here’s why: When you do your most “iffy” exercises last, you’ll have less energy, and therefore you’re less likely to harm yourself further by doing them. Second, your most bitchy joints are usually related to your most well-developed body parts. Let’s say that you’ve got great pecs, but also painful shoulders, from benching. Given that your pecs are now your best-developed muscle, you can afford to back-burner that exercise, allowing your shoulders to heal up. 3 – Batching: Don’t Wash Just One Pair of Socks Batching is a very effective productivity tool that involves completing all similar tasks in a single block of time rather than performing different types of tasks in the same sitting. As Tim Ferris explains, “You wouldn’t do your laundry every time you have a new pair of dirty socks… you wait for a certain critical mass of dirty laundry to accumulate and then you do your laundry.” This is because the time and labor required to do a full load of laundry is the same as you’d need to wash a single pair of socks. Also, switching back and forth between similar tasks requires more time and focus than focusing on a single task. As you consider the best type of training split, think in terms of batching. Although I explained my love of whole-body training splits in The Single Most Effective Workout Split, I can’t dismiss one powerful benefit of bro splits, upper-lower splits, and push-pull-legs splits: they allow you to focus on related tasks during each workout. This type of focus allows you to minimize warm-up time since the warm-up sets you do for your first exercise tends to keep you warm for later exercises as well. You’re also likely to work with greater intensity since you won’t need to “save yourself’ for other body parts later in the workout. Pro Tip Busy trainers often use a related tactic known as “training in the margins.” Rather than completing traditional 60-90 minute
Origin: More Gains in Less Time: 5 Pro Tips
Tip: Master the Pendulum Pull-Up
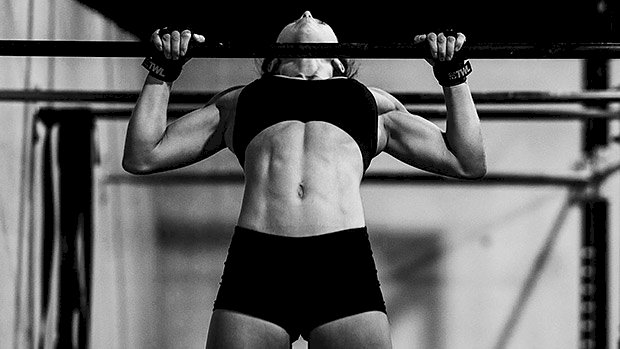 Pull-ups are great, but many people feel the tension in their arms more than their upper backs. This is suboptimal for back strength and hypertrophy… especially since the pull-up is primarily supposed to be a back exercise. To fix this, just take it through a full range of motion. “But wait, isn’t the pull-up already a full-ROM exercise?” Unfortunately, it’s not. In a typical pull-up, your spine remains relatively neutral. This doesn’t allow the muscles of the upper back to go through their full contractile range of motion. The Solution That’s where the pendulum pull-up comes in. With this variation, you’ll extend and flex your spine at different portions of the rep. Take a look: At the top of the rep, extend your spine and curl your legs up. This allows your shoulders to externally rotate and your shoulder blades to pull tightly down while your chest sticks up. This will fully shorten your upper back musculature. Then, as you lower your body, unbend your legs, round your spine, and hang in a hollow body position at the bottom of the rep. This allows your shoulder blades to fully rotate upwards and lengthen the lats, giving them a nice loaded stretch, which has been shown to increase hypertrophy (1). The flexing and extending of the spine will take the key muscles through their true contractile range of motion. You can do it this way with any grip you like. Don’t Cheat, Bro Be careful though. The line of pull is still very strict. The leg curling is only to maximize muscle contraction. It’s not supposed to help you swing for momentum. If you struggle with staying strict on normal pull-ups, these are probably too advanced for you. If you’re a pull-up stud, give these a
Origin: Tip: Master the Pendulum Pull-Up
The 6 Mandatory Angles for a Big Back
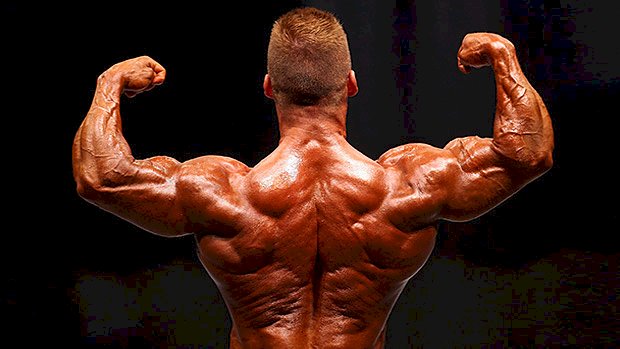 Building a big back takes a willingness to work hard, lift heavy, and train smart. Most lifters have the hard work and heavy lifting parts down. But to get full development – that chiseled topographical map of muscles – you need to train smarter. Simply hammering rows and pulldowns from the same angles every back workout isn’t going to cut it. You’ll see some positive changes, but you won’t maximize your potential. To do that, you’ll need to: Know what muscles you want to hit. Know what angles work what muscles. Know what exercises hit those angles. Know how to program those exercises. So first let’s cover the movement patterns and exercises (the fun stuff), then we’ll look at programming, and finally we’ll geek out and break down the anatomy. Movement Pattern 1: Low to High Pull By setting up the cable unit at your feet and pulling towards your chest as you’re hinged forward (and then pulling over your forehead as you stand up) you’ll create an upward motion that allows you to load up heavy. Use a wider neutral grip bar to maximize your retraction capability while also allowing for a great stretch of the lats after each eccentric (negative) rep. You’ll hit the lats, mid and lower traps, rhomboids, and posterior deltoids (and thus teres major). Check your form: Use a strong stance with feet driving into the ground. Use a proper hinge that loads the glutes and puts a small stretch on the hamstrings. Brace your core by engaging your midsection like you’re preparing to take a punch. Take a small step away from cable anchor to avoid slamming the weights back into the stack on each rep. This also allows you to go into a bit of an eccentric loaded stretch during each rep. Use a neutral grip with an emphasis on driving the elbows behind and “around” the back. Use a controlled eccentric/lowering phase with a small protraction reach at the end of each rep. Movement Pattern 2: High to High Pull This exercise is called an overhead banded face pull. The face pull doesn’t get as much love from hardcore lifters because you aren’t able to load it up like you can other back movements. This lift significantly limits the amount of weight you can handle at the end range. This will hit the external rotators, the posterior delts, the middle and upper traps, and a bit of your lats. Check your form: Use a strong stance with feet driving into the ground. Lean back slightly into your hips with a tall spine. Brace your core to resist the bands desire to pull you over. Pull your arms towards your eyes, elbows wide, until you reach ideal depth. Rotate your fists behind you as though you’re making a “field goal is good” hand motion. Hold this top squeeze for a two-second count and slowly release back to the start. Movement Pattern 3: Isometric Wide Grip Hold While it may seem sort of contradictory to have an isometric contraction on this list, our muscles don’t need to create movement in order to be worked, become exhausted, and require recovery that can lead to hypertrophy. In fact, isometrics done in the right way can actually help enhance our growth potential by targeting specific ranges of motion, and thus muscle fibers, that are weaker or underdeveloped. Anything like a farmer’s carry, a deadlift, or even an isometric row hold will do wonders hit the outer lats, the rhomboids, posterior delts, and traps. Technically you could accomplish this doing the snatch-grip trap bar deadlift, which was something I learned from Dr. Joel Seedman here. Or try my personal favorite carry variation – the cowboy carry: Your execution on both emphasizes the lat squeeze caused by actively depressing and downwardly rotating the scapula. As Tony Gentilcore has said, “imagine squeezing an orange in your armpits and making orange juice.” Movement Pattern 4: Horizontal Pull All rowing variations are horizontal in relation to your torso, and I like the one-arm row because it allows you to pull in a J-shape manner. While the one-arm row is a classic move in most programs, it can usually be done better by pulling with this J-shaped trajectory. One concept in muscular anatomy that’s often overlooked is the direction that fibers run. Muscles contract along the lines of fibers within them. So, muscles only contract in the direction those fibers run. In the case of the lats, the fibers run a bit diagonally from the shoulder joint down towards the lumbar spine. So it’s important to use those fibers that are high up in the back (and diving into the shoulder joint) by letting a weight travel in front of us during rows. This adjustment has been making a huge difference for my clients for years, and Lee Boyce has touched on it too. Check your form: Get one knee on a bench with the same-side arm directly underneath the shoulder joint. Your off-bench leg should shoot out wide to “get out of the way” and create a pocket for the elbow. Engage your core and brace to keep your spine level (tabletop back). Let the dumbbell begin
Origin: The 6 Mandatory Angles for a Big Back
Tip: Is Your Tracker Making You Fat?
![]() How accurate are those watches that tell you how many calories you burned during a workout? Well, not really accurate. A friend of mine recently told me that she did a lifting workout that burned 960 calories. And while I’d like to believe that – because it would make lifting the best fat loss tool known to man – it’s simply not realistic. It’s hard to know exactly how many calories you burned during a workout. It depends on the exercises (a squat uses more fuel than a curl), the number of reps completed, the training methods used, and how much muscle you recruited during each rep. For upper body lifts, a hypertrophy set lasting 40-60 seconds might expend 7-10 calories while it can get as high as 40 calories for a set of squats lasting one minute (Victor M. Reis, R. S. 2011. Energy Cost of Resistance Exercises: J Hum Kinet. 29A: 33–39). If you do 4 work sets like that, we’re talking about 160 calories. If you have another big lift in your workout, done with the same parameters, that could add another 160 calories. Then if you have four smaller exercises it could add 350-400 calories. Such a workout would expend 650-700 calories and it’d be one helluva workload. A hypertrophy workout for the upper body could expend 250-400 calories more than your normal caloric expenditure for the duration of the workout. For the lower body, it could burn up to 500-700 calories more than your normal caloric expenditure, and a whole-body workout could be in the 300-500 calorie range. I believe that the caloric expenditure estimated by those watches/apps use mostly heart rate as the measure for energy expenditure. These formulas were developed with cardiovascular exercise in mind. In that type of exercise, the heart rate is directly proportional to the rate of energy expenditure because the heart rate increases only in response to the need of the heart to pump blood to the muscles to supply oxygen to produce fuel. However, with resistance training the increase in heart rate can also be due to a high release of adrenaline. Furthermore, heart rate might spike for the duration of the set and stay elevated because of the adrenaline/neural activation during the rest periods, despite no work being done. As a result, these instruments will dramatically overestimate how many calories you’re burning during a lifting workout. Why Is That a Problem? By giving the impression that you’re burning a metric ton of calories, it might lead you to overeat or overindulge. “I just burned 1200 calories in my lifting workout! I can eat that burger since it only has 600 calories!” No, you can’t. In the grand scheme of things it’s not the end of the world, but it’s still
How accurate are those watches that tell you how many calories you burned during a workout? Well, not really accurate. A friend of mine recently told me that she did a lifting workout that burned 960 calories. And while I’d like to believe that – because it would make lifting the best fat loss tool known to man – it’s simply not realistic. It’s hard to know exactly how many calories you burned during a workout. It depends on the exercises (a squat uses more fuel than a curl), the number of reps completed, the training methods used, and how much muscle you recruited during each rep. For upper body lifts, a hypertrophy set lasting 40-60 seconds might expend 7-10 calories while it can get as high as 40 calories for a set of squats lasting one minute (Victor M. Reis, R. S. 2011. Energy Cost of Resistance Exercises: J Hum Kinet. 29A: 33–39). If you do 4 work sets like that, we’re talking about 160 calories. If you have another big lift in your workout, done with the same parameters, that could add another 160 calories. Then if you have four smaller exercises it could add 350-400 calories. Such a workout would expend 650-700 calories and it’d be one helluva workload. A hypertrophy workout for the upper body could expend 250-400 calories more than your normal caloric expenditure for the duration of the workout. For the lower body, it could burn up to 500-700 calories more than your normal caloric expenditure, and a whole-body workout could be in the 300-500 calorie range. I believe that the caloric expenditure estimated by those watches/apps use mostly heart rate as the measure for energy expenditure. These formulas were developed with cardiovascular exercise in mind. In that type of exercise, the heart rate is directly proportional to the rate of energy expenditure because the heart rate increases only in response to the need of the heart to pump blood to the muscles to supply oxygen to produce fuel. However, with resistance training the increase in heart rate can also be due to a high release of adrenaline. Furthermore, heart rate might spike for the duration of the set and stay elevated because of the adrenaline/neural activation during the rest periods, despite no work being done. As a result, these instruments will dramatically overestimate how many calories you’re burning during a lifting workout. Why Is That a Problem? By giving the impression that you’re burning a metric ton of calories, it might lead you to overeat or overindulge. “I just burned 1200 calories in my lifting workout! I can eat that burger since it only has 600 calories!” No, you can’t. In the grand scheme of things it’s not the end of the world, but it’s still
Origin: Tip: Is Your Tracker Making You Fat?
