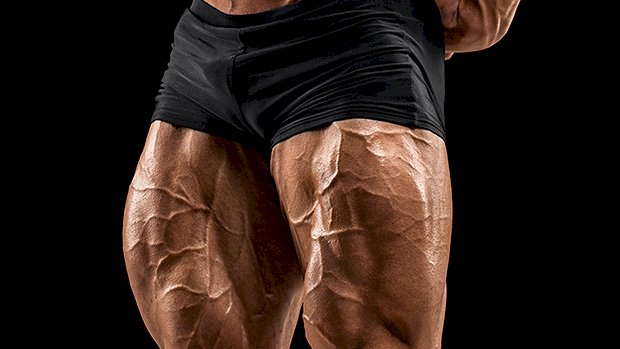
 Whether you use a dedicated landmine device or you just shove a barbell into a corner (against a towel or even an old shoe), this style of training is worth adding to your program. These three variations will smash your lower body, but in a different way than you’re probably used to. Plus, this type of work has transferability to your big lifts. Getting jacked while being more functional? Win-win! Landmine Squat Unlike the goblet squat, the landmine variation changes the strength curve and actually turns the squat into more of a hip-dominant movement. Our society is plagued by lower back problems, which isn’t surprising given our daily postures. Extra work for the posterior chain is always a plus. This isn’t a movement for the faint of heart either. The loading capability will challenge even the most seasoned meathead. Build up to a heavy 8-10 rep set over the course of 5-6 sets. Landmine Reverse Lunge If you’re looking to change up your lunge variation, this is it. The landmine version affects the strength curve differently than a kettlebell or dumbbell pressed against the chest because of the biomechanics of the movement angle of the barbell. You’ll be surprised be the increased level of balance required as well. Try 3-4 higher-rep sets of 8-15 per leg. Single-Leg Landmine RDL The single-leg RDL is a challenging movement for just about anyone. It’s often used as an assessment tool and, as you can imagine, the loading capacity is quite low with it. But with the landmine variation, loading capacity is higher because the level of stability required is lower. Try 3-4 sets of 8-10 reps per
Origin: Tip: 3 New Ways to Blow Up Your Legs
Author: ondriving
Tip: Pummel Your Abs with Butt Scratchers
 “Butt scratchers” are named after how a dog looks when trying to wipe its butt on your carpet. If yours does this frequently, you may want to consult a vet. For humans though, mimicking this butt drag (except going backwards) is a surefire way to pummel your abs. Here’s what they look like: The idea is to tuck your pelvis under, behind your arms. Your butt isn’t touching the floor though; it should be as far off the floor as your arm length will allow. This “drag” movement makes these particularly useful at working your abdominals through both spinal flexion and posterior pelvic tilt. This combo means that butt scratchers are effective at working your superficial abs in their fully-shortened position. There’s zero abdominal load through most of the movement, but as soon as your butt drags behind you you’ll be lucky if your abs don’t cramp from the intense contraction. Try to hold it there for a brief second before letting your abs up for a breather. Awareness of your superficial abs can often be an issue when trying to develop them. You need to actually find them before you can target them with more loaded ab exercises that’ll make them grow. Butt scratchers will help you find your abs with very little load and have them wrecked after just a few sets. If you’re the type that feels abdominal crunches in your neck, or leg raises in your hip flexors or lower back, then butt scratchers are a novel alternative that’ll get the job done. No Sliders or Space? No Problem! If you don’t have a pair of sliders, don’t worry. For a fraction of the cost, a pair of furniture sliders will do the same thing and will slide on most surfaces. You’ll find these in many hardware stores or any gigantic online retailer named after a rainforest. An old towel will also slide comfortably on a wooden lifting platform or gym floor. As an alternative, butt scratchers can also be performed statically. Your hands stay in one position on the floor and you’ll rock back and forth. Again, the focus should be on tucking your pelvis under and behind your forearms. Statically, these can be done with your heels in a suspension trainer (TRX, etc.), on a foam roller, or with a Sorinex glute-ham roller or similar. If T-Rex arms let you down, an easy workaround would be to have something by your sides to elevate you higher. Push-up handles, yoga blocks, a few hex dumbbells, or step boxes will
Origin: Tip: Pummel Your Abs with Butt Scratchers
Question of Strength 60
 My Favorite Methods: A Breakdown Q: What are your absolute favorite training methods? A: I’ve given seminars where I presented 37 different training methods, not including loading schemes. My favorite method? The one that gets you to your goal. The “best” method will vary depending on what you want to achieve. Want strength? Want size? There are different methods for those. Your level of experience will influence which ones will be a good fit. But if you forced me to choose two methods – one for strength and one for growth – I’d choose these: 1. Favorite Strength-Building Method: Clusters Cluster training is my go-to method for rapidly increasing strength. It never fails. Clusters consist of rest periods between all the reps in your set. One set becomes a series of single reps with very short rest periods in between. While you can do clusters with any type of loading and rest intervals, the traditional cluster requires you to use a load of around 90 percent of your 1RM (which is normally your 3RM load) and do four to six reps with that weight. You’d do so by resting anywhere between 10 to 20 seconds between reps depending on the exercise. A set could look like this: Unrack the bar and do rep one Rack the bar and rest 15 seconds Unrack the bar and do rep two Rack the bar and rest 15 seconds Unrack the bar and do rep three Rack the bar and rest 15 seconds Unrack the bar and do rep four Rack the bar and rest 15 seconds Unrack the bar and do rep five Rack the bar – end of set Why is it so effective? There are several factors that can influence strength gains: You recruit and fatigue the fast-twitch muscle fibers. You develop the capacity to make the fast-twitch fibers “twitch” as fast as possible. This is called a high firing rate. You build muscle mass. You desensitize the Golgi tendon organs (GTO). You become more psychologically comfortable with the lift. Clusters improve all of those! You achieve maximum fast-twitch fiber recruitment when the load on the bar is around 80-82 percent of your maximum at that moment. Sure, you can get there by using lighter weights and using fatigue to increase the relative load of the bar. But by using clusters with 88-90 percent of your max, you’re recruiting all those fast-twitch fibers from the get-go. As a result, you won’t have any reps that simply drain energy. But it’s not enough to recruit the fast-twitch fibers. The real strength gains will come from improving your capacity to use a high firing rate. This is a motor skill. And motor skill acquisition depends not only on the number of reps done with the skill emphasized, but on the ratio of “good” and “bad ” reps. The closer you are to your maximum strength, the higher the firing rate. Firing rate increases the most when you need even more force and you can no longer recruit more fibers. At 90 percent you have a very high firing rate from the start. If you do five cluster reps with 90 percent you’ll get five reps with a very high firing rate and no reps with a low firing rate. From a motor learning standpoint, that’s golden. Now compare that to doing 10 reps with 70 percent. Because of fatigue you’ll still end up with five to six reps where the fast-twitch fibers are maximally recruited and probably three reps with a high firing rate. But you also get five reps with a lower firing rate. From a motor-learning perspective, this is vastly inferior. It’s like trying to play golf and doing 30 great swings, 20 suboptimal ones, and 50 shitty ones. Chances are you won’t improve rapidly. Clusters are also very good at building muscle. Hypertrophy has a lot to do with the number of maximally-effective reps. A maximally-effective rep is a rep where you’re recruiting as many fast-twitch fibers as you can. Since these have the greatest growth potential, it’s all about stimulating them as much as possible. As we just saw, when the load represents 80 percent of the max weight you can lift at that moment, you’ll be recruiting the max number of fast-twitch fibers you can recruit. You can get there by using less weight because each rep fatigues you. As you’re fatiguing, your strength will go down (two to four percent per rep) so the weight on the bar is relatively heavier compared to what you can lift. Here’s an example: Rep Weight on Bar Fatigue Level Relative Weight 1 70% 0% 70% 2 70% 3% 73% 3 70% 6% 76% 4 70% 9% 79% 5 70% 12% 82% 6 70% 15% 85% 7 70% 18% 88% 8 70% 21% 91% 9 70% 24% 94% 10 70% 27% 97% As you can see, by rep five you’d have maximally-effective reps. That gives you six of them in the set. Now let’s look at a cluster set. Because of the rest period you’ll have some recovery, so fatigue is a bit slower. Rep Weight on Bar Fatigue Level Relative Weight 1 90% 0% 90% 2 90% 1.5% 91.5% 3 90% 3% 93% 4 90% 4.5% 94.5% 5 90% 6% 96% 6 90% 7.5% 97.5% Clusters allow you to get as many growth-producing reps as you normally would in a higher-rep set, without having to waste energy doing
Origin: Question of Strength 60
Tip: Set Your Hammies and Glutes on Fire
 The hip-banded RDL (Romanian deadlift) is a great way to load your hamstrings and glutes. Having a band pulling your hips back promotes correct RDL technique. It can also be a useful extrinsic coaching cue if you’re new to RDLs. Using the setup shown here will enable you to use more band resistance. You’ll be able to double up the band and have more control. Bonus: It seems to promote a better hip hinge – there’s something to hinge (take a bow) over. Of course, the band helps to add horizontal load through the hips, making it a potent butt-builder as well. To develop your hamstrings and the rest of your posterior chain, sets of 6-8 work well. To Hit the Hamstrings Harder:Steer clear of locking out, working a two-thirds movement at the bottom. To Hit the Glutes Harder:Lock out at the top with some posterior pelvic tilt for extra butt
Origin: Tip: Set Your Hammies and Glutes on Fire
The 4 Mandatory Lifting Movements
 The Functional Movement Patterns Sports rely on specific movements for performance. Those actions are derivatives of the four main athletic movements and the four main lifting movements. The four main athletic movements are jumping/landing, throwing/striking, locomotion, and rotation. But let’s focus on what you can do in the weight room. The four main lifting movements are: Pushing Pulling Knee Bend Hip Hinge This list of movement patterns should guide your training on a weekly basis. Now sure, the term “functional” is a buzzword, but think of these differently. Functional exercises give you the ability to carry out what you need to do on a daily basis. Having a functional body is about having physical freedom. This means building an all-around stronger, more adaptable body capable of performing at a higher level in any environment… not just inside the gym. That said, strength solves a lot of problems. It provides a better physical foundation to perform the four main athletic movements. So, a focus on the four main lifting movements is needed. Weekly Lifts: Your Checklist Every week do an exercise from each section. This will cover your bases. Since all exercises are merely variations of the main functional lifting movements, and since the categories they’re in are general, then select (and deselect) from each category what you’re capable of doing. Be discerning. Fit exercises to you; don’t fit yourself to exercises. Unless you’re injured, perform at least one of the following lifts each week: For Upper Body Vertical or Diagonal Pushing Lift Horizontal Pushing Lift Vertical Pulling Lift Horizontal Pulling Lift For Lower Body Double-Leg Knee Bend Lift Single-Leg Knee Bend Lift Double-Leg Hip Hinge Lift Single-Leg Hip Hinge Lift Let’s get into these variations and the top three exercises in each category. And if you’re training on the go, you’ll also see the top versions you can do using just bodyweight and bands. Pushing These exercises improve your ability to move something away from you like an object or opponent. These are the two specific types of pushing exercises you’ll want to do each week: vertical or diagonal pushing, and horizontal pushing. The Top 3 Vertical Pushing Exercises 1. One-Arm Dumbbell Overhead Press Overhead pressing with one arm increases core activation. You’re forced to maintain your torso position while dealing with the off-set load. There’s also less of a tendency to cheat by leaning backward, the way you might during two-arm overhead presses. 2. Dumbbell Rotational Overhead Press The rotation adds a little more coordination and control demand on both your shoulders and torso musculature. Plus, the foot pivot allows you to train some hip internal rotation, which is a key element to rotational power generation. 3. One-Arm Band Overhead Press This is a great option when you’re training with minimal equipment. You can increase the intensity by performing the reps fast, as shown in the video. The Top 3 Diagonal Pushing Exercises You don’t have to do both a vertical and a diagonal pushing exercise each week, though doing both can make your workouts more complete. But if time is a factor, choose either a vertical or diagonal exercise. If overhead pressing bothers your shoulders, then stick with diagonal pressing until you get your shoulder issues worked out. 1. Dumbbell Incline Press Incline presses train your pecs differently than horizontal pressing. Trainers often say “train movements, not muscles.” Here’s the reality: Muscles create movements. Muscles, along with your bones and connective tissues, respond to how they’re loaded. So, the only reason it’s important to push from a variety of angles is because they train the muscles differently. 2. Angled Barbell Press This is often called the landmine press. The landmine is really the name of a device (that you don’t even need) used for this exercise. But you just need a barbell and a corner. Because of the offset nature, this exercise also really hits your core musculature. 3. Band Incline Press No gym? No problem! Just pack some bands with you when you travel. And, even if you do have access to a gym, bands allow you to do dynamic effort (speed) work, as shown here. The Top 3 Horizontal Pushing Exercises When you do horizontal pushing exercises like bench presses, push-ups, etc., allow your elbows to go low enough to the point where you begin to feel a stretch in your pecs. Why? Because training at longer (stretched) muscle lengths not only causes muscles to be stronger at long lengths, it can also improves flexibility just as good as static stretching (1, 2). So the best way to prevent “tight” pecs is to do horizontal pressing exercises and other pec exercises in a way that creates some level of a stretch. 1. Barbell Bench Press Every meathead has a love/love relationship with the bench press. So I made sure to include it here because the bench press, to many lifters, is like a baby and its
Origin: The 4 Mandatory Lifting Movements
Tip: Master the Leg Press
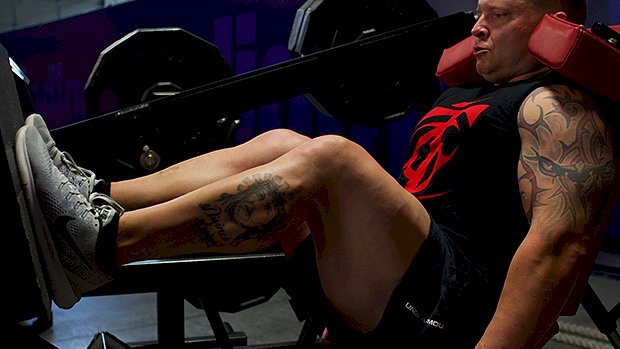 On leg day, after your squats and lunges, a machine exercise like the leg press can add direct quad training volume without accumulating a lot of systemic fatigue. Foot placement matters for muscle activation but not at the cost of joint pain or lost range of motion. Knee-dominant exercises will always be quad dominant so any foot position used for this will train your quads effectively. Start by placing your feet narrow and lower on the press platform, but work higher and or wider if this allows better range of motion or eliminates joint pain. Maintain a strong foot arch while externally rotating the hips to keep your knees from collapsing inward. Keep your core flexed and rigid. Descend to the fullest range of motion available without allowing your hips to lift from the seat and causing your back to round. Don’t ego-lift and micro-rep like a jackass. Avoid a hard lockout at the top to avoid injury. Use a load which allows 12-15 reps to hit failure. This brings intensity, volume, mechanical tension, and metabolic stress into play. Drop set the last set 1-3 times for added destruction. If your leg press is occupied, swap it out for the hack squat machine. The same principles
Origin: Tip: Master the Leg Press
Tip: How to Peak for a Powerlifting Meet
 Does Supercompensation Work? A lot of the information you read about peaking for a competition revolves around “supercompensation.” You dramatically increase training volume and intensity for 7-14 days then, one week out from the competition, you bring training stress way down and increase carbs to supercompensate. This leads to an increase in performance. Sounds sciency and smart. But does it really work? Well, it depends. If you’re an endurance athlete, it might. It seems to work pretty well for swimmers. But if you’re a strength athlete, it won’t do anything. It’ll give the illusion of working, but it really doesn’t. Here’s Why First, when we talk about supercompensation we’re really talking about increasing glycogen storage in the muscles. The theory? By dramatically increasing training volume and reducing carb intake, the body will upregulate the enzymes responsible for storing glucose. When you flood your body with tons of carbs and reduce volume for 3-7 days before an event, the body will store more glycogen than it normally would if you had not done things to “deplete” it. In theory, by storing more glycogen (supercompensation) you have more fuel available for your event and you’ll perform better. This can work if your sport is dependent on the amount of stored glycogen you have. Endurance sports might benefit from higher glycogen storages, and glycolytic sports certainly would. But strength sports like powerlifting and weightlifting are not at all dependant on glycogen stores for performance since the main fuel in these sports is ATP-CP. While glycogen supercompensation might help the bench press and possibly the squat by providing an increase in passive joint stability – as noted in Question of Strength 58 – it’s certainly not the main driver of performance. Does That Mean You Shouldn’t Deload? No, you should. But you must understand what the deload will do so you can plan it properly. It also means you shouldn’t do a stress week or two (7-14 days) prior to the deload to create a supercompensation effect. You can’t supercompensate the nervous system. You can’t supercompensate the endocrine or your muscle mass. Just because you’re trashing those systems by training too much for a short period of time, it doesn’t mean that these will rebound even higher. The nervous and endocrine systems don’t function like your glycogen storage. Here’s what happens during a deload and why it can give the illusion of supercompensation of neurological resources. First, You Need to Understand Two Things 1. The connection between cortisol and adrenaline Cortisol increases the conversion of noradrenaline into adrenaline. The more cortisol you produce, the more adrenaline will increase. Four main training variables can lead to an increase in cortisol (thus adrenaline) during training. Those are… Volume:The more energy you need, the more cortisol you release. Intensiveness:The closer to the limit you’re pushing your sets, the more cortisol you produce. Psychological stress:Mostly related to the amount you’re lifting. Neurological demands:Learning new exercises, using more complex movements, or doing a complicated workout structure. 2. Beta-adrenergic downregulation When you overstimulate the beta-adrenergic receptors, they downregulate. In layman’s terms, this means when you’re producing a boatload of adrenaline that connects to the beta-adrenergic receptors, these receptors can downregulate. As a result, you respond less and less to adrenaline. Since adrenaline increases strength, speed of contraction, and motivation (among other things), if you respond less to it, strength and power will go down. On the other hand, the more sensitive your receptors are, the more strongly you respond to adrenaline and the more force your muscles will be able to produce. Now Let’s Connect the Dots If you dramatically increase training intensity and volume (stress week), you produce more cortisol. This leads to a very high level of adrenaline. This high level of adrenaline can downregulate the beta-adrenergic receptors, decreasing strength potential. After that stress week, you feel like crap and your performance drops. Then you deload, reduce volume, intensity, and maybe even frequency. You drop assistance exercises, which decreases neurological demands too. This all leads to a decrease in cortisol levels, and in return, a much lower level of adrenaline. The beta-adrenergic receptors now become much less stimulated and they recover their original reactivity. Now you respond to your adrenaline again. You regain your strength and motivation. You think, “My deload worked, I supercompensated!” No, you didn’t. You just recovered the responsiveness to adrenaline that you lost by doing too much! A study by Fry et al. (2006) found a 37% downregulation of the beta-adrenergic receptors after only two weeks of very high intensity/high frequency work. By doing one or two weeks of high demand work prior to a competition, this
Origin: Tip: How to Peak for a Powerlifting Meet
Tip: Do SST for a Mind-Blowing Pump
 As anyone who’s lifted weights for longer than a six-month stretch knows, resistance training is plagued by the principle of diminishing returns. The longer you do it, the slower the gains. But rather than accept this fact, a lot of us devote a whole lot of time and mental horsepower into figuring out ways to get around it. Often, the solution is to just eat better (you dope), or to use supplements, drugs, or new training methodologies to get us back into growth gear. Swiss bodybuilder and trainer Patrick Tuor took that last route, designing something called sarcoplasma stimulating training, or SST. It involves a whole lot of time under tension, reps, and sweat, all designed to get an acute muscle pump, which researchers such as Brad Schoenfeld have suggested plays an important role in muscle growth. Of course, any mutt can come up with a training methodology, but Patrick Tuor was lucky enough to have his SST system chosen for laboratory testing by the Catholic University of Brasilia. What They Did The scientists no doubt laid out a generous assortment of churrasco steak with chimichurri to lure 12 Brazilian young men, all of who had been weight training for between 2 and 8 years, to participate in their study. Each participated in three different biceps/triceps training sessions. During the first session, they trained in a “normal” way, doing 8 sets to failure with their 10RM (the most weight they could lift for 10 reps). The other two sessions required the lifters to use Tuor’s SST training methods. The first, as follows, is coined the “contraction type” version of SST: Warm up. Set of 10 using 10RM weight. Rest 20 seconds. Set done to failure with that same 10RM weight. Rest 20 seconds. Set done to failure with that same 10RM weight. Rest 20 seconds. Remove 20% or the load and go to failure, using a 4-second concentric (lifting) phase and a 1-second eccentric (lowering phase). Rest 20 seconds. Remove 20% of the weight and go to failure, using a 4-second eccentric phase and a 1-second concentric phase. Rest 20 seconds. Remove 20% of the weight and perform an isometric (static) hold to failure with your arms bent 90 degrees. The second version of SST they tested is the “rest interval variable” style: Warm up. Set of 10 using 10RM weight. Rest 45 seconds. Set done to failure with that same 10RM weight. Rest 30 seconds. Set done to failure with that same 10RM weight. Rest 15 seconds. Set done to failure with that same 10RM weight. Rest 5 seconds. Set done to failure with that same 10RM weight. Rest 5 seconds. Set done to failure with that same 10RM weight. Rest 15 seconds. Set done to failure with that same 10RM weight. Rest 45 seconds. Eighth set to failure with that same 10RM weight. The goal was to figure out what effect SST had on lactate levels and muscle thickness. What They Found Oddly enough, at least to me, the SST style of exercise didn’t increase lactate concentration any more than regular strength training. However, both styles of SST led to immediate increases in muscular thickness, with the “contraction style” training being slightly more effective than the “rest interval variable” style. The results prompted the scientists to write: “Highly trained subjects may benefit from changing their resistance training routines by using the SST method, as this method may offer a superior muscle training stimulus…” How to Use This Info You may have raised an eyebrow when you read that the SST style resulted in greater muscle thickness in just one training session. Well relax that eyebrow. It wasn’t because of an increase in actual sarcoplasmic hypertrophy; just a bigger pump. But a bigger pump isn’t something to take lightly. For one thing, a pump represents an increase in cellular hydration (the raising of water content in the muscle cells), which in itself appears to be a stimulus for muscle growth. Further, a pump apparently activates a membrane protein named “integrin” that’s responsible for triggering anabolic processes within the cell. (Biotest’s Plazma™ protocol is based almost entirely on this physiological fact. The idea behind the supplement is to “force-feed” key nutrients into the muscle cell during the time the muscle cell is most responsive to nutrient uptake and growth signaling, otherwise known as the pump. Based on the scientists’ findings, Plazma would marry well with the SST style of training.) While the current study involved only biceps and triceps, I experimented with both the contraction style and rest interval variable style of SST training during recent back and chest workouts. While both created a lot of ouch, each led to an extremely satisfying pump, with the contraction style edging out the rest interval variable style in pressure exerted on the seams of my T-shirt. SST is definitely worth trying, particularly if you’re a veteran trainer who’s having trouble urging your muscles into new
Origin: Tip: Do SST for a Mind-Blowing Pump
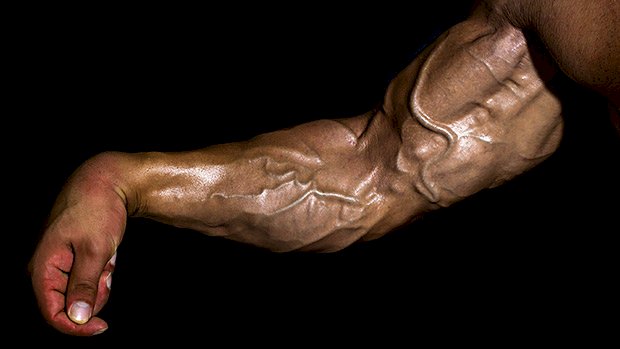
Tip: BFR for Big Arms
 Blood flow restriction (BFR) training is a specialized technique that can help you build sleeve-popping arms. It involves wrapping a restrictive implement such as bands or cuffs around the limbs while lifting. This type of training comes with a warning though: Mind-blowing and sometimes painful pumps may be experienced. Here’s what you should know before diving in. Blood Flow Restriction: The Basics Research on hypertrophy shows a load of 65% or more is required to build significant muscle size. But research on BFR shows loads as low as 20-30% create the same muscle-building effect. That would mean you’d theoretically build as much muscle with 65 pounds as you normally would with 200. The advantages of requiring less weight are obvious when it comes to rehab, as well as building muscle without undue stress on other body structures – the type of stress that causes elbow pain after a few weeks of heavy triceps training, for example. Trying to grow your arms can sometimes feel like you’re beating a dead horse. Week after week you hammer them hard with progressive overload, only to stop because your elbows and wrists have had enough. If this sounds like you, then BFR could be a way to manage your training load, reaching a point where your stubborn arms finally start to grow. What’s Happening? Occlusion training allows arterial blood flow to a region, your arms in this case, while restricting venous return. Basically, you’re allowing blood to flow into the muscle, but partially restricting its return out. To do this safely and effectively, using a purpose-made occlusion cuff is always best. This occlusion results in an increase in Type II muscle fiber recruitment and an increase in localized growth hormone and IGF-1 levels (by up to 300%). In return, you’ll see an increase in muscle protein synthesis by 45-55%, leading to greater muscular growth. The benefits of occlusion training are largely seen distal to the occlusion device. For example, placing it high on your arm will provide benefits to the rest of the arm below the cuff. (There’s some evidence to suggest that there are also benefits proximal to the cuff, though.) Selecting the Right BFR Device Today you can find a number of implements made just for BFR training. These are generally better than knee or wrist wraps. Some lifters even use medical tourniquets, but a proper occlusion cuff is best. Researchers use specialty inflatable cuffs that measure the pressure. You can buy these online. Cuff pressure is individual, depending on vasculature, tolerance level, or if you’re using it over or under a shirt. Just remember, greater pressure from the cuff does not directly correlate to how hardcore you think you are. Just keep it snug, not as tight as it’ll go. For the upper arms, you’re seeking around 100-220mmHg using an occlusion cuff, or a 7 out of 10 in intensity relative to your maximum tolerable level. Place the cuff at the top of your upper arms. It’s good if you’ve got a little pump prior to doing this. Find the right pressure and then begin your BFR training. You can leave the cuff on for up to 10-30 minutes, although if there’s any sensation of numbness, tingling, or major discomfort, take it off immediately. The BFR Arm Workout You can do this workout up to twice a week. You may feel you can do more or add in some extra exercises, but don’t. The aim of this workout is to stimulate, rather than annihilate, your arms into growth. To get your arms bigger you need to get them stronger too. That’s why the workout will start with some heavy lifts (producing a lot of mechanical tension) before your actual BFR exercises. The protocol often cited in research as having the greatest effects on hypertrophy is 30/15/15/15. This is exactly what you’ll be using. That means you’ll squeeze a near-maximal 30 reps out of your first set. Thirty seconds later you’ll aim for just 15 reps with the same weight, then do two more 15-rep sets. This will still be a struggle since your arms will have ballooned up! A. Weighted Dips or Decline Narrow Grip Bench Press:4 x 5-7 with a 4-second eccentric (negative) tempo. Rest 2 minutes between sets. B. Seated or Scott Hammer Curl:4 x 5-7 with a 4-second eccentric tempo. Rest 2 minutes between sets C. Overhead Triceps Extension with BFR:4 x 30/15/15/15. Rest only 30 seconds between sets. (See video above.) D. Cable-Behind Biceps Curl with BFR:4 x 30/15/15/15. Rest 30 seconds between sets. (See video
Origin: Tip: BFR for Big Arms
Tip: 7 New Ways to Attack Your Core
 Adding an extra rep to your max bench press is exciting. Adding more reps to your max number of sit-ups? Not so much. After you’ve achieved a certain level of fitness, that’s just boring and unproductive. So how can you make your core training more challenging? Try these. They’ll not only make your abs look better, they’ll also teach you to develop full-body tension that translates over to your big lifts. Plank Plate Shuffle Grab three 2.5 or 5-pound plates. Stack them on top of each other. With your opposite hand, bring the plates over one at a time to the opposite side of your body. Work on not moving your hips at all. TRX Body Saw Set up the TRX so that when your legs are “in” you’re parallel to the ground. Push your legs back as far as you can without going into low-back extension. Sandbag Pull-Through This can be done in the push-up position or the bear crawl position. Pull the sandbag to the other side of your body without rotating your hips. Put a weight on your back to make this even more challenging. Plank Push-Pull In the plank position, instruct your partner to provide resistance as you push out, then again provide resist as you row in. No partner? You can use a cable station. Wall Plank Find a spot on the wall where you can put your feet up. Make sure your body is parallel to the ground and hold the plank position. Deadbug with Plate Grab a 25-pound plate and assume the deadbug position. Flex at your shoulders so the weight goes over your head. The further back the harder this will be. Make sure your low back stays in contact with the ground the entire time. Bring one leg out and hold. Try putting both legs out or strapping on leg weights to make this more challenging. Earthquake Bar Offset Isohold Attach a kettlebell to one side of the bar. Be careful that it doesn’t tip. Unrack the weight and resist side bending. This can be done with a regular bar as
Origin: Tip: 7 New Ways to Attack Your Core
