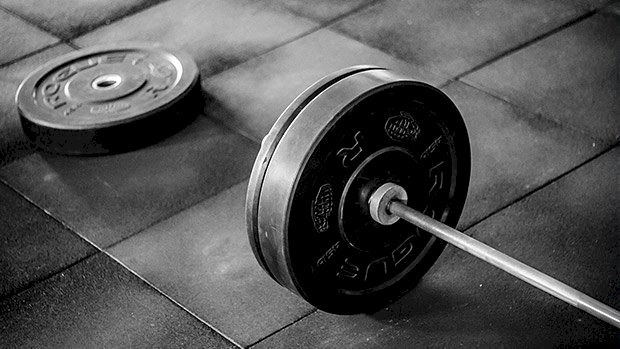
 All of us who lift weights or bodybuild know things, painful things, about lifting that we normally don’t share with beginners because, frankly, no one ever filled us in on these secrets beforehand and we’re all still pretty chafed about it. But I’m feeling uncharacteristically nice today, so if any of you out there are thinking about taking up lifting, here are a few of the distressing truths you’ll soon come to realize. 1 – You’ll only really look good for a month or two a year… probably in summer. No one ever bothers to tell you that the guys pictured on bodybuilding websites don’t normally look all ripped. Most of the time, they look like Fat Thor, or that their high school nickname was Billy Bob and Coach Kilmer wanted them to play in the big game for West Canaan, even though Billy Bob has a concussion. It’s only when they get ready for a contest or, if they’re amateurs, when they get ready for summer that they start to get the body of pre-Thanos Thor. That’ll probably be you too, because walking around all year-round with body fat in the single digits is about as easy as running a marathon every day while wearing one of those goofy T-Rex suits and carrying a serving set of tea cups. But hey, two months of looking good is better than zero months of looking good. 2 – You’ll get to know what being old feels like, years before it actually happens. Let me clarify this a bit. You’ll feel fine, even great, once you’ve been lifting weights for a while… as long as you’re sitting perfectly still. If you are moving, well hello old guy who does commercials for those walk-in bathtubs! You won’t just “get up” in the morning. You’ll be so achy from lifting that you’ll actually have to unfurl yourself out of bed, once piece at a time like some cheap piece of mass-produced furniture from IKEA. Some parts will wake up faster than others, but until all your decrepit joints are in sync, you’ll do a kind of an answering-the-phone-with-your-pants-around-your-ankles walk that would cause an Elementary school administrator to pull over and offer you the custodial job recently vacated by the passing of Dale, the funny-in-the-head janitor who died last Tuesday. But it’s all worth it, of course. 3 – People will assume you’re stupid. Once you start filling out your T-shirt with muscle, people will assume your brain is inversely proportional to your degree of muscle. You’ll be regarded much the same way as Fran, the squeaky voiced, large-breasted but dim-witted hooker in that 80’s movie, The Man With Two Brains: Dr. Michael Hfuhruhurr (Steve Martin):I can’t. Fran:Can’t what? Dr. Michael Hfuhruhurr:I can’t inject you with window cleaner. Fran:I don’t mind. Hey, what does it do anyway? Dr. Michael Hfuhruhurr:It causes your brain to die. Fran: I don’t mind. No one will take you seriously about anything, unless it has to do with the bench press or protein requirements. And if you do say something smart, people will be thunderstruck. They’ll regard you the same they would if they met a chimp who learned how to use the toilet, or some four-year old who learned the lyrics to Itsy-Bitsy Spider. It’ll all feel pretty demeaning. 4 – You’ll start looking for any excuse to take off your shirt. There’ll come a time – probably a few months after you start training – that you’ll start feeling a little cocky about your new body. You’ll be like some fool who learned a few words of Spanish and then looks for any excuse to go to a Mexican restaurant to proudly exclaim “Muy bueno!” when the doesn’t-give-a-shit waitress comes to clear his plate away. But instead of showing off your linguistic aptitude, you’ll start showing off your torso by taking off your shirt in front of an audience whenever there’s any excuse to do so, whether the thermometer inched up to a sweltering 71 degrees or you just need to push the trash dumpster out to the street. It’ll take all your restraint not to strip off your suit jacket and shirt at a funeral because carrying that casket would really make your delts pop. Likewise, you’ll never again pass a mirror, window, or back of a shiny spoon without catching an admiring glimpse of your wonderfulness. It’s pretty sad, but like I said, it’s all worth it. 5 – You’ll never again eat anything that tastes good. You poor bastard. You’re now going to eat for both muscular size AND fat loss, a Houdini-like nutritional trick that, while not impossible, is kind of like going camping and trying to start a campfire underwater on the bottom of Lake Winnibigoshish. Besides that, your diet isn’t going to have a lot of variety. Let’s put it this way: You know how you’ve been feeding the family dog the same kibble every day for his whole life? Well, next to your new, bodybuilding diet, the dog’s diet is a wild, gastro-fusional delight that does the cha-cha on the tongue. Everything you eat from now on until you set down your last dumbbell is going to be from a painfully short list of standard high protein, low-carb,
Origin: 7 Things No One Tells You Before You Start Lifting
Author: ondriving
Tip: 4 Questions You Need to Ask Yourself
 You can read all the most cutting-edge research you want to convince yourself that you’re on top of it, but if you’re not 21 anymore or genetically gifted, you’ve got to get real. You’ve got to apply common sense. You’ve got ask yourself some serious questions and accept what might be some inconvenient truths. The answers will do more to determine your ultimate progress than any training program or diet you undertake. Ready? 1 – What’s Your Real Age? I’m 32 years old now, and I started working out properly for size and strength around age 20. The methods my trainer and I used worked well, but I’d be lying to myself if I thought I could handle them now for more than a week. The simple truth is that I just don’t have the same work capacity that I used to, and that seems to be a common theme with people who train through their adulthood. To be clear, not having the same work capacity doesn’t necessarily scream “worse.” It just screams “different.” It means that if you’re not a young stunner anymore, you’d be wise to modify your training program so you can still get away with working hard on a consistent basis – even if that means scheduling shorter workouts, a couple of deload weeks, 15 more seconds of rest between sets, or a little bit lower volume with the heavy stuff. The lesson learned is simple: Respect your calendar age by tailoring your workouts to match the training effect you’re after – not a certain performance number or standard. 2 – What’s Your Injury History? Regardless of whether it’s something like chronic shoulder pain or something serious like a surgically repaired back or knee, these things should be factored in when you’re considering the demands of your program. One-size-fits-all programs don’t “know” what you’ve been through, and clustering up to 90% of your max weight multiple times per week may not be the smartest idea you’ve ever had. Still, there’s encouragement to be found. Never forget that the beauty of training for the long haul is that you have a much less urgent “deadline” to add muscle and strength. You can still do it, as long as you remain realistic and give your body the accommodations it needs. On top of this, you’ve now opened up the possibility of considering other ways to view “progression,” like increasing range of motion, optimizing tempo, and reducing rest intervals. 3 – What’s Your Training Age? Whether you’re 19 with a year of experience, 39 with a year of experience, or 79 with a year of experience, the amount of time you’ve spent as a lifter equates to the same number: 1. That’s a very important factor to consider when taking a rational approach toward seeing goals. A lifter who’s spent 15 years in the gym will react differently to a program for strength and size than a lifter who’s brand new to the game. An overly ambitious program might seem good on paper to the novice lifter, but might prove too advanced and have adverse effects. On the flipside, a simplistic program may have utility for an experienced lifter, but chances are that finally hitting that 400-pound deadlift or squat might require some advanced lifting methods. Respecting the amount of time you’ve spent under the iron is the first step to knowing just what to implement to bring your gains to the next level. And be honest – it’s easy to say you’re advanced. Simply put, if you’re not sure if you are, you probably aren’t. 4 – How “Bad” Are Your Leverages? It’s unrealistic to think that reaching a double-bodyweight squat or deadlift is attainable as a 37 year old who’s 6’6″ and 275. Standards like that are geared toward young, healthy, and most importantly, usually light individuals where relative strength plays a bigger role than absolute strength. The size of the individual is rarely taken into consideration when creating rules for strength training, and many programs make a similar misstep in ignoring a lifter’s individual anthropometry. Having longer femurs and a shorter torso will make a conventional deadlift more of a hassle for a tall lifter than the other way around. By extension, adding mass as a taller lifter may require slightly different approaches because of a defining factor that differentiates a longer-limbed lifter from a shorter one: work. Of course a good lifter will “work hard.” That’s not what I’m talking about. It’s about the actual physics of lifting. Work is calculated as Force x Distance. As such, if a tall lifter and a short lifter are doing squats with the same load to full depth, the taller one will end up doing more work because of how much farther he has to go up and down. That should put into question whether or not chasing a prescribed percentage of max effort lifts with limited rest intervals and plenty of volume will serve a tall lifter the same way it does a shorter lifter. Most often, longer-limbed lifters need to bridge the gap by adding more volume to choice isolation movements that still deliver a lot of bang for their buck, and a bit less volume to big,
Origin: Tip: 4 Questions You Need to Ask Yourself
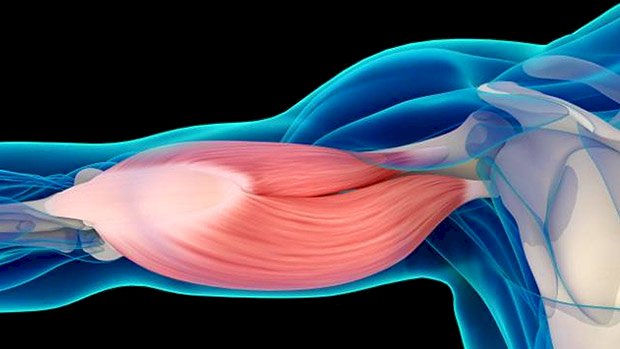
Thick and Wide: The Back Solution
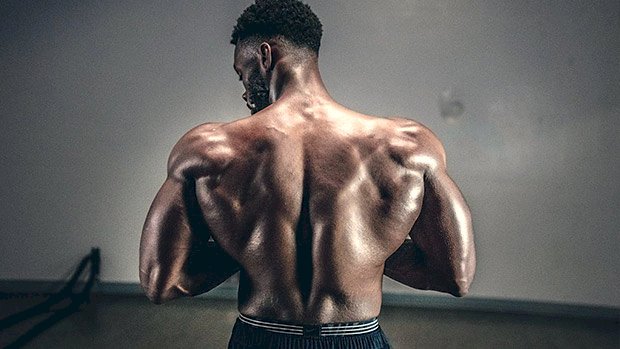 Here’s something nobody’s ever told you before: Your technique is keeping your back small. Sure, we could talk about exercise selection, reps, sets, and frequency, but these factors are largely irrelevant if you don’t understand the back muscles and what adjustments to make to really hit them. If you want to actually gain some size on your back, there’s a hell of a lot more to it than deadlifts and pull-ups. Thick and Wide: The Muscles When people talk about building the back, they mean choosing exercises that build thickness or width. But what do those even mean? We need to differentiate between them and see which muscles create each effect. The characteristic you need more (thickness or width) will determine your best technique. Back Width The muscle responsible for creating width is the latissimus dorsi – the lats. It originates from the spine, where the fibers fan upwards and insert into the humerus. Back Thickness The muscles primarily responsible for creating thickness are the upper back muscles: teres major, rhomboids, traps (upper, middle, and lower), and the posterior delts count here too. Arm Path and Grip The path your arms take – flared versus tucked in – during pulling exercises will determine which back muscles get hit more. So if one area of your back is taking over (keeping you from building another area) you can change your arm path and focus in more on what you’re wanting to build. Grip Type The type of grip you’re using will play a role in arm path. It doesn’t wholly dictate it, but certain grips will make arm path more natural than others depending on what area of the back you’re trying to isolate. A supinated (underhand) grip will lend itself to keeping the arm path in close to the body, which will tend to bias the lats more. A neutral grip tends to do the same, but can also be used to hit the teres a bit more. A pronated (overhand) grip will be most commonly used to hit the muscles of the upper back because it’ll naturally lend itself to a more flared arm path. Grip Width A closer grip or shoulder-width grip is usually more ideal for targeting the lats. A wider grip can be a great option for the upper back, especially when doing chins or pulldowns. It can cause a bit more abduction of the humerus. That said, one reminder is to have elbow-to-wrist alignment when you’re in the fully contracted position of a pulling exercise. It’s a great overall position for the joints to be in to fully maximize the area of the back you’re trying to bias and can keep you from compensating with other muscle groups. Building a Wide Back Let’s talk about the lats. Since they attach to the spine, then fan upward to the humerus, it should make sense that to fully lengthen and shorten them, and work them in line with the fibers, the arms need to begin in front of the body (lengthening the lats). From that position, you want to take an arm path where you initiate the pull by driving the arms down and bringing the elbows in towards the hip (shortening). The Row When you focus on this execution principle, you’ll understand that a row, depending on how it’s performed, can actually be a dominant lat movement rather than an upper back movement. Various row machines can be used to bias the lats rather than the upper back if that’s what you’re wanting to do. The Pulldown The way you do a pulldown will also dictate which area of the back is working with the greatest amount of tension. Even though pulldowns are traditionally known to hit the lats, if you’re not doing them right, they’ll do more for the upper back. So keep the narrow or neutral grip in mind, and remember to keep the arm path in front of you. Cues Start with the arms in front of the body rather than out to the sides and use a narrow or shoulder-width grip. Lengthen the lats while maintaining tension. Don’t lose tension in the fully lengthened position. Drive the arms down to initiate the concentric without allowing the elbows to flare. Make your arm path come in close to the body and drive the elbow toward the hip. To Arch or Not to Arch? To hit the lats, brace with the abs rather than extending the lumbar spine (arching the lower back). You’ve probably read that to get a full lat contraction, you need to arch the lower back. You even see pictures of guys with huge backs using an arch when doing pulldowns. It’s not a bad technique, but it doesn’t preferentially build the lats. Why? Because it actually takes away from fully shortening the lats and will decrease output by them, creating more engagement in the upper back. So instead, brace with the abs to create more stability by maintaining a neutral spine. It’s in the neutral spinal position that the lats can produce the greatest amount of output and contract maximally. Building a Thick Back Hit the traps, rhomboids, and teres major. The Pulldown Let’s take a quick look at a pulldown variation that targets the upper back, also known as the “lat-less” pulldown. You’re
Origin: Thick and Wide: The Back Solution
Tip: We Might Have Been Wrong About Diabetes
 All of us diet and nutrition types were pretty sure we knew all the causes of Type 2 diabetes. Whenever the topic came up, we’d look for the nearest soapbox, hook our thumbs in our suspenders, and start to drone on about its causes. We’d tell you how this here disease, folks, is brought about by obesity and physical inactivity in general, but that there’s a genetic component, too, friends and neighbors, and that it’s more prevalent in African Americans, American Indians, Hispanics, and Pacific Islanders. We’d then stroke our chins and get all sciency, blathering about how all you were all led astray by the devil and ate too much sugar and carbs or food in general and it forced your pancreas to work overtime until it, like John Henry competing against that steam-powered drill, plain tuckered out. Insulin resistance ensued, followed by fatness and inflammation and flop sweat. And then some of us would try to sell you an elixir to cure the disease. Even so, none of us really knew the exact molecular mechanism by which all this occurred. It may be, though, that some scientists at the University of California, San Diego, just kicked that soapbox out from beneath our feet. They found that when test subjects – either healthy or diabetic – ate a high-calorie, high-carbohydrate meal, it led to insulin receptors on cells in the bloodstream being literally EATEN away, paving the way to insulin resistance and diabetes. What They Did Professor Paul J. Mills and his colleagues recruited 30 people who fell into one of three groups: healthy, pre-diabetic, or Type 2 diabetic. All of them were then fed a McDonald’s breakfast consisting of an Egg McMuffin, two hash browns, a glass of orange juice, and a McCafe hot chocolate. Blood tests were taken before and after the meal. What They Found After eating the high-calorie, high-carb meal, participants from all three groups exhibited higher amounts of enzymes in their bloodstreams. These enzymes, initially released in the stomach to digest the McDonald’s meal, leaked through the gut and then continued to digest proteins, including the insulin receptors on cells in the bloodstream. Normally, these enzymes (proteases, in this case) remain in the stomach, but something about this meal – either the high calories, the high amount of carbs, or the processed nature of the meal – caused intestinal permeability to increase, enabling the digestive enzymes to continue on their destructive path. While, as stated, this “leaky gut” thing happened in participants from all three groups, the amount of proteases was lower, and returned to normal more quickly, in the healthy group. What This Info Means to You You see what happened here? Eating a junk-food meal could allow proteases to eat up insulin receptors on cells, thereby mucking up the body’s ability to regulate glucose levels and thus, potentially, leading to diabetes. The previous thinking was that a person had to eat like crap for a long time to damage his insulin sensitivity, but this study suggests that even one bad meal can have a dramatic effect. Obviously, there are questions to be answered, like what, specifically, about high carbs or high calories caused the proteases to leak through the gut? (Was it because the breakfast itself was inflammatory and caused the release of zonulin, the protein that regulates the gaps and fissures in the intestinal lining?) And secondly, just how long does the damage incurred by these leaked enzymes last? Their results may have also presented a therapeutic target for the prevention of Type 2 diabetes in that it may be possible in the future to block the activity of the digestive enzymes once they breached the intestinal tract. In the meantime, we might all want to start thinking about the wisdom, or at least the frequency, of “cheat meals” as they may be doing more harm than we
Origin: Tip: We Might Have Been Wrong About Diabetes
Tip: A Cheap, Simple Stack for Healing Injuries
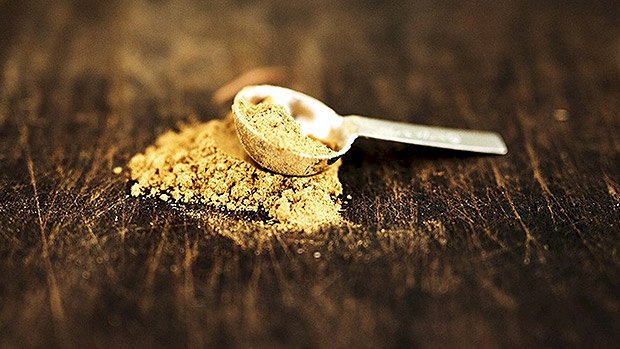 You could give a carton of malted milk balls to somebody with bad knees and just tell them that it’ll make them feel better and it’ll do more to relieve them of their pain than taking glucosamine and chondritin. That’s because multiple studies show that the much-vaunted and much used joint pain/joint reconditioning supplements either fare worse than placebo in treating joint pain, or maybe/kinda might help just a teeny-tiny bit with joint pain, but they’re not really sure. Not really a full-throated endorsement, is it? Fortunately, there’s likely a couple of things in your kitchen right now that, when combined, can double the amount of a collagen propeptide (indicating increased collagen synthesis) in your blood in less than an hour – at least that’s what a recent study out of New Zealand shows. All you’ve got to do is combine a small amount of gelatin (the processed form of collagen) from that moldering box of lime Jell-O in the back of your cupboard with a few tablets from that bottle of vitamin C you bought that time you had a cold. What They Did Scientists recruited 8 healthy males and ran them through the usual randomized, double-blinded, crossover design protocols that are emblematic of a decent study. Subjects consumed either 5 or 15 grams of a vitamin-C enriched gelatin or placebo control. One hour after drinking the stuff, the subjects performed 6 minutes of rope skipping to stimulate collagen synthesis. Blood samples were drawn before ingesting the drinks and multiple times after to determine amino acid levels in the blood. The protocol was repeated 3 times a day at approximately 6-hour intervals for 3 days. What They Found “Supplementation with increasing amounts of vitamin C enriched gelatin increased circulating glycine, proline, hydroxyproline, and hydroxylysine, peaking 1 hour after the supplement was given.” “Engineered ligaments treated for 6 days with serum from samples collected before or 1 hour after subjects consumed a placebo or 5 or 15 grams gelatin showed increased collagen content and improved mechanics.” “Subjects who took 15 grams of gelatin 1 hour before exercise showed double the amino-terminal propeptide of collagen 1 in their blood, indicating increased collagen synthesis.” How to Use This Info Ditch the glucosamine and chondritin and start using gelatin and vitamin C instead. The effects seen in the study were clearly dose-dependent, with the 15-gram drinks synthesizing more collagen than the 5-gram drinks. Just take at least 50 mg. of vitamin C with 15 grams of gelatin powder, which you can easily mix into water or any other liquid, about an hour before you work out. (There aren’t many 50mg. tabs of vitamin C on the market and rather than divvy up a 500mg. pill with an X-Acto knife or a hammer, just swallow the whole tablet. Using more than what’s recommended shouldn’t be a problem in this case.) Hell, you can even make Jell-O shots (using plain, unflavored gelatin or the actual stuff that was endorsed by the Fat Albert, he-whose-name-shall-not-be-mentioned guy). Just mix about 120 grams of gelatin with 2 cups of water and about 600 mg. of vitamin C powder, boil, and divide into 8 shots using an ice-cube tray. Refrigerate and serve. Alternately, you could probably get away with just taking three to five 500-mg. glycine capsules with a vitamin C tab an hour before you work out. (Glycine is the predominant amino acid in collagen and the one thought to be the most influential in collagen synthesis.) It’s probably a good idea to also take the vitamin C/gelatin combo on non-workout days, too, as increased collagen intake may also have the following benefits to general health: Accelerated weight loss (by regulating blood sugar) Improved hair quality Improved sleep quality Improved wound healing Reduced
Origin: Tip: A Cheap, Simple Stack for Healing Injuries
Tip: The Exercise To Do Before Deadlifting
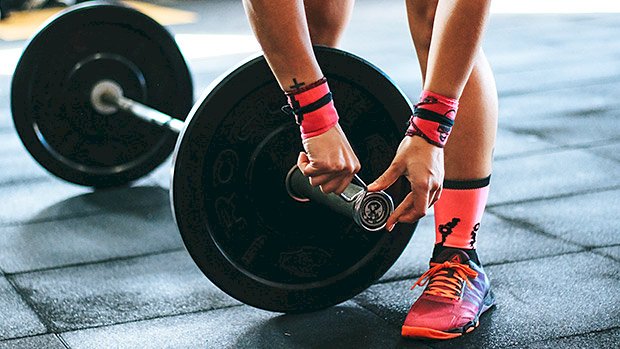 Many lifters have trouble engaging their hamstrings when deadlifting. They lack “hamstring awareness.” This usually ends up going one of two ways: They don’t feel like they’re getting any benefits from it and decide deadlifting isn’t for them… which is hugely upsetting. They carry on anyway, their form breaks down easily, and they put up with constant back pain after every deadlift session. If you’re someone who struggles with one of these issues, here’s a great way to become more aware of the hamstrings AND make them infinitely stronger. The Hamstring Slider Place a few furniture sliders or similar on a smooth surface and press your heels into the ground to lift yourself up as much as you can. Now curl your legs up towards you while keeping your hips completely extended. This exercise leaves no room for compensation. If you do them right you can’t avoid feeling your hamstrings. The harder these are for you, the less hamstring awareness you have. Ideally, everyone should aim to build themselves up to doing 3 sets of 15 reps with minimal rest. Use this exercise as a deadlift warm-up and primer. After, set up for your deadlift and see if you can you use your hips in a way that makes you feel aware of your hamstrings before you lift. It’s very important to have this feeling nailed down; many people can look like their back is straight when actually their lower back is doing a ton more work than it should. Building good hamstring strength and awareness now will help you keep making gains in the long
Origin: Tip: The Exercise To Do Before Deadlifting
Tip: Two Back Muscles You’re Missing
 The Key to a Chiseled Upper Back The lats get a lot of attention, but what’s often missing in back training is hitting the mid-back musculature like the rhomboids and mid/lower traps. Training these muscles will beef up your upper back, making you look impressive with or without a shirt. Having strong mid-back muscles is also crucial for maximizing performance since they’re often a limiting factor when it comes to overhead presses, rows, and vertical pulling. Here are two exercises that’ll fire up your mid back: Wide-Grip Double Pulley Row Set two cables up high and about a foot outside of shoulder width. Ideally, it would line up with how wide your elbows are when flared. Pull the cables from high to low as you bring your elbows down and back. Keep your elbows flared out to engage the mid back. Squeeze your shoulder blades together in the shortened position. Think about pulling the handles back and apart simultaneously. Dumbbell Rhomboid Hold To set up, hold two moderately heavy dumbbells at your side and hinge forward about 30 degrees. Keep your shoulder blades depressed and retract them together. Hold this position and squeeze for as long as you can. Really focus on the mind-muscle connection with this one. Programming Do these at the end of an upper-body day as a superset for 3-4 sets each. You’ll get both static and dynamic contractions to trigger hypertrophy and strength gains. Your rhomboids and traps will get thicker and fuller as a
Origin: Tip: Two Back Muscles You’re Missing
How To Make Any Diet Work
 You’re probably not trying to get peeled like a stage-ready bodybuilder. That’s fine. But if you want to get relatively lean (something beyond seeing your top two abs), and you’ve had trouble doing it, then your dietary compliance probably sucks. You just can’t stick with the plan. But why? Let’s get into that, then talk about five proven ways to stay compliant. Compliance Matters Most “My diet is better than your diet!” You hear that a lot these days… and anyone who says it is probably wrong. Throughout the 1990s, bodybuilders used moderate protein, high carb, low fat diets to get ripped. But somewhere into the 2000s there was a shift where carbs suddenly became the enemy and were responsible for everything from cancer to Nickleback. Lately it’s become sugar. Just eliminate sugar and eat more fat and your jiggly tissue will fall off. None of that’s accurate, of course. But it hasn’t kept the masses from getting overzealous about high-fat, low-carb, n=1 anecdotes. Incidentally, they ignore mountains of research and discredit the anecdotes of those who didn’t use that approach. Here’s the truth: For the person who’s lifting weights and trying to lose fat, all diets that equate for caloric and protein intake work basically the same. When it comes to fat loss, no one type of diet is superior to any other when those factors – eating plenty of protein and being in a caloric deficit – are considered. What generally allows a person to get results from ANY diet is their degree of compliance. Ultimately, that ends up being the secret of why it worked. It’s not because removing carbs or reducing fat did something magical. Each diet just reduced caloric intake. Those who claim that their diet is superior basically just found a style of eating that was easier for them to adhere to. Because their diet was a nice fit for them, they were able to stay in a caloric deficit for enough time to lose fat. Period. Why is compliance a big deal? Because a consistent energy deficit is what has to happen to get lean, and you can’t maintain a consistent energy deficit if your diet is too hard to keep doing. The 5 Steps to Dietary Compliance 1 – Know Your Triggers All of us have trigger foods. These are foods that send us spiraling right into the seventh circle of gluttony hell. Those triggers vary greatly from person to person. This is one area where I’d define foods as being “good” or “bad” based on your reaction to eating them. Contextually, a bad food is one that meets the seventh circle criteria when you’re trying to get lean. It’s up to you to be aware of what foods cause you to eat more even after you’ve had your fill. For me, it’s basically anything that doesn’t fall under the bro-diet umbrella. So basically anything that’s not eggs, oatmeal, rice, chicken, etc. I don’t just eat a slice of pizza; I eat four pizzas. I don’t just eat one doughnut; I clean out the bakery. Some people CAN just have two Oreos. They’re called sociopaths and they feel nothing, have no emotions, and lack empathy. It’s up to you to identify your trigger foods and eliminate them during the time that you’re trying to have a high degree of compliance. No, this isn’t something you have to do forever. But if you’re wanting to shed fat and you don’t want to screw it up, then just eliminate the foods that cause those problems. Now, there’s one obstacle to look out for: the scarcity effect. It’s when we end up wanting something because of the perceived lack of availability. The less access we have to something, the more we tend to crave it. This can be a lethal combination when it comes to trigger foods. The solution to replace those trigger foods with foods that are “close enough.” If you love pizza, try a thin crust or cauliflower option using toppings that are higher in protein and lower in calories: grilled chicken instead of sausage, extra veggies, half the cheese, etc. If you love cookies and brownies, try the low fat and/or low carb recipes for those foods. If it’s easier for you to just abstain all together, then do that. But figure out what you need to do to stop short-circuiting the fat loss process by giving in to your trigger foods. 2 – Figure Out Your Ideal Meal Frequency For decades there was this belief that eating more often raised our metabolic rate causing us to lose more fat. You know, eat six small meals a day instead of three big ones. We know now this isn’t actually true and eating frequency has no major effect on metabolic rate. What most likely was happening was that frequent eating created a higher degree of satiety throughout the day, so people had a higher degree of compliance and didn’t feel the need to overeat at any one meal. From a muscle retention standpoint, it’s probably a good idea to have some protein coming in every four hours or so to stay highly anabolic and to keep muscle protein synthesis elevated. That usually means about four meals a day. Anecdotally, I’ve found this to work well for people who don’t
Origin: How To Make Any Diet Work
Tip: The Ultimate Triceps Isolation Exercise
 This triceps extension variation is much different from others because it allows you to focus solely on building and strengthening the triceps. CJ Extension Other variations force you to unknowingly compensate by contracting the abs, lats, pecs, and even traps. They disperse the workload to the other muscles and ultimately postpone your goal of strengthening the triceps. The CJ variation should be considered one of your go-to movements when training triceps. Here’s how to do it: Lay flat on the ground with feet planted on the floor (similar to how you would start a sit-up). With the cable machine back above the head, pull the rope out so that the elbows are near the side of your body. From this position, extend the rope down to the hips, spreading the hands out to each side, allowing you to lock out the arms. Return to the starting position and repeat for 15-25 reps.
Origin: Tip: The Ultimate Triceps Isolation Exercise
Build Muscle Anywhere, Anytime
 The idea that bodyweight exercises can build muscle might seem foreign to some people. After all, most people’s concept of bodyweight exercises are the stuff you see on cheesy workout DVDs. The truth is, bodyweight exercises can be extremely effective for building muscle, when done correctly. Muscles respond to force. When you lift weights, your body generates force to fight against resistance and create tension. That’s how the process of hypertrophy (muscle growth) begins. But what if you don’t have access to weights? Can you still create enough resistance and tension to build muscle? Absolutely. Here are some key bodyweight exercises you can do anywhere, anytime to help you build muscle. Then we’ll dig into the science. Push-Up Variations Push-ups are the bodyweight king when it comes to building a bigger chest and arms. Here are a few challenging variations: Full Stop Push-Up Get into a push-up position, bring your chest down onto the floor and come to a full stop. While keeping your core engaged and your back straight, push yourself up from the floor to full extension. Full stop push-ups eliminate any potential momentum or cheating during the exercise, putting sole emphasis on your chest to push yourself up from the floor. Isometric Push-Up These minimize momentum and add a pause. Bring your chest down toward the floor and come to a full stop two inches above the ground. While keeping your core engaged and your back straight, push yourself up from the floor to full extension. Eccentric Push-Up Slowly lower yourself to the bottom position and hold for about 5 seconds. Explode back up to full extension. You’re going to be feeling the time under tension while you lower yourself and then apply as much force during the concentric phase. Maintain proper form. Tiger Push-Up This is an amazing variation for the triceps. It’s almost like the Russian dip exercise, but on the floor. Set up in a push-up position with your hands about shoulder width apart. From there, shift your bodyweight back and come down to your elbows. You should be on your forearms with your hips raised up slightly higher than your starting position. Shift your weight forward onto your hands and push yourself up to full extension. Repeat for 10 reps and tell me how your triceps feel. Joe D. Pec Poppin’ Push-Up I’m borrowing this from Joe DeFranco because it’s a good one. When you’re in the starting position, think of pulling yourself to the floor by pushing your hands down and back into the floor. This helps you control the eccentric/negative phase and keep your shoulders set in place. When you get to the bottom of the push-up, press back up and hold. When your arms are fully extended, try to squeeze your hands together as hard as you can without moving them. Maintain this hard contraction for about 3 seconds. You won’t need to do these for more than 10 reps if you’re doing them right. Upper Back Exercises Isometric Y-W-T Lay on your stomach and extend your arms out into a Y formation with your thumbs turned up to the ceiling, squeezing your shoulder blades together as hard as you can for about 3-5 seconds. Pull your elbows back down towards your ribs so your arms are in a W formation and hold again for 3 seconds, squeezing as hard as you can. Finally, extend your arms out into a T position with your thumbs still pointed to the ceiling and squeeze as hard as you can for 3 seconds. That’s one rep. Do 6-8 of those and you won’t need any more. Another way to do this exercise would be to hold each position on its own for 30-40 seconds and rest for about 20-30 seconds before going again. No matter which way you do it, the idea is to contract your upper back muscles and squeeze your shoulder blades together as hard as you can to create an isometric contraction. Handcuffs This is the best bang for your buck when it comes to bodyweight exercises for the shoulders and upper back. It can also be a great warm-up for the shoulders while stretching the pecs. It also fires up the small upper back muscles we tend to neglect during heavy rowing exercises. There’s no way you can cheat this move or use momentum to your advantage, something that you often see when people do weighted back exercises like rows and pulldowns. Start in a prone position by laying on your stomach with your hands behind your lower back (like you’re being handcuffed). Extend your arms out straight by hinging at the elbow and begin to bring your arms to a Y position. Keep them locked and keep your thumbs turned up toward the ceiling. From there, do the same motion coming back, trying to make as big of a circle as you can coming around, and return to your starting position with your hands placed behind your lower back. You’re then going to retract your shoulder blades. While keeping your hands on your lower back, bring your shoulder blades back down, and repeat this entire motion for 10-15 reps. Legs You might think there’s no way to
Origin: Build Muscle Anywhere, Anytime
