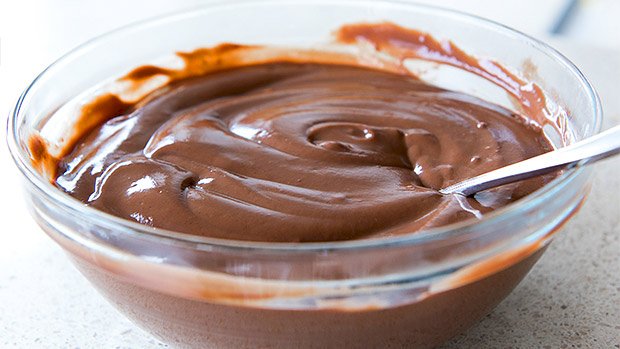
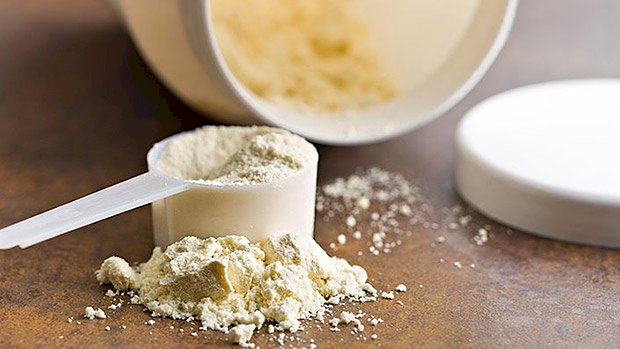
 Is Nighttime Eating Bad? Yes and, um, no. The devil is in the details, or in this case, the devil is in the macronutrient makeup of your pre-bed snacks. Previous studies on nighttime eating paint an ugly picture. Eating a late-night meal or big snack before bed leads to more fat gain. (See: The Meal That Damages Metabolism.) In short, fat metabolism is impaired. Eating more before bed (as opposed to earlier in the day) also raises insulin, fasting glucose, and triglyceride levels, which adds up to a negative metabolic profile (1). Even if those Netflix snacks fit into your caloric limits for the day, the body just doesn’t seem to “handle” those calories as well, which might lead to a disruption of your appetite-controlling hormones. But these studies were usually conducted using “average people food.” And the average person is chubby and makes really crappy food choices. So what happens if you switch out the carby or fatty snacks for pure protein? New research published in The Journal of Nutrition sheds some light. The Study Researchers gathered up a bunch of weight-training women for this study. In one experimental condition, the buff women consumed a casein-containing protein shake (30 grams of protein) during the day. In the second condition, they consumed the same protein shake 30 minutes before going to bed. The researchers dragged out all their fancy machines for this one and used various methods to measure overnight fat oxidation and subcutaneous abdominal adipose tissue (belly fat) metabolism. The Results The protein shake did not blunt overnight lipolysis (the breakdown of fats) and was not expected to increase subcutaneous abdominal fat (2). The lead scientist summarized by saying, “Essentially, you can eat protein before bed and not disturb fat metabolism.” Important Details The 30-gram protein shake did not contain a significant amount of fat or carbohydrate. So if you want to switch out your normal, metabolism-disrupting snack for a shake, be sure to use a low-carb protein powder that contains a lot of casein, preferable micellar casein like that found in Metabolic Drive® Protein®. The test subjects were resistance-trained women, though this should apply to men too. If you’re not lifting weights, this info may not apply. Try This Drinking a protein shake while watching TV at night doesn’t feel much like snacking. Here’s how to change that: Mix one or two scoops of Metabolic Drive® Protein into a very small amount of water or unsweetened almond milk. You want it to be very thick and creamy, like pudding or yogurt. Partially freeze your protein goop. About 15-30 minutes should do it. Eat it with a spoon. It’s damn close to pudding or soft-serve ice cream and feels a lot more “snacky” and satisfying than just chugging a shake.
Origin: Tip: Eat This Before Bed and Stay Lean
Author: ondriving
Tip: The Truth About Rate Coding
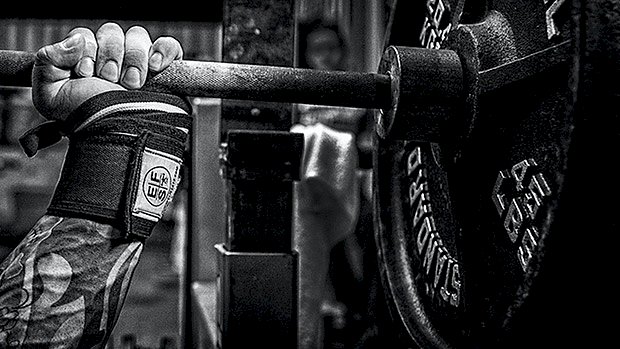 Here’s a question I received recently: “I’ve heard that you shouldn’t vary the weight you’re using on an exercise by more than 10 percent in a workout, otherwise it just confuses the nervous system and you won’t gain as much strength. This has something to do with what’s called ‘rate coding.’ Any truth to that?” For weight training, no. It’s based on a bad understanding of how the nervous system works. For example, this 10 percent rule means that you couldn’t do something like this because the load changes by 15 percent from the heaviest to the lightest: Set 1:8 reps, 150 pounds (75%) Set 2:6 reps, 160 pounds (80%) Set 3:4 reps, 170 pounds (85%) Set 4:2 reps, 180 pounds (90%) Look at this objectively: What about warm-ups? If you can’t have more than a 10 percent difference in weight on an exercise within a session it means you can’t warm-up. If your heaviest work set is going to be 600 pounds then it would mean that anything lighter than 540 pounds in that session would hurt your gains. Just for fun, try squatting 600 without a warm-up to see how it goes for you! Yet, this “you can’t vary the load on an exercise by more than 10 percent” is a pretty common belief, especially for those of us who had Coach Poliquin as a mentor. He put a lot of emphasis on that idea. Where Did This Idea Come From? It actually comes from track & field, coach Charlie Francis to be exact. This was Ben Johnson’s coach, and he was light years ahead when it came to the nervous system and its role in sprinting. He noticed that when his sprinters did resisted running (sprinting with a parachute) and the speed of the athlete decreases by more than 10 percent, the athlete’s sprinting technique changed. For example, he’d run more upright and would have a slightly slower stride frequency. Charlie’s recommendation was that you shouldn’t do resisted running with 10 percent or more resistance as it changes sprinting technique. Coach Poliquin took that 10 percent rule and applied it to weight training. But Sprinting Isn’t Lifting Weight training is not speed-dependant and the technique is much simpler. Even if your speed slows down when lifting, it doesn’t affect your capacity to make the lift or get stronger or bigger from it. It also won’t change your technique. In sprinting, both will happen. The argument used to justify not varying the load by more than 10 percent in a workout is something called “rate coding.” Essentially, the proponents of this principle say that the body programs the speed at which the recruited muscle fibers will “twitch” as the set starts. That programming is called “rate coding.” The heavier the weight is, the faster the fibers will twitch. If you change the weight from set to set too much you confuse the nervous system by changing the motor program on every set. It’s appealing and sounds scientific. However, it’s not accurate and just shows a bad understanding of physiology. See, when you’re lifting heavy weights the firing rate of the muscle fibers will actually change during the set. In fact, once a weight starts feeling heavy (80 percent of what you can lift at that moment) every rep after that will have a different firing rate. The firing rate doesn’t stay the same from rep to rep. With weights lighter than 80 percent of what you can lift at that moment, you increase force production by recruiting more muscle fibers. Once you reach around 80 percent you’re recruiting all the muscle fibers you can recruit. From that point on, any increase in force production will come from increasing the fibers’ firing rate (mostly the fast twitch fibers). Here’s where real physiology contradicts the 10 percent principle: The recruitment pattern changes with every rep because the “relative load” changes every rep. If you start with 70 percent on the bar, the relative load is not 70 percent for the whole set. The weight on the bar doesn’t change, but YOU get fatigued. As you get fatigued you also get weaker. If you get weaker and the bar weight stays the same, it means the bar will feel relatively heavier compared to what you can lift right now. It looks something like this: Rep Weight on Bar Fatigue Relative Weight 1 70% 0% 70% 2 70% 3% 73% 3 70% 6% 76% 4 70% 9% 79% 5 70% 12% 82% 6 70% 15% 85% 7 70% 18% 88% 8 70% 21% 91% 9 70% 24% 94% 10 70% 27% 97% When you hit failure, it means that the relative weight is 100% or more of your capacity at that moment. Now, let me show you what muscle fiber recruitment looks like depending on the weight. In our example above, from rep number 1 to rep number 4 or 5 you would compensate the fatigue by increase muscle fiber recruitment. From rep 5 and onward you can’t bring in any new fibers, so from that point on you start making the recruited fast twitch fibers twitch faster (higher firing rate). If the 10 percent principle were true, we’d be in trouble because even within a set there’s more than a 10 percent variation. What’s important here is that
Origin: Tip: The Truth About Rate Coding
Ask Us Anything 05
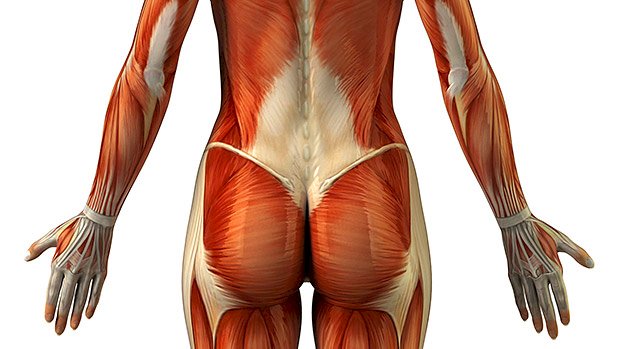
 Can’t Feel My Hammies! Q: What’s the best way to make the hamstrings kick in if I’m not feeling them enough during workouts? A: The hamstrings have a dual function: They work to both flex the lower leg and extend the hips and trunk, but let’s first look at lower leg flexion. If you’re not feeling the hammies when you do lying leg curls, it might be because you’re getting too much help from the gastrocnemius, which assists the hamstrings during leg flexion. Try this: When you curl your lower leg towards your butt, dorsiflex (point your toes towards your body). This allows the gastrocemius to kick in and help you lift heavier resistance than you might be able to do just using your hamstrings. When you lower the weight, plantar flex your foot (point the toes away from the body). This “deactivates” the gastrocnemius so the hamstrings have to do all the work on their own. Take one second to raise the weight, and 3 to 5 seconds to lower it. You’ll feel it. As far as feeling the hamstrings when you’re using them to extend the hip/trunk, it’s usually a case of using too much weight. For stiff-leg deadlifts, good mornings, reverse hypers, and glute/ham raises, try rep ranges of 12-15. Again, take one second to raise the weight and 3 to 5 seconds to lower it. That should work. – TC Luoma Abracadabra: The Appearance Of Abs! Q: Are visible abs a sign of strength or starvation? A: Strength isn’t a great indicator that someone will have visible abs, and while diet (or what you call starvation) can play a role, there are people who have ab definition even when they’re not dieting. The truth is, abs can be a sign of multiple things. Here are six variables that affect their visibility: 1 – Genetics The science of abs is pretty cool. Christian Thibaudeau has explained how some people – even when they get lean – won’t be able to see their abs because their abdominal muscle bellies aren’t naturally thick. He’s also explained tendinous attachments (they’re what create the lines between abs) and how they can play a role in the amount of separation you see between abdominal muscles. In short, they determine whether you’ll have a 4-pack, 6-pack, or 8-pack, no matter how lean and muscular you are. It’s genetic. 2 – Training Those who don’t genetically have thicker ab muscles will need to do more work to hypertrophy theirs. Diet alone won’t cut it. The abs are a muscle group, so this shouldn’t come as a surprise. Train them directly with resistance. The big lifts alone won’t cut it. 3 – Body Fat There’s a point when, even if you DO have developed abs, they won’t be visible if you’re carrying too much body fat. No amount of ab training will make them visible if they’re underneath several inches of adipose tissue. 4 – Digestion Some people say chronic digestive distress can lead to increased body fat around the midsection. I’m not sure I buy that. But I will say that stomach distension and pressure in the gut (from gas, constipation, undigested food sitting in the stomach, etc.) can make your belly protrude. And extreme protrusion alone will make ab separation less visible, unless you flex hard. So even if you’re someone who’s lean enough to have abs, slow motility and poor digestion can simply make it harder to display them. 5 – Water Retention Ask any fit woman when she wants to get professional photos taken and there’s a good chance she’ll schedule it around her period. Why? Because there are a handful of days every month when we retain more water than usual, and it can affect the appearance of our midsection. But even men experience water retention for various reasons. Sometimes both males and females will use diuretics before big events in order to manipulate water and increase definition all over, including the abs. 6 – Skin Tone Ab definition is slightly more visible when you have a tan. It just makes what you have easier to see. This is especially true if you’re lean enough to have ab definition, but you haven’t been able to build much muscle thickness there. So if you’re pale skinned and you have a shadow of an ab or two, try slapping some fake tanner on and see if that makes them a bit more visible. To recap, having visible abs mainly depends on what your mom and dad gave you, how much muscle you’ve built in the midsection, and how lean you are. Contributing factors may include digestion, water retention, and skin tone. – Dani Shugart The No-Bench, No-Rack Workout Q: I’m trying to ditch the gym membership and build a home gym. Right now I only have a barbell, no bench or squat rack. What can I do for variety? A: I’ll assume you have a pile of plates and you’re already covering the basics: rows, overhead presses, deadlifts, curls, etc. If a rack is beyond of your budget right now or just takes up too much room in your garage, then spend about 75 bucks on a portable landmine setup. I like the Post Landmine from Rogue. Of all the gadgets that come and go in the fitness world, I think the landmine-type
Origin: Ask Us Anything 05
Tip: The Ultimate Glute Warm-Up
 I love quick and effective warm-ups. The best ones are made up of drills that complement each other and help you sneak in some mobility work without having to spend loads of time stretching. Combining the couch stretch and kettlebell swing will deliver both. Do 3 Rounds: 30-Seconds Couch Stretch, each side 10 Kettlebell Swings Focus on opening your hips completely and squeezing the glutes throughout both exercises. The couch stretch, when done correctly, is one of the best mobility drills to open the hip flexors and improve your hip extension. The kettlebell swing is all about an effective hip hinge and building strength and power during hip extension. So, the first exercise opens that range in your hips, then you directly apply that same motion to a strength movement. This will not only give you better glute activation but also stop your hip flexors from tightening up again. Many people get stuck in the “stretching forever” cycle because they stretch and stretch and never actually strengthen their new ranges. Their body can’t keep the new open position, so it goes back to being tight. Try this quick warm-up for a few weeks and see what difference it makes to your
Origin: Tip: The Ultimate Glute Warm-Up
4 Calf Exercises You’ve Never Tried
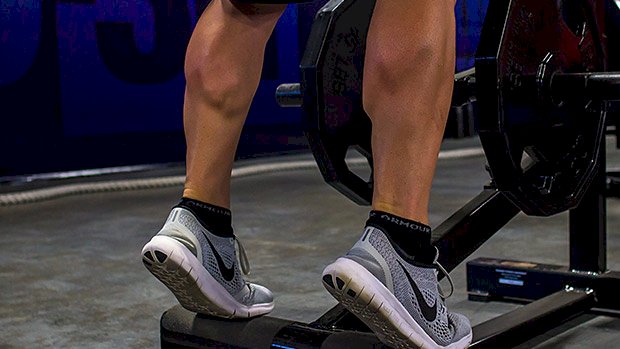 Even experienced lifters struggle to build their lower legs, but it IS possible to develop them. You’re already familiar with basic straight-knee calf work, like the standing calf raise. And you’re also well aware of bent-leg, seated calf raises. That’s a good start. There’s a reason to do both types: Your calves are made of the gastrocnemius complex and the soleus. Research shows that doing calf raises (ankle plantar flexion) with a straight-knee creates superior gastrocnemius muscle activity, while doing these raises with a bent-knee creates superior soleus muscle activity (1,2,3,4). So it makes sense to do at least one calf exercise in each knee position to maximize your training time and efficiency. But are you stuck in a rut doing the same two lifts over and over again? Most are. Luckily, there are other great calf exercises in both categories that you can add to your arsenal. Get more out of your lower leg work by picking at least one calf exercise from the straight-knee category and one from the bent-knee category. Two Straight-Knee Calf Exercises These two exercises require you to perform a heel raise in a manner that involves propelling yourself forward as well as upwards on each step. The plantar flexion action is more similar to that of walking and running. Dumbbell One-Leg Leaning Calf Raise Stand facing a wall with your feet hip-width apart while holding a dumbbell in your left hand. Place your right hand on the wall at roughly chest height and lean your body forward while keeping your torso, hips, and knees all in a straight line. Bend your right knee and step your left leg backward, placing it as far behind you as possible with keeping your heel on the ground and your left foot pointed at the wall. Your left knee, hip, and torso should all form a straight line. Lift your right foot off the floor while keeping your right knee bent at around a 90-degree angle. While maintaining your body position, lift your left heel as high as you can off of the floor so that you end up on the ball of your foot. Slowly lower yourself until your heel touches the floor to complete the rep. Don’t allow your left foot to rotate outwards at any point. Keep it straight and pointed at the wall throughout. Don’t bounce. Control the lowering (eccentric) portion of each rep by allowing your heel to touch the floor gently – not to fully rest on the floor – until all reps have been completed. Do all the reps on the same side before switching sides. Dumbbell Walking Calf Raise This simply combines a dumbbell farmer’s walk with a calf raise. Stand at one end of the room and hold two heavy dumbbells, palms facing your body by your hips. Walk to the other end of the room. On each step, as soon as your foot hits the ground, quickly lift your heels as high as you can off the floor, ending up on the balls of your feet. Lower yourself down after each step with control until your heel touches the floor to complete the rep. Do the heel raise in a smooth and coordinated action with each step. Two Bent-Knee Calf Exercises It’s important to notice that both of these involve positioning your working side foot closer to you. This increases the range of motion demand, making it more productive. Half-Kneeling Dumbbell Calf Raise Using a mat or rolled towel for comfort. Get in a half-kneeling position with your torso straight and both knees bent 90 degrees. Move your front foot backwards underneath your same-side thigh as far as you can while keeping your heel on the floor and your foot straight. Place the side of a dumbbell, or the bottom of a kettlebell, on top of the knee (not on top of your mid-thigh) of the same foot you just moved toward you. Push your toes into the ground and lift your heel as high as you can off the floor, ending up on the ball of your foot. Slowly lower your heel until it touches the floor to complete the rep. Don’t bounce. Control the lowering portion by allowing your heel to touch the floor gently. Do all the reps on the same side before switching sides. Seated Dumbbell Calf Raise Sit tall on a bench with your feet roughly hip-width apart. Move one of your feet backward underneath your same-side thigh as far as you can while keeping your heel on the floor and your foot straight. Place one side of the dumbbell, or the bottom of a kettlebell, on top of the knee. Push your toes into the ground and lift your heel as high as you can, ending up on the ball of your foot. Slowly lower your heel until it touches the floor to complete the rep. As always, no bouncing.
Origin: 4 Calf Exercises You’ve Never Tried
Tip: The Truth About Exogenous Ketones
 Exogenous ketones – waste of money or worth it for some? I guess it depends on why you’re using them. Right now, they’re relatively new on the scene. There’s only very slight evidence they’re having an impact on performance enhancement, and very little (if any) evidence they’re aiding fat loss. Science is notoriously slow with answering these questions and that’s frustrating for all of us, especially when it means the overzealous people of anecdotes fill the void. Add an MLM (multi-level marketing) component to it and you have a big mess of novelty bias, research gap, bioscience, and monetary motivation to contend with. I will say this: If you’re using the keto diet to lose weight, the use of exogenous ketones does NOT make much sense. If you eat the ketones, your body sees no need to make its own ketones. You may still be in ketosis on your ketometer, but are those ketones you’re making from your own fat stores or from the stuff you just drank? Where they may have some utility is getting into ketosis faster, exercising under ketogenic conditions, and experiencing satiation. We know that protein is THE most satiating macronutrient. Some evidence suggests once the body starts making ketones they’re on a par with protein in satiating potential. Exogenous ketones may play a role in controlling SHMEC (sleep, hunger, mood, energy, cravings) in that all-important three days to get into ketosis. I call that the AKZ (the Almost Keto Zone). Most people who try keto can never get past these three miserable days and therefore end up getting fatter. They cut carbs and then binge within three days and repeat that cycle again and again. So, I think there are some possible beneficial areas to explore the use of exogenous ketones, but right now the science doesn’t substantiate the hype. It’s also useful to note that the ketosalts widely available currently have shown less potential in research compared to the ketone esters which, if I am not mistaken, are not available
Origin: Tip: The Truth About Exogenous Ketones
The Best Squat You Haven’t Tried
 Get Lumberjacked! If you struggle with squat depth, if your wrists, elbows, or shoulders hurt, or if you feel like you’re falling apart before leg day even started, try the lumberjack squat. Though similar to the goblet squat, it offers the benefit of being able to go heavier. Here’s what it looks like: If you’re familiar with landmine squats you may be confused about why I use a bench for these. The bench minimizes the risk of getting hurt while picking up and putting down a heavier load. And it prevents you from tiring out getting into position. You don’t want picking up the bar to be the hardest part of the work set. You might think the bench setup isn’t worth it. Well, you’d be wrong. Try it and you’ll quickly figure out how comfortable the starting position feels. It’s safer too. Setting up in this way also helps standardize squat depth, and it makes for an easy way to bail out if you need to. It’s not necessary to train to complete failure, but if you’re going to then the lumberjack squat makes it easy to do so. The Setup Get a landmine attachment ready. Whether it’s fixed to the floor or a rack attachment doesn’t matter. One thing not to do, though, is to use the corner of your gym. With the loads you might get up to, it’ll likely drill a hole through the wall. It’s also less secure. Use a standard length 7-foot Olympic bar. Even most beginners can handle the load of a 45-pound bar quite comfortably. And because of the fulcrum, you’re not truly handling the full weight of the bar anyway. Get the bar up into place. You CAN just whip the bar up into position, but a smarter approach would be to use a bench (or box) like it’s shown in the video. That way there’s no twisting or jerking of your back and no awkwardness getting into position. Mind the starting height. If you’re tall, you can use a plyometric box or even stack a few plates on the bench to get the perfect height. A standard gym bench could be suitable. As a 5’11” lifter, the bench height works well without any adjustments. If you’re shorter, you can use a step with risers to get the correct height. You can also use smaller plates on the landmine. It’s up to you to figure out what’s best according to your frame and squatting anatomy. The Execution Like conventional squats, your foot position can vary depending on your own anatomy or what you’re looking to emphasize (more on this later). At the bottom, try to drive your knees out with your elbows and keep your feet flat on the floor. Get set, get tight, and start your first rep by overcoming the inertia of the weight in the bottom position. As you fire out of the hole, you’ll move slightly forwards. The landmine will determine the angle, just make sure you keep the bar close to your chest throughout (cupped) and don’t let it inch down. You’ll probably find you need to stand further behind the bar than what you initially thought. There’s a sweet spot, but don’t worry, you’ll know when you’ve got it. Make sure you’re staying tight throughout and take a deep breath on every rep – breathing out on the upward effort. Once you’ve nailed the setup, add some load. Providing you don’t have tiny hands and a horrible grip, you’ll be able to handle some respectable weight, typically more than a goblet squat would allow. Here are a few ways you could use this variation: For Athletic Strength, Add a Band As you approach the top of the rep, the tension drops a little. This means that while it’s harder in the bottom position, as you reach full extension it gets easier. To accommodate for this and even out the strength curve a little, use a resistance band. A band will encourage you to fire through it, while also accelerating you on the way down. Because of the slightly more horizontal nature of this squat, it’s a great option for athletes looking to develop more horizontal force. Pick the load according to your goals, although this can be a good option to improve strength-speed (high-load power output and rate of force development). For Intensity, Do a Drop Set To add intensity to your lower body session, drop sets work well here. The lumberjack squat setup makes it easy to strip plates as you go. In the video you’ll see a single drop-set, but feel free to add multiple drops for some extra nastiness. Only someone with a sadistic side will enjoy these. You’re welcome! To Emphasize the Quads, Wedge the Heels Lumberjack squats work well when combined with a heel wedge. This might take a few tries to get right. For most, the heel wedge would be level with the end of the bar when stationed on the floor. Adjust accordingly though. The heel wedge will increase quadriceps’ activity and allow an even greater depth over a variety of foot placements. You can go super narrow to hit the outer quads a bit more (vastus lateralis) or take a wider toes-out stance to hit more of that teardrop (VMO). Programming Lumberjack squats could be used as an alternative to conventional squats if you’re
Origin: The Best Squat You Haven’t Tried
Tip: The Stretch That Accelerates Gains
 Can stretching help you build muscle faster? Yes, if you use a certain type of stretching. What type? Weighted stretching. You’ve probably read about how loaded stretching increases activation of the anabolic mTor pathway, increases your active range of motion, and creates an occlusion effect that promotes increased blood flow and delivery of nutrients to muscle cells. So let’s take a look at one more benefit. Pre-Set Antagonist Weighted Stretching Most of the benefits of weighted stretching focus on the target muscle. For example, performing a bottom-range dumbbell press hold at the end of a chest workout. But what if we were to stretch the pecs right before doing a set of, say, rear-delt rows? What you get is increased active range of motion of your row, along with higher output and better quality muscle contractions. How does this work? It’s based on the agonist-antagonist relationship: For a muscle to shorten to the desired range, its antagonist must be able to lengthen to accommodate. Taking the example of the row, the pec minor has to lengthen to allow the rear delts to shorten. The rear delts are the agonist; the pecs are the antagonist. When the agonist shortens and contracts, the antagonist lengthens and relaxes. This is a slight oversimplification, given that the antagonist doesn’t always relax, at least not fully, but you get the idea. The exercise combos below have been thoroughly tested and work very well: 6 Ways to Apply This Method Clavicular Pec Weighted Stretch – Rear Delt Row Cue:Actively pull or “row” into the stretched position. Tip:If you’re not confident with a heavier loaded hold, do a wide flye stretch with a submaximal load. Sternocostal Pec Stretch – Lat Focused Pulldown Cue:Cue the elbows towards the base of the spine to keep them tight during the stretch. Tip:If you can knock out dips comfortably, you could also hold an isometric stretch at the bottom of a dip. Mid-Trap and Rhomboid Stretch – Pec Dec Flye Cue:Think about getting your shoulder blades to your pecs. Tip:Use a long rope in a seated cable machine or sit on the floor. Keeping the lumbar as neutral as possible, allow the T-spine to flex while simultaneously protracting as much as you can. Couch Stretch – Hamstring Curl Cue:Actively drive the stretching knee through the floor. Tip:If you want to intensify the stretch, reach the arm on the same side overhead and side-bend away from the stretching leg. Want to take it up a notch again? Do it under a squat rack and use a band to further increase the lengthening of the hip flexors. Weighted Biceps Stretch – Triceps Extension Cue:Think of pushing your elbow through your elbow “pit,” fully flexing the triceps. Tip:Set up the bench at an angle where you can get your elbows behind your torso without the shoulders rounding forward. A 40-50% incline is usually best. Anterior Tibialis Stretch – Calf Raise Cue:Simultaneously push your toes away from you while pulling your heels towards you. Think about creating a straight line with the top of your feet and shin bones. Tip:If you have bum knees, then an option is to use a rear-foot elevated split squat with active plantar flexion. Putting These Stretches Into Action These stretches are performed in one of two ways: A constant isometric contraction in the lengthened position of the antagonist with a moderate load. Multiple smaller holds of 3-5 seconds with submaximal loads. Use either method and allow 20-30 seconds between the weighted stretch and performing your working set. You should be able to shorten the target muscle to a significantly greater degree than normal, thus increasing your ability to maximally contract the muscle. Increased stimulus equals increased
Origin: Tip: The Stretch That Accelerates Gains
Liquid Smarts
 Nootropics are hot. Whether it’s L-theanine for relaxation, ginkgo for improved memory, or just plain old caffeine for increased energy, it seems that everyone has a favorite. The big question is, how many of these cognitive enhancers are good and how many of them are pure garbage? Unfortunately, in my experience, most brain supplements out there are pure, unadulterated bullshit. Even the ones that give a passing nod to respectability usually don’t have enough active ingredients to make you feel anything. When the “minimal dosage” is 3 mg, they’ll sometimes include a 0.5 mg whiff of the substance to fool you while saving some cash. But there are a few good nootropics out there, so let’s take a look at the ingredients in Brain Candy®, Biotest’s cognitive-enhancing supplement. What’s In It? Far too many consumers see flashy marketing and colorful label designs and assume that the product will work. As with any supplement, you need to go a step further and look at the ingredients label. Here’s what Brain Candy® has to offer: Acetyl-L-Carnitine N-Acetyl-L-Tyrosine CDP-Choline DMAE L-Theanine Acetyl-L-Carnitine Acetyl-L-carnitine, or ALCAR for short, is a naturally occurring amino acid that’s essential for the proper functioning of mitochondria. While your body produces it naturally, it sometimes struggles to produce enough. This is why people who consume extra ALCAR often experience incredible benefits such as increased energy, enhanced cognition, and improved focus. In fact, according to WebMD, Acetyl-L-carnitine is so effective that it’s injected intravenously to emergency room patients suffering from reduced blood flow to the brain. Hell, one study, conducted by the Department of Pharmacology at Tokyo Medical University, found that acetyl-L-carnitine can even be used to treat Alzheimer’s disease, but you don’t have to have Alzheimer’s for ALCAR to be of benefit. Even in healthy brains, many users experience: Improved focus Elevated mood Enhanced memory Better attention span N-Acetyl-L-Tyrosine N-acetyl-L-tyrosine is a highly bioavailable form of tyrosine. It’s the easiest form of tyrosine for your body to absorb and utilize, meaning more focus, energy, and brain power to help you crush life. It helps increase dopamine, and dopamine plays a critical role in mood, learning capacity, concentration, and stress management, but it’s particularly important for motivation. That’s also how Adderall works, but Adderall has a lot of drawbacks. N-acetyl-L-tyrosine is a much safer and more logical alternative. One meta-study, conducted by the Institute of Psychological Research in the Netherlands, confirmed its cognitive-enhancing properties: “TYR (tyrosine) does seem to effectively enhance cognitive performance, particularly in short-term stressful and/or cognitively demanding situations.” CDP Choline Citicholine, otherwise known as CDP choline, was first developed in Japan with the intention of treating patients suffering from frequent strokes. It didn’t take long though for people to discover the multitude of other benefits this nutrient has: Increased attention span Higher energy levels Improved memory Enhanced focus Consider the study conducted by the F.I.S.A. Medical Department in Barcelona that found that CDP choline can help treat cognitive impairment, enhance learning, and improve memory: “CDP-choline has a neuroprotective effect in situations of hypoxia and ischemia, as well as improved learning and memory performance in animal models of brain aging… thus, it has been experimentally proven that CDP-choline increases noradrenaline and dopamine levels in the CNS.” They went on to write that taking CDP choline was completely safe and can even be used to treat patients suffering from head trauma and other brain-related issues: “CDP-choline is a safe drug, as toxicological tests have shown; it has no serious effects on the cholinergic system, and it is perfectly tolerated. These pharmacological characteristics, combined with CDP-choline’s mechanisms of action, suggest that this drug may be suitable for the treatment of cerebral vascular disease, head trauma of varying severity, and cognitive disorders of diverse etiology.” While more research should be done on how CDP choline enhances performance in high-functioning adults and athletes, the preliminary research shows that it’s a powerful way to help your body increase dopamine and noradrenaline levels. DMAE (Dimethylethanolamine) Dimethylethanolamine, otherwise known as DMAE, is a naturally brain chemical found in high concentrations in certain seafoods. Taking greater amounts than what’s produced naturally can give you that extra “jolt” you need to ace that interview, get that promotion, or dominate that workout. The compound was once sold as a prescription drug for children with ADHD and other cognitive issues, but it received over-the-counter status in 1983. Many users experience the following when taking DMAE: Increased sense of
Origin: Liquid Smarts
The Best Damn Cardio for Natural Lifters
 Figuring out the best way to train for muscle growth and strength is already complex. And it gets even more complicated when you add cardio to the mix. You’ve probably heard or read statements like these before: “Fasted cardio will eat into muscles!” “Low intensity cardio will make you look like a marathon runner!” “Cardio after lifting will negate your gains!” We’ve reached a point where we’re almost scared of doing cardio. We’re afraid of losing our hard-earned muscle. Well, don’t look to “enhanced” bodybuilders for applicable advice. Their use of anabolic drugs counteracts any drawbacks that cardio could have on muscle mass. But don’t throw the baby out with the bath water either. Cardio remains a tool that can help us get leaner and healthier. Let’s look at the best and worst forms of cardio for the natural lifter. Cortisol is Key Cortisol has a significant correlation with muscle mass, albeit an inverse one: the higher someone’s cortisol production is, the harder time he’ll have building muscle and gaining strength. In fact, a higher cortisol level has been correlated with a drop in strength in older individuals (1). And while producing it is necessary for proper human function, too much can kill your gains. It may do so in a few different ways… It can increase muscle catabolism. Cortisol will lead to a breakdown of the tissue to make amino acids that can then be transformed into glucose to be used for energy (gluconeogenesis). That’s one of the main functions of cortisol. It’s not a self-destruct function, but rather, a function designed so that you’ll have fuel when you need it. It may inhibit the immune system. This is important because muscle damage repair (important for growth) is driven by the immune system. By inhibiting the immune system, cortisol can slow down muscle repair and impair growth. It can increase levels of myostatin. Myostatin plays a big role in how much muscle your body will allow you to build. The more myostatin you have, the harder it is to build new muscle. So that means, by increasing myostatin, cortisol can once again diminish muscle growth. An enhanced lifter can handle a lot more cortisol with less negative impact on muscle growth because of the exceedingly high levels of anabolic hormones in his body that can counteract (to an extent) excess cortisol production, at least when it comes to muscle growth. But a natural lifter wants to avoid producing too much cortisol from his cardio work. As such, the best damn cardio for the natural lifter is the one that can deliver results with the least amount of cortisol being released. Two Things Cortisol Does During Training Cortisol has many purposes during a workout. The most important are: It mobilizes energy. It will free up stored glycogen, fatty acids, and even break down muscle tissue to have energy available to fuel muscle contractions. The more energy you need to mobilize, the more cortisol you’ll release. Of course, since the goal of cardio is often to lose fat, you do need to force the body to mobilize some fuel. But too much might offset the fat-loss benefits. It gets us amped up. It increases adrenaline levels by increasing the conversion of noradrenaline into adrenaline. If you need to get amped up, motivated, or are facing something that’s perceived as stressful, you’ll produce cortisol. Doing a high volume of cardio will lead to high cortisol levels and so will pushing to an extremely high intensity level. It helps us maintain blood sugar levels. If blood sugar levels are too low, cortisol and glucagon are released to bring it back up. Why is that important? Because if you exercise in a fasted state, you’ll increase cortisol to a greater extent, especially if you need to mobilize a lot of fuel. “Yeah, but I train fasted and it energizes me!” Of course it does. Go back to what I just wrote – cortisol increases adrenaline levels. Feeling energized is the byproduct of jacking up adrenaline. And while it might make you feel good in the short term, it can do more harm than good if you stay like that for too long or produce it too often. So we have three elements that raise cortisol: Volume or burning a boatload of energy Pushing yourself to the limit Training fasted The Worst Types of Cardio for Natural Lifters The worst types are those that combine a high level of one element or a combination of elements, increasing cortisol above what’s necessary for fat mobilization. 1. Fasted Interval Training Why pick on fasting? Well, I’m not. Taking a 45-minute walk on an empty stomach in the morning is fine, but doing intense intervals fasted in the morning is not. In the first case, sure, you’re fasted (which is one factor to release cortisol) but the intensity is very low (taking a walk can even be calming) and the energy expenditure is low too. A 45-minute walk doesn’t require much glycogen mobilization and doesn’t have a big caloric expenditure. While it’s fasted, the total cortisol output will not be
Origin: The Best Damn Cardio for Natural Lifters
